Raspberry Pi Connect
Introduction
Edit this on GitHub
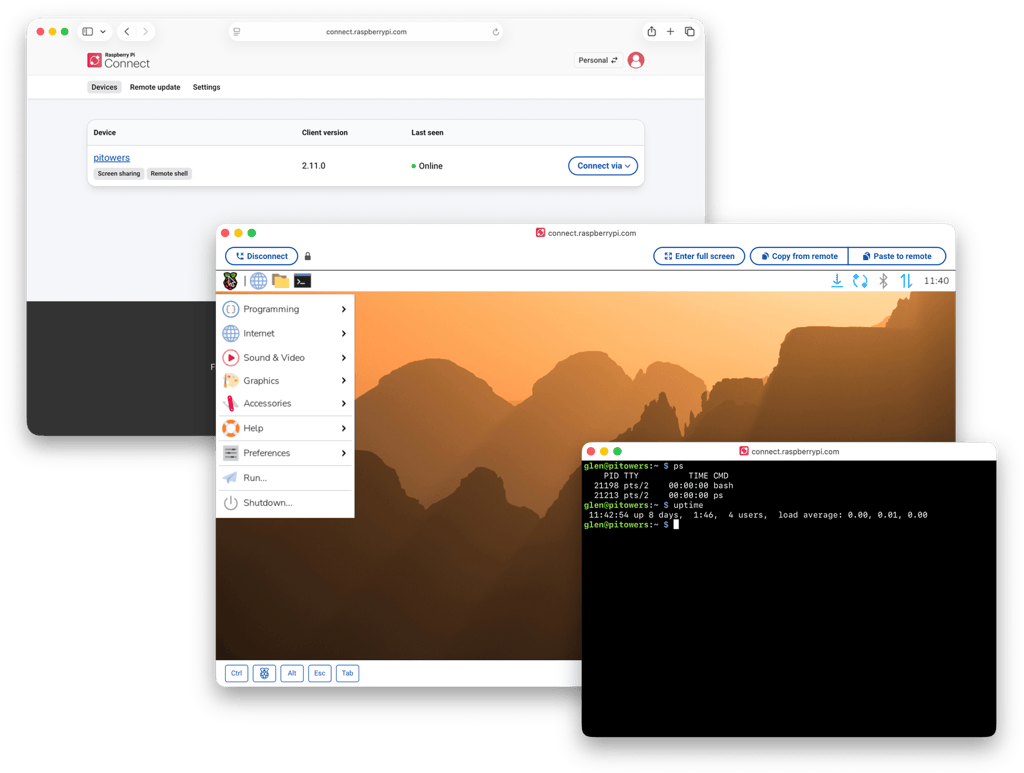
Raspberry Pi Connect provides secure access to your Raspberry Pi from anywhere in the world. It works by linking your device to your Connect account.
Connect is installed by default in Raspberry Pi OS Desktop and Raspberry Pi OS Full (desktop with recommended software).
An alternate Lite variant of Connect, which supports only remote shell access with no ability to screen share, is installed by default in Raspberry Pi OS Lite.
|
Note
|
To use Connect, your Raspberry Pi must run Raspberry Pi OS Bookworm or later. |
Connect service features
After you have linked your Raspberry Pi devices to your Connect account, you can interact with them in the following ways:
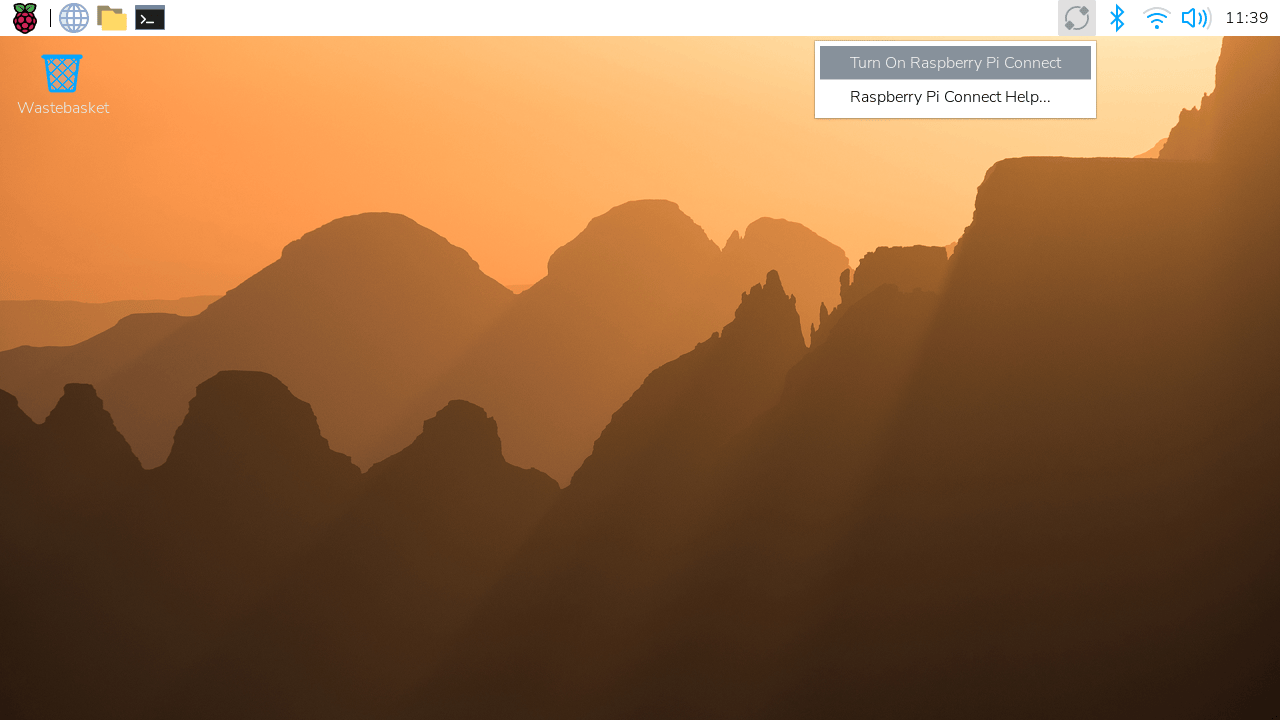
Connect menu
The Connect menu allows you to turn Connect on and off, sign in and out, and enable or disable the two remote access methods (shell and screen sharing).
Security and data storage
Connect uses a secure, encrypted connection.
By default, Connect communicates directly between your Raspberry Pi and your browser. However, when Connect can’t establish a direct connection between your Raspberry Pi and your browser, we use a relay server. In such cases, Raspberry Pi only retains the metadata required to operate Connect.
Connect account types
There are two types of Connect account: personal and organisation.
The personal account provides a single user with a view of all the devices linked to their Connect account. This account type is free.
The organisation account allows multiple users to view devices linked to a shared Connect account. This account type is billed monthly. For more information, see Connect for Organisations.
Get started
Edit this on GitHub
There are three steps to get started with Connect:
-
Sign in to connect.raspberrypi.com with your Raspberry Pi ID. For more information, see Create a Raspberry Pi ID.
-
Turn on the Connect service on your Raspberry Pi device, then link it to your Connect account.
-
From your PC, Mac, or other device, visit connect.raspberrypi.com to remotely access your linked devices in a web browser.
Turn on the Connect service and link your device
The full versions of Raspberry Pi OS include Connect, but the service is disabled by default. You must therefore turn it on before first use.
Turn Connect on and link it to your Raspberry Pi device using the desktop, the command line, or an auth key.
|
Note
|
Connect signs communication with your device’s serial number. Moving your SD card between devices signs you out of Connect. |
-
Desktop
-
CLI
-
Auth key
To enable Connect and link your device:
-
Power on your Raspberry Pi device.
-
From the Connect icon in the system tray, select Turn On Raspberry Pi Connect.
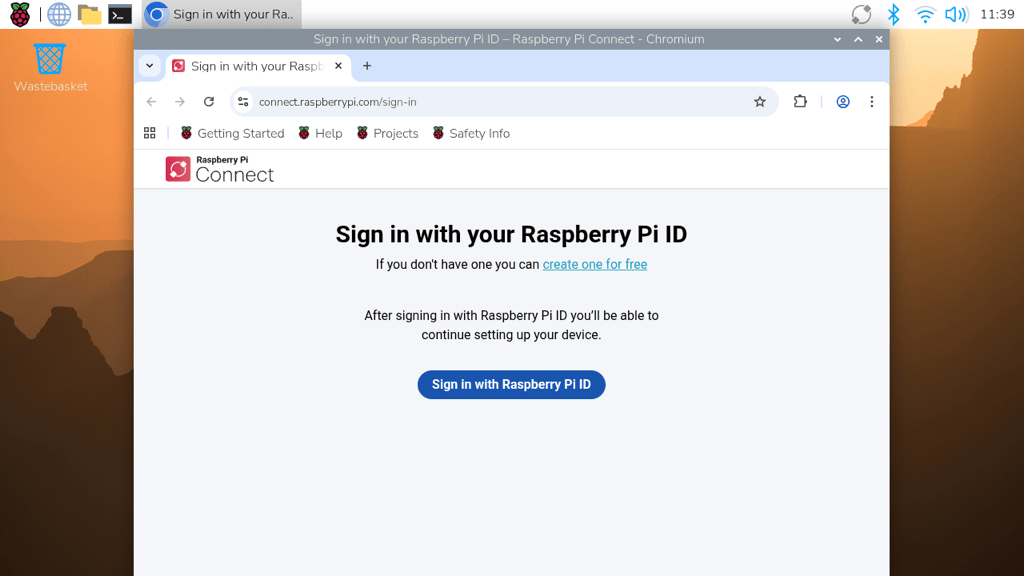
If this is the first time you have turned on the Connect service, or if you aren’t signed in with your Raspberry Pi ID, a browser opens.
-
Enter your Raspberry Pi ID email and password, then select Sign In.
-
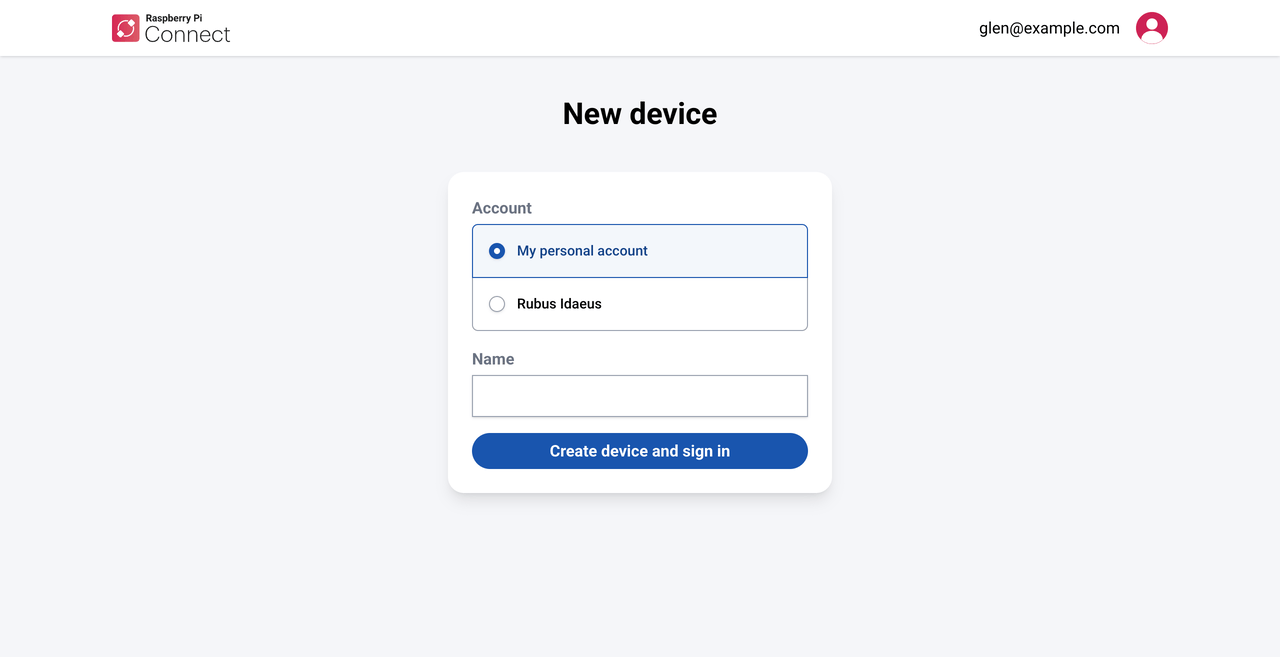
Follow the on-screen prompts to give your Raspberry Pi device a name and choose which Connect account to link it to.
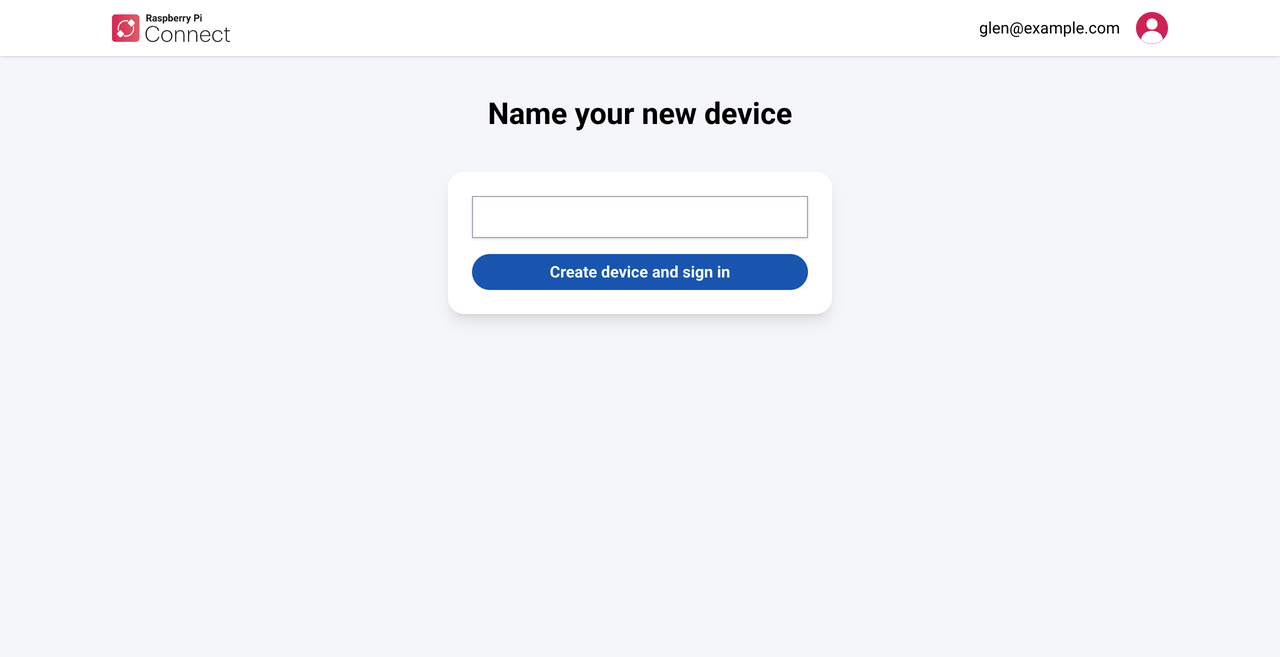
If you’re an administrator of an organisation, select whether to add this device to your personal account or to a specific organisation.
-
Select Create device and sign in.
When you’ve completed these steps, the Connect icon in the system tray of your Raspberry Pi device turns blue to indicate that it’s signed in to the Connect service.
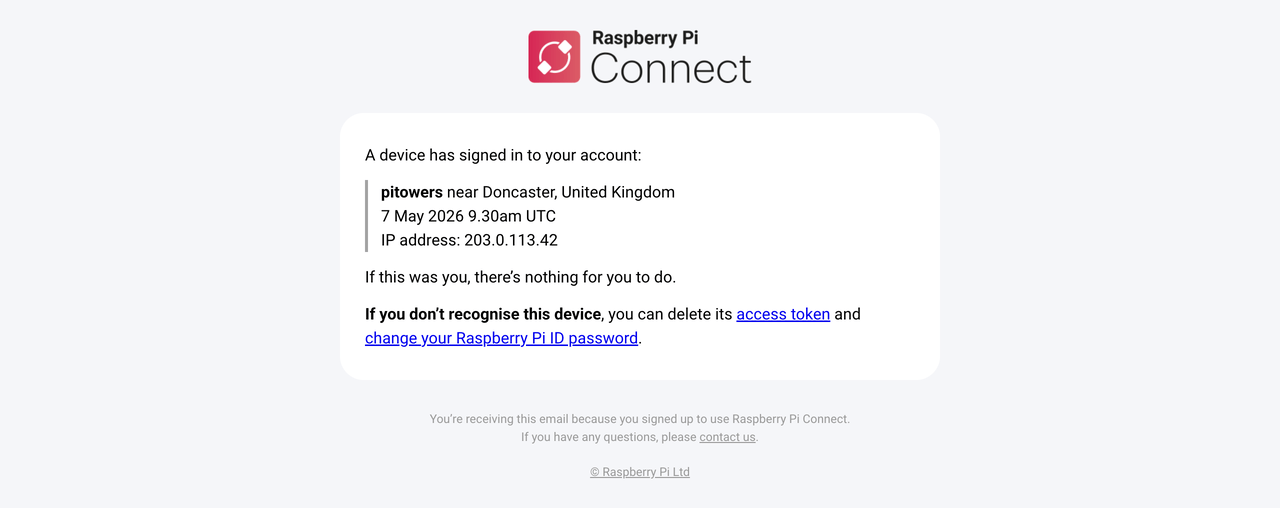
A notification is also sent to your registered email address to inform you that a new device is linked to your Connect account.
-
Turn Connect on by running the following command:
$ rpi-connect onThis turns the Connect service on, but doesn’t sign you in.
-
Sign in by running the following command:
$ rpi-connect signinThis command outputs something like the following:
Complete sign in by visiting https://connect.raspberrypi.com/verify/XXXX-XXXX
-
Visit the verification URL on any device and sign in with your Raspberry Pi ID to complete the linking process.
When you’ve completed these steps, the Connect icon in the system tray of your Raspberry Pi device turns blue to indicate that it’s signed in to the Connect service. A notification is also sent to your registered email address to inform you that a new device is linked to your Connect account.
You can also type
rpi-connect statusinto the command line to check the status of the connection.
An auth key is a single-use, temporary token that lets you link a device to a Connect account automatically (without using the web interface). Personal auth keys expire six hours after creation; organisation auth keys expire between 1 and 90 days after creation (1 day by default).
The easiest way of creating and using an auth key is by using the customisation options in Imager. You can also manually create an auth key from the Settings page of a personal or organisation’s Connect account, and organisation administrators can create auth keys using the management API.
|
Note
|
Personal accounts can only have one auth key active at a time; organisations can have multiple auth keys active at once. You need a unique auth key for each device. |
|
Tip
|
To use an auth key, ensure that you boot your Raspberry Pi and connect it to the internet before the expiry time shown on the Raspberry Pi Connect website. |
After creating an auth key, provide this to your device using the rpi-connect signin command, or by writing the auth key to a file in your home directory.
Alternatively, save it to .config/com.raspberrypi.connect/auth.key in your home directory so that Connect detects it automatically.
To provide your auth key as a string, run the following command:
$ rpi-connect signin --auth-key=rpuak_123456If you’ve saved your auth key to a file, you can pass its full path to the command by prefixing it with @:
$ rpi-connect signin --auth-key=@/home/alice/auth.keyWhen you’ve completed these steps, the Connect icon in the system tray of your Raspberry Pi device turns blue to indicate that it’s signed in to the Connect service.
A notification is also sent to your registered email address to inform you that a new device is linked to your Connect account.
Security best practices
If you receive a notification email for a device that you don’t recognise:
-
Change your Raspberry Pi ID password immediately.
-
Follow the instructions in Remove the device from Connect to permanently disassociate it from your account.
-
Consider enabling two-factor authentication to keep your account secure.
View linked devices
Connect lists all your linked devices on the Devices tab.
To view your devices:
-
On any device, sign in to connect.raspberrypi.com.
-
Select the Devices tab. Connect displays a list of linked devices.
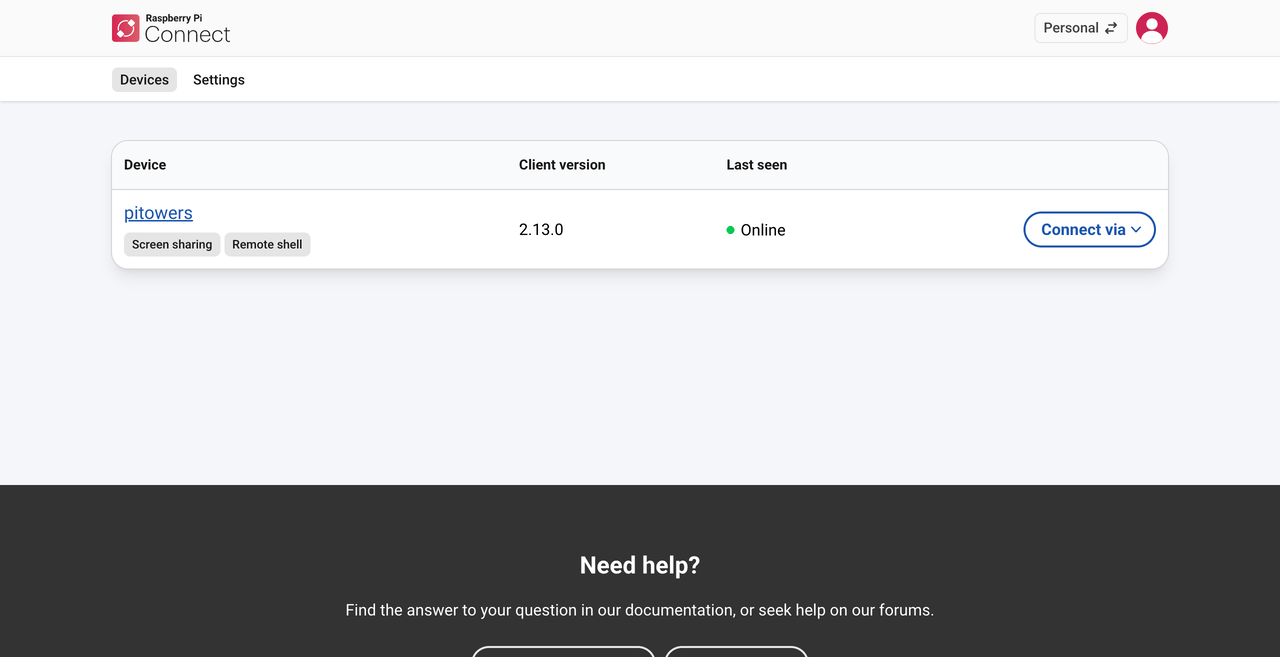
If you’ve an organisation account, you can search and filter this list, and add tags to devices.
Access your device in Connect
Edit this on GitHub
After you’ve linked your Raspberry Pi device to your Connect account, you can access it from anywhere using only a web browser.
You can do this using either of the following methods:
-
Screen sharing
-
Remote shell
Screen sharing requires the Wayland window server. Raspberry Pi OS Bookworm and later use Wayland by default. Screen sharing isn’t compatible with Raspberry Pi OS Lite or systems that use the X window server.
|
Note
|
Screen sharing and remote shell work whether your Raspberry Pi is on the same network or a different network than your browser. However, a direct local connection is faster and more responsive than one that goes over the internet or through a relay server. |
Screen-sharing interface
Connect’s screen-sharing interface is designed for both desktop and mobile devices.
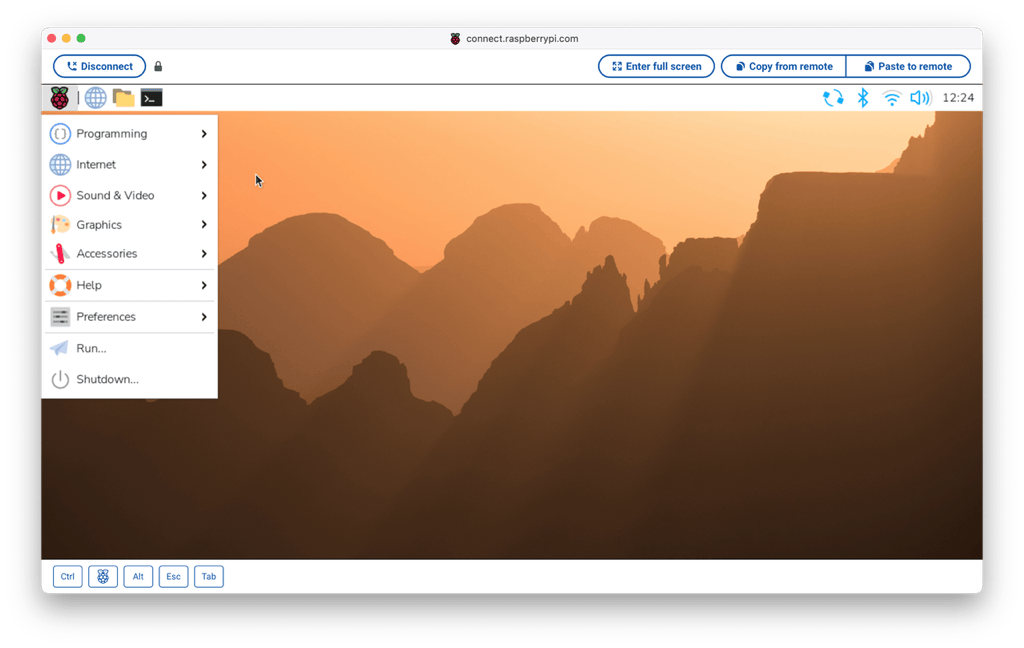
You can simulate common keyboard functions using the buttons at the bottom left of the interface:
-
Keyboard. Toggles the on-screen keyboard. Displayed only on mobile devices.
-
Ctrl. Simulates holding down this key on a physical keyboard.
-
Super key. Simulates holding down this key on a physical keyboard.
-
Alt. Simulates holding down this key on a physical keyboard.
-
Esc. Simulates a single press—pressing and then releasing—of this key.
-
Tab. Simulates a single press—pressing and then releasing—of this key.
You can also use the buttons at the top of the browser window to complete other useful tasks:
-
Copy from remote. Transfer text from the device’s remote clipboard to your local clipboard.
-
Paste to remote. Transfer text from your local clipboard to the device’s remote clipboard.
-
Enter full screen. Expand the browser window to full size.
-
Disconnect. Terminate the sharing session.
Start screen sharing
To start a screen sharing session:
-
Make sure your Raspberry Pi device is linked to your Connect account, is powered on, and that Raspberry Pi OS has booted.
-
From your PC, Mac, or other device, sign in to connect.raspberrypi.com.
If your browser or operating system requests permission to find or connect to devices on your local network, allow it. If you disallow it, Connect still works, but sessions with devices on your local network can’t use the local route.
-
Select the Devices tab.
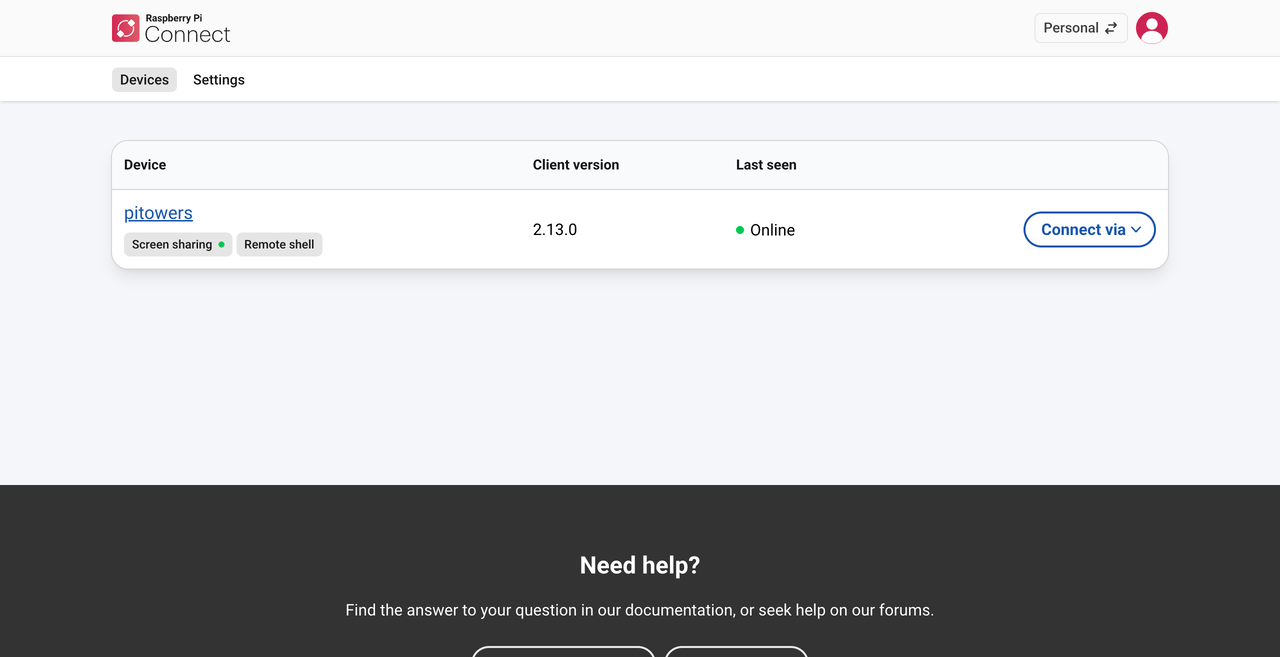
Devices available for screen sharing show a grey Screen sharing badge below the name of the device.
-
Select the Connect via button to the right of the device you want to access.
-
Select the Screen sharing option from the menu.
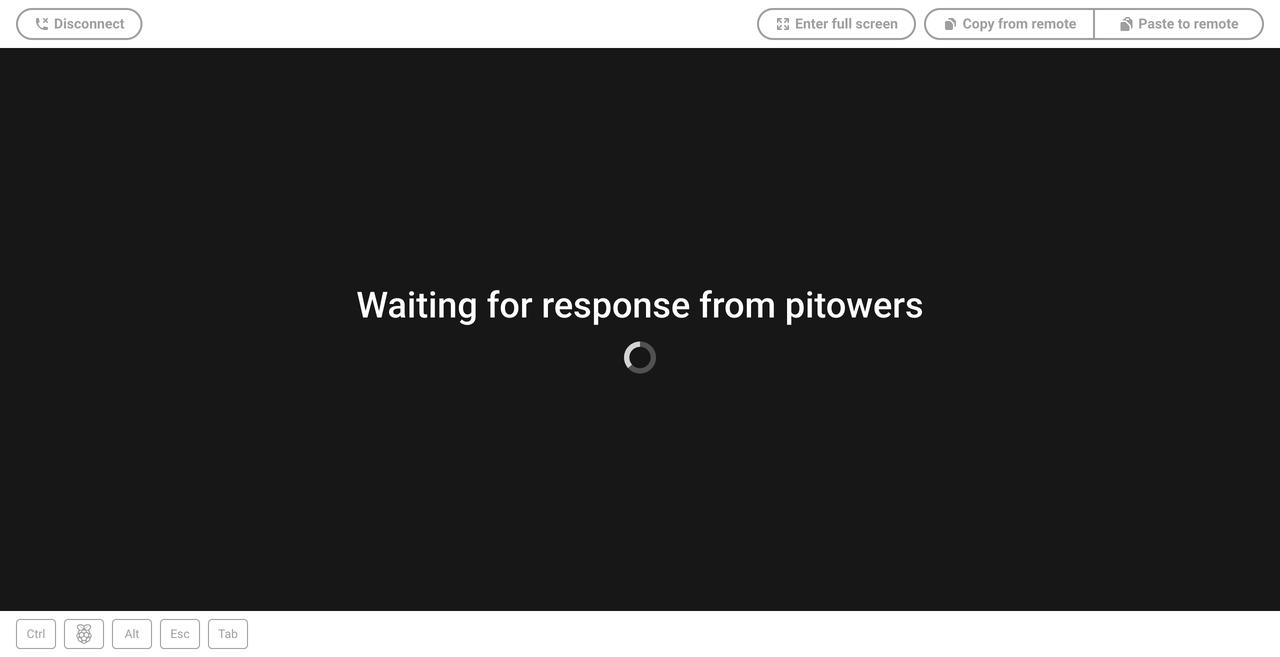
A browser window opens that displays your device’s desktop, and you can now use your device in the same way as a local device.
When screen sharing has started, a green dot appears next to the Screen sharing badge in the Connect dashboard. This indicates an active screen sharing session. Hover over the dot to see the current number of screen sharing sessions.
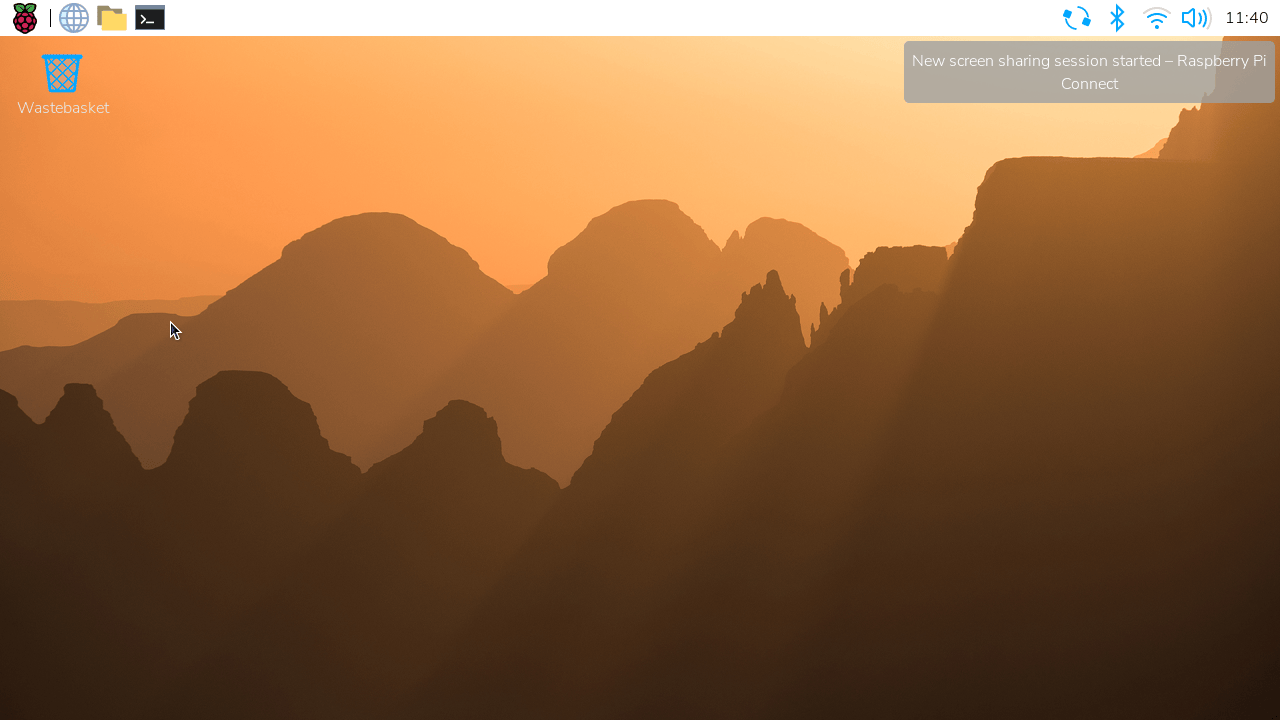
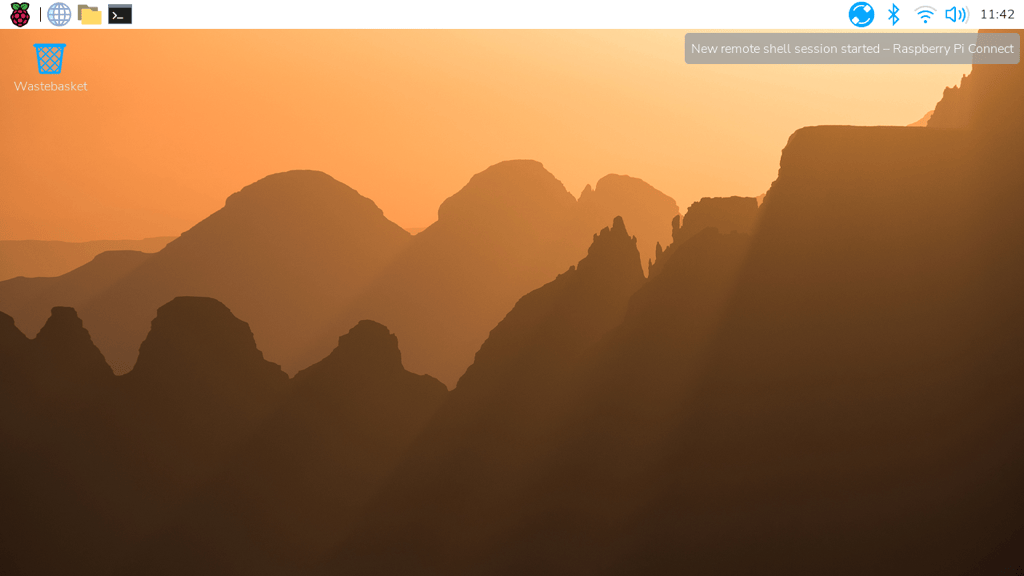
The Connect icon in the system tray rotates when a screen sharing session is in progress. A desktop notification appears whenever a screen sharing session starts.
Stop screen sharing
To stop screen sharing:
-
Select the web browser window that displays the screen share.
-
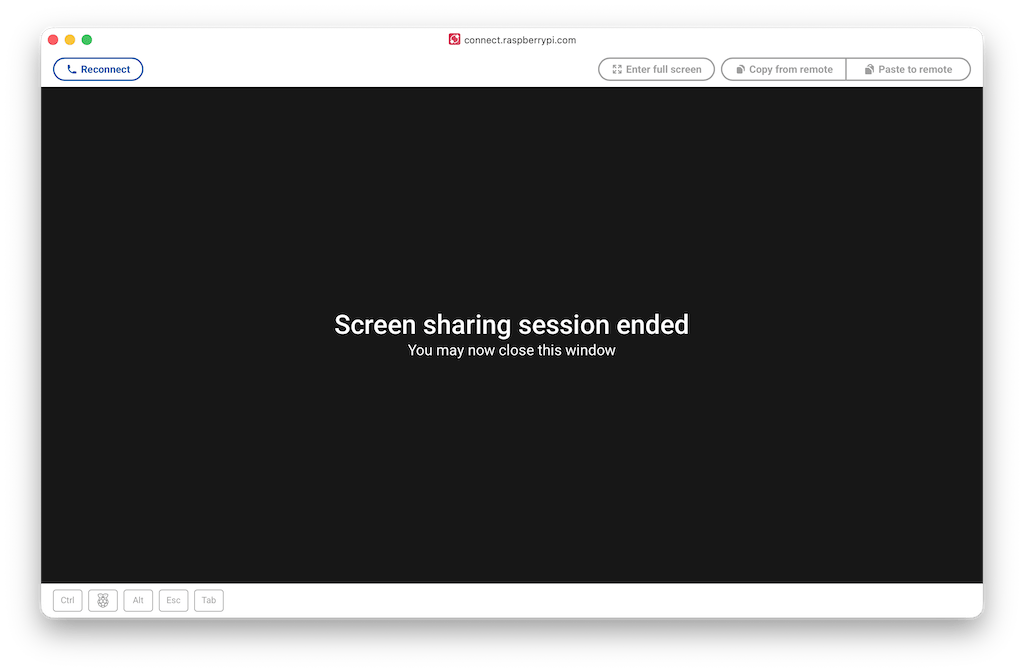
Select the Disconnect button at the top left.
Disallow and re-allow screen sharing
You can disallow screen sharing from your Raspberry Pi device using either the interface or the command line.
|
Warning
|
If you disallow both shell access and screen sharing from a shell or screen sharing session, you must use other common remote access solutions such as SSH to access the device without being physically present. |
-
Interface
-
Command line
To disallow screen sharing:
-
On your Raspberry Pi device, select the Connect icon in the system tray, then deselect Allow Screen Sharing.
Your device remains signed in to Connect, but screen sharing is now disallowed.
-
(Optional) Validate that screen sharing is disallowed:
-
From your PC, Mac, or other device, sign in to connect.raspberrypi.com.
-
Select the Devices tab and locate the Raspberry Pi device in the list: the Screen sharing badge and the Screen sharing option in the Connect via menu are now crossed out.
-
To disallow screen sharing:
-
On your Raspberry Pi device, open the Terminal.
-
Enter the following command:
$ rpi-connect vnc offYour device remains signed in to Connect, but screen sharing is now disallowed.
-
(Optional) Validate that screen sharing is disallowed:
-
From your PC, Mac, or other device, sign in to connect.raspberrypi.com.
-
Select the Devices tab and locate the Raspberry Pi device in the list: the Screen sharing badge and the Screen sharing option in the Connect via menu are now crossed out.
To re-allow screen sharing:
-
-
On your Raspberry Pi device, open the Terminal.
-
Enter the following command:
$ rpi-connect vnc on
Remote shell
To access the remote shell:
-
From your PC, Mac, or other device, sign in to connect.raspberrypi.com.
If your browser or operating system requests permission to find or connect to devices on your local network, allow it. If you disallow it, Connect still works, but sessions with devices on your local network can’t use the local route.
-
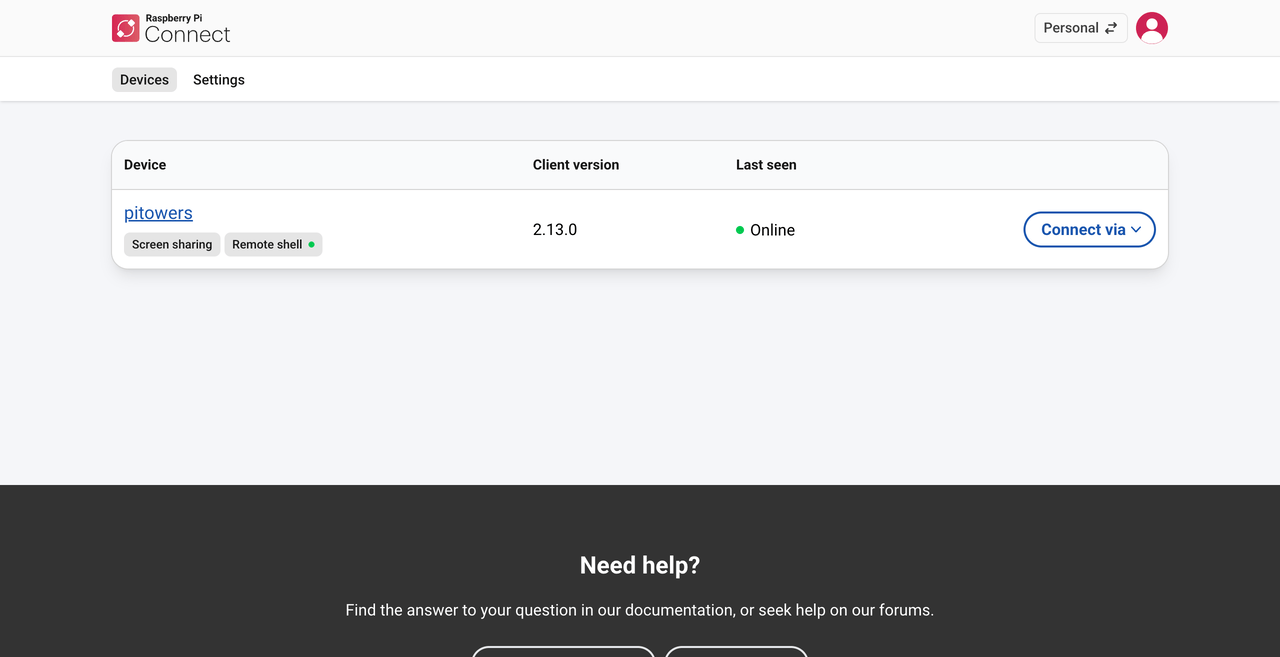
Select the Devices tab and locate the Raspberry Pi device in the list.
Devices available for remote shell access show a grey Remote shell badge below the name of the device.
-
Select the Connect via button to the right of the device you want to access.
-
Select the Remote shell option from the menu. This opens a shell session on your device.
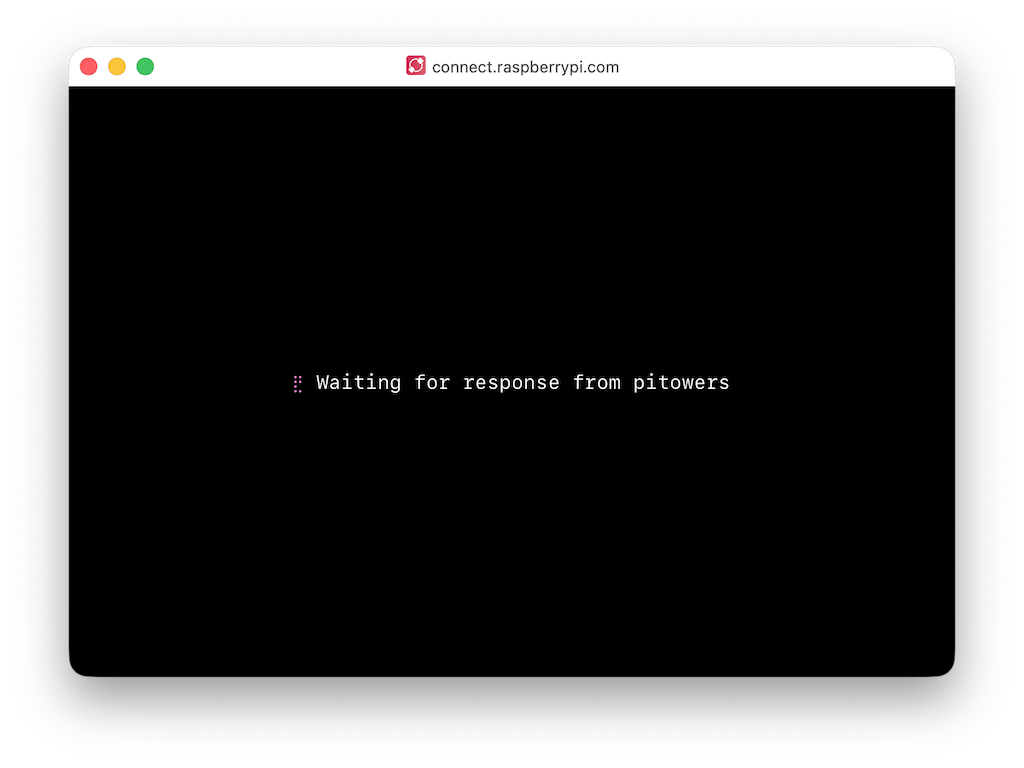
You can now use your device in the same way as a local device.
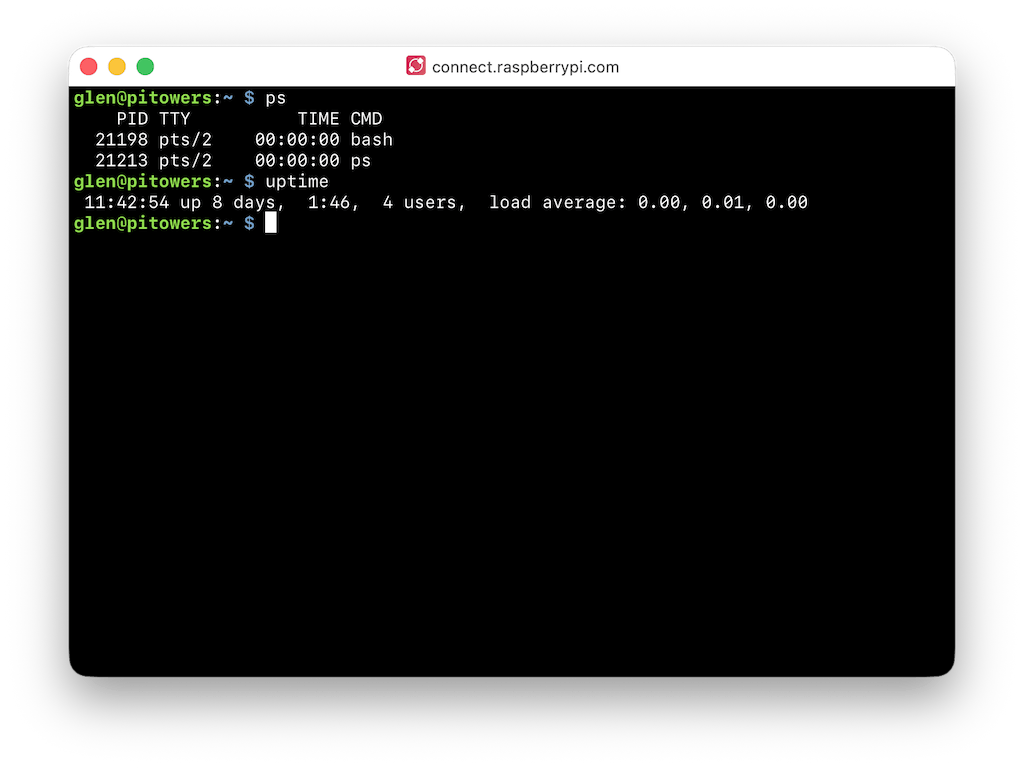
|
Tip
|
On some operating systems, the browser intercepts key combinations like Ctrl+Shift+C and Ctrl+C. Instead, you can use the right-click menu or Ctrl+Insert to copy and Shift+Insert to paste. |
A desktop notification appears whenever a remote shell session starts. While connected, a green dot appears next to the Remote shell badge in the Connect dashboard, indicating that a remote shell session is active. Hover over the dot to see the current number of remote shell sessions.
|
Tip
|
Every remote shell connection creates a brand new connection, just like SSH. To persist background commands and configuration across multiple sessions, use screen or tmux.
|
|
Tip
|
The CONNECT_TTY environment variable indicates that a session uses a remote shell provided by Connect.
|
End a remote shell session
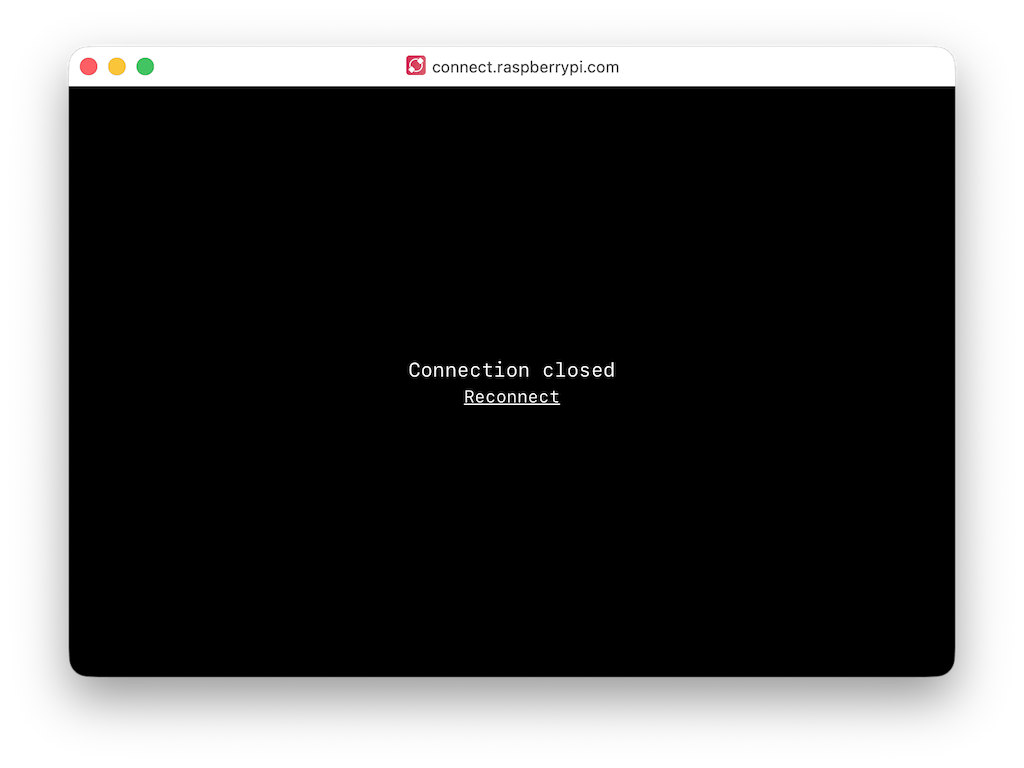
To close a remote shell session, run the exit command from the command line, or close the browser window.
Disallow and re-allow remote shell access
You can disallow shell access from the interface or the command line.
|
Warning
|
If you disallow both shell access and screen sharing from a shell or screen sharing session, you must use other common remote access solutions such as SSH to access the device without being physically present. |
-
Interface
-
Command line
-
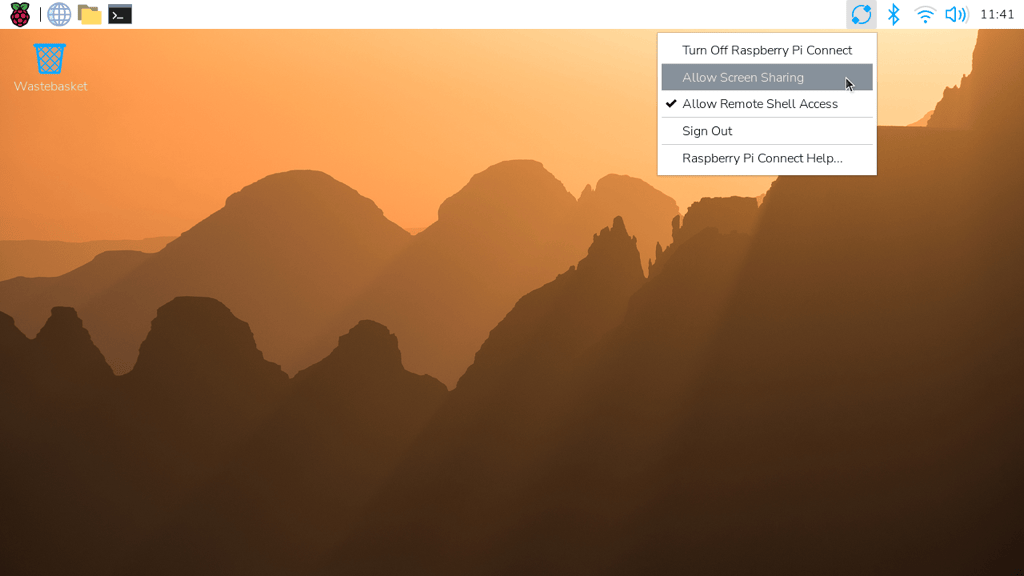
On your Raspberry Pi device, select the Connect icon in the system tray.
-
Deselect Allow Remote Shell Access.
Your device remains signed in to Connect, but you can’t create a remote shell session from the Connect dashboard.
-
On your Raspberry Pi device, open the Terminal.
-
Enter the following command:
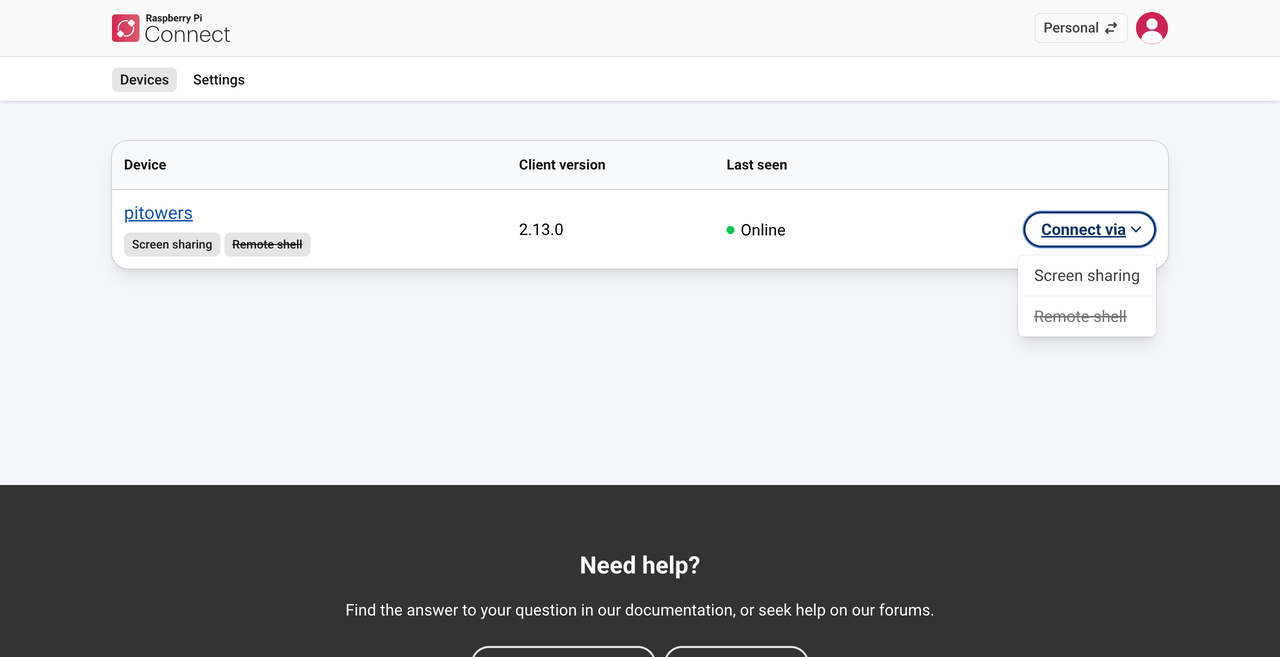
$ rpi-connect shell offIn the Connect dashboard, the Remote shell badge and the Remote shell option in the Connect via menu appear crossed out.
To re-allow remote shell access:
-
Interface
-
Command line
-
On your Raspberry Pi device, select the Connect system tray icon.
-
Select Allow Remote Shell Access.
-
On your Raspberry Pi device, open the Terminal.
-
Enter the following command:
$ rpi-connect shell on
Remotely update your devices
Edit this on GitHub
Connect includes the ability to update your Raspberry Pi devices by remotely pushing them updates.
Remote updates are useful for updating devices behind a firewall, and devices that are physically remote or hard to reach.
Connect supports two types of update artefact:
-
Script artefacts, created with
otamaker, run a shell script as root on the device. They work on a standard installation of Raspberry Pi OS and suit maintenance tasks such as upgrading packages. -
A/B boot updates, created with
rpi-image-gen, replace the entire operating system and automatically revert to the previous version if the update fails. They require imaging the device with an A/B boot layout first.
Whichever type of artefact you build, you deploy it from the Raspberry Pi Connect website, as described in Deploy the update artefact. You upload the artefact as part of the deployment, and Connect passes it to the recipient device.
If your devices belong to a Connect for Organisations account, you have more options: an organisation keeps a library of artefacts that you can deploy more than once, and you can host an artefact yourself instead of uploading it, so the artefact doesn’t expire while you wait for a device to come online. For more information, see Deploy remote updates in an organisation.
Deploy the update artefact
After you’ve built an artefact with otamaker or rpi-image-gen, use the Raspberry Pi Connect website to deploy it to a device.
|
Note
|
If the recipient device belongs to an organisation, deploy it as described in Deploy remote updates in an organisation instead. |
Deployments always start from the device you want to update, so make sure that the recipient device is registered to your personal account before you proceed:
-
Log in to Raspberry Pi Connect.
-
Select the Personal account using the account switcher at the top right.
-
Go to the Devices tab, then select Deploy next to the recipient device. Deploy appears only for devices that have remote update enabled.
This opens the New deployment form, which creates a new artefact for the deployment in two steps.
In Step 1: Upload an artefact, upload the artefact you built:
-
Enter a Name for the artefact. Names don’t have to be unique, so use something that helps you recognise the deployment later, such as a version number.
-
Drag the artefact onto the File area, or select browse to choose it. The file must be a Zstandard-compressed tar archive (a
.tar.zstfile) of 2 GB or less. -
Wait for both Checksum and Upload to show Complete.
To choose a different file, select Remove. To abandon a file that is still uploading, select Cancel.
-
Select Next.
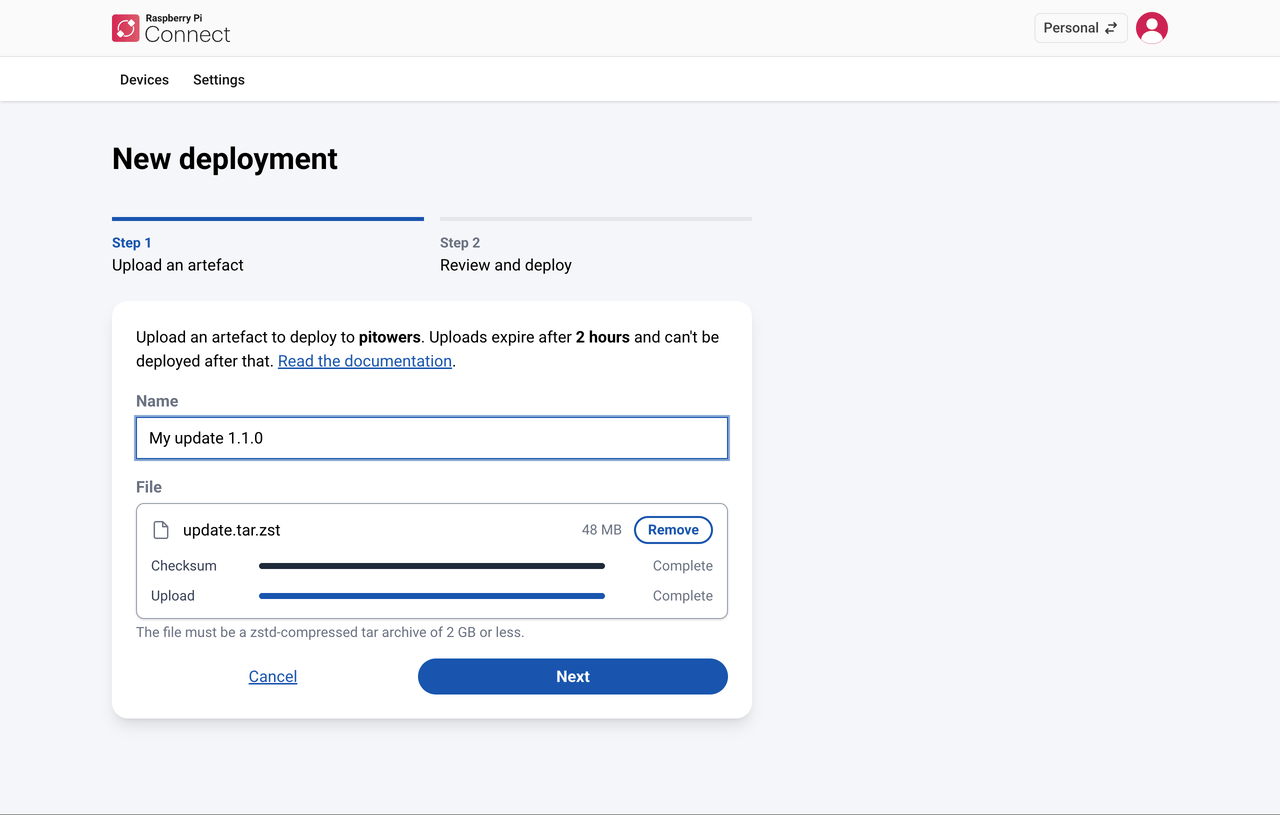 Step 1 of the New deployment form, showing the Name field and the uploaded artefact.
In Step 2: Review and deploy, check the name, file, and SHA-256 checksum, then select Deploy. If you spot a mistake, select Back to correct it. This step also shows when the uploaded file expires.
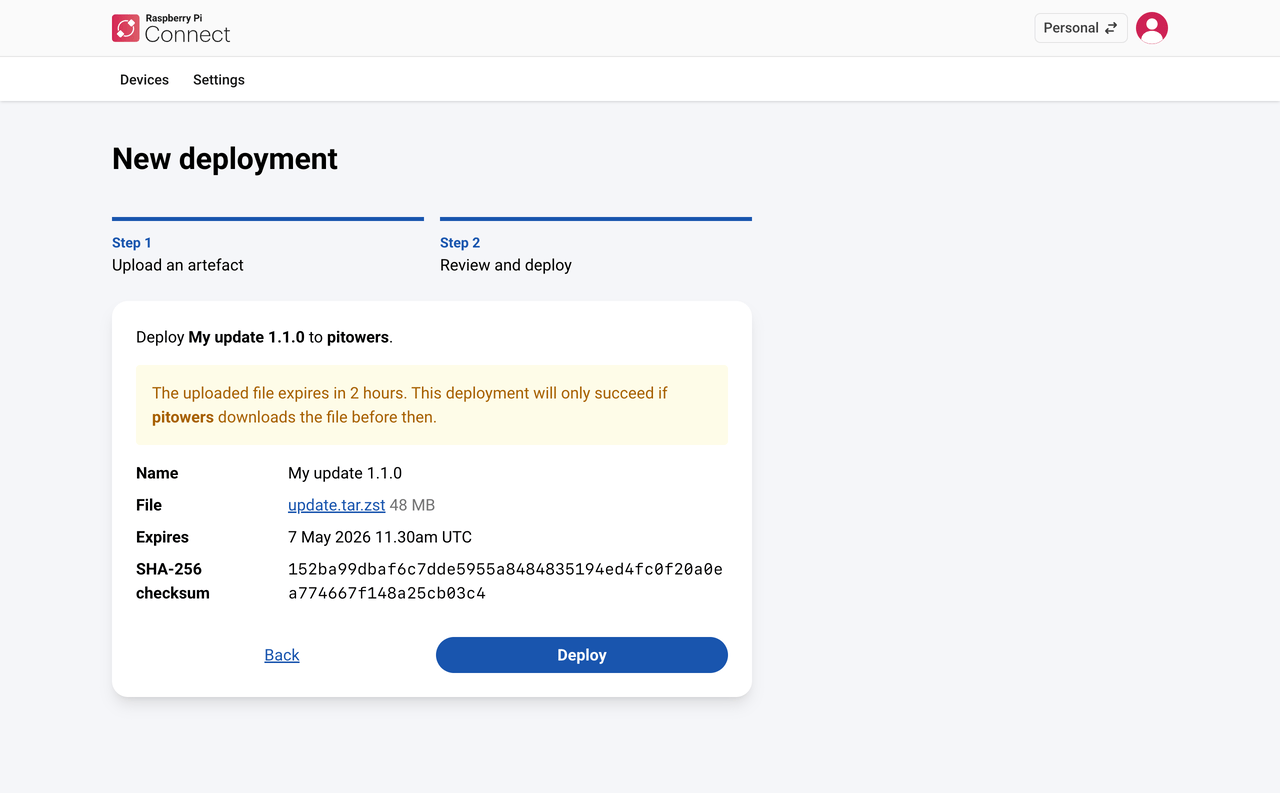
The recipient device doesn’t have to be online when you deploy, but Connect keeps the artefact you uploaded for only two hours, then deletes it.
|
Important
|
The deployment succeeds only if the recipient device comes online and starts the deployment within two hours of the upload. A deployment that hasn’t started by the time its artefact is deleted is marked Invalidated. To deploy that artefact again, upload it again. |
Monitor the deployment
From the Devices tab in Raspberry Pi Connect interface, you can select a device and then view a list of the most recent deployments uploaded to it.
Deployment states are:
-
Pending: waiting for the recipient device to pick up the update.
-
In Progress: the update is being applied to the device.
-
Succeeded: the update has been applied successfully.
-
Failed: the update failed. For more information, see Troubleshooting.
-
Cancelled: the update was cancelled before it could be applied. Pending deployments are automatically cancelled when another deployment is queued for the same device.
-
Invalidated: an update that can no longer be applied.
When a deployment is Pending or In Progress, the Devices page automatically updates with the current state. It stops updating once the deployment has entered Succeeded, Failed, Cancelled, or Invalidated.
To check a deployment’s details:
-
Log in to Raspberry Pi Connect.
-
Select the Personal account using the account switcher at the top right.
-
Go to the Devices tab, then select the device you deployed to. The Deployments section lists the most recent deployments for that device.
-
Select a deployment from the list to read more about its state, or to read any error messages for a failed deployment.
To cancel a deployment:
|
Note
|
You can only cancel a deployment that is Pending. |
-
Log in to Raspberry Pi Connect.
-
Select the Personal account using the account switcher at the top right.
-
Go to the Devices tab, then select the device you deployed to. The Deployments section lists the most recent deployments for that device.
-
From the deployment list, select the deployment you want to cancel, then select Cancel.
Verify the deployment
To verify a deployment, see Script artefacts for a script artefact, or A/B Boot Update for an A/B boot update.
Script artefacts
Edit this on GitHub
A script artefact packages a shell script that Raspberry Pi Connect runs as root on the recipient device. Use script artefacts for maintenance tasks such as upgrading packages, changing configuration, or installing software.
Unlike an A/B boot update, a script artefact doesn’t require a special partition layout, so you can deploy one to any device running a standard installation of Raspberry Pi OS. However, there is no automatic recovery if a script fails, so test your scripts carefully before deploying them to remote devices.
Use otamaker to create script artefacts.
Prerequisites
The following are required to create and deploy a script artefact:
For the recipient device receiving the update artefact:
A Raspberry Pi device that is:
-
Connected to the internet.
-
Registered with, and signed in to, your Raspberry Pi Connect account.
-
Running the latest version of Raspberry Pi Connect or Connect Lite with the
rpi-connect-otapackage installed:$ sudo apt update $ sudo apt install rpi-connect rpi-connect-otaIf you use Connect Lite, install
rpi-connect-liteinstead ofrpi-connect. -
Opted in to remote updates, which
rpi-connectmanages using itsota(over-the-air) subcommand:$ rpi-connect ota on
For creation of the update artefact using otamaker:
-
The
otamakerutility, which is included in therpi-connect-otapackage.TipTo build artefacts on a computer other than a Raspberry Pi, download otamakerfrom the utils repository on GitHub.
Step 1: Create the script
Write the shell script you want to run on the recipient device. The script runs as root, so it has full access to the device’s filesystem.
Use the script’s exit code to report the outcome of the update to Raspberry Pi Connect:
-
0: the update succeeded. -
1: the update failed. -
2: the update succeeded, and the device must reboot to finish applying it.
For example, the following script, saved as aptupgradescript, upgrades all of the packages installed on the recipient device, and reboots it if any of the upgraded packages require a reboot:
#!/bin/sh
export DEBIAN_FRONTEND=noninteractive
if ! apt update; then
    echo Package index update failed
    exit 1 # EXIT_FAILURE
fi
if apt -y -o DPKG::Options::="--force-confnew" upgrade > output.txt 2>&1; then
    if [ -r /var/run/reboot-required ]; then
        echo Rebooting to finish the upgrade
        exit 2 # EXIT_REBOOT
    fi
else
    echo Upgrade failed:
    echo
    cat output.txt
    exit 1 # EXIT_FAILURE
fi
echo Upgrade complete
exit 0 # EXIT_SUCCESS
Anything the script prints to standard output or standard error is recorded in the recipient device’s systemd journal, which you can view after deployment to verify the update or diagnose a failure. The example script captures the output of apt to a file and prints it only when the upgrade fails, so a successful run records just Upgrade complete.
Step 2: Create the manifest
Next, create a YAML manifest that describes the artefact and the payloads it contains.
The following manifest, saved as aptupgrade.yaml, packages the script from Step 1:
# Run apt upgrade on a remote device
artefact:
  name: aptupgrade
  version: 1.0
  device_type: rpi

payloads:
- name: aptupgradescript
  type: script
The artefact section names and versions the artefact. The payloads section lists the files to package: each payload’s name is the name of a file in the directory where you run otamaker, and a type of script tells the recipient device to execute it. To package a file from another directory, add its path as a comment after the payload’s name, for example - name: aptupgradescript # scripts/aptupgradescript.
Step 3: Build the artefact
Build the artefact by passing the manifest to otamaker:
$ otamaker aptupgrade.yamlThis creates a Zstandard-compressed update artefact (.tar.zst file) containing the manifest and the script, and outputs the artefact’s SHA-256 checksum.
Step 4: Deploy the artefact
Deploy a script artefact in the same way as any other update artefact: select the recipient device and upload the .tar.zst file to it, as described in Deploy the update artefact.
If the recipient device belongs to an organisation, host the artefact first, then deploy it using its URI and checksum, as described in Deploy remote updates in an organisation. You can skip the step that calculates the checksum; otamaker already output it when it built the artefact.
A/B Boot Update
Edit this on GitHub
The A/B boot update prevents a failed or faulty update from causing your device to stop working.
The configuration has two independent slots, each made up of a boot and a system partition. Slot A is used for the existing operating system (OS) and slot B is used for the update. The device boots from slot B, but reverts to booting from the known working partition, slot A, if that fails. This process repeats with each successive update.
Configuring for A/B boot requires being able to physically access the device. This is because you must image the device with the appropriate A/B boot layout. However, once configured, you can then deliver remote updates using Raspberry Pi Connect.
Raspberry Pi 5 and later devices that use EEPROM boot can also be configured to use A/B boot update. See A/B bootloader updates.
Use rpi-image-gen to create both the A/B boot configuration (.img file) and the update artefacts (update.tar.zst files). Use Raspberry Pi Imager to configure the .img file and write it to the storage device for transfer to the recipient Raspberry Pi.
Prerequisites
The following are required to use remote update and the A/B boot configuration:
For creation of the A/B boot configuration and creation of the update artefact using rpi-image-gen:
A Raspberry Pi device on which is installed:
-
The latest 32-bit or 64-bit version of Raspberry Pi OS (Trixie).
-
The latest version of Raspberry Pi Connect or Connect Lite.
-
The latest version of Raspberry Pi Imager.
To configure the recipient device for A/B boot:
-
A storage device (typically, microSD) to save the A/B boot layout to and a way to connect the storage device to the Raspberry Pi.
You must have at least 16 GB of space, but you must decide exactly how much disk space you need based on your expected future requirements for the boot partition (firmware, kernel, device tree files, and possibly initramfs) and the system partition (kernel modules and system-level software such as the standard Linux command-line utilities).
Implement A/B boot and remotely update the first image
Follow the three stages below to implement the A/B configuration and send updates using Raspberry Pi Connect:
-
Stage 1: Prepare the recipient Raspberry Pi 4 and later device for remote updates by creating an A/B boot file, then deploy it to the device.
-
Stage 2: Create an update artefact file for deployment to the recipient device.
-
Stage 3: Use Raspberry Pi Connect’s remote update feature to deploy the update artefact to the recipient device, then verify the update.
Stage 1: Create A/B boot configuration
Standard Raspberry Pi OS installations don’t feature an A/B boot configuration. This stage shows you how to create one using rpi-image-gen and Raspberry Pi Imager.
rpi-image-gen outputs an .img file containing the A/B boot image.
Raspberry Pi Imager then uses the .img file to write the operating system configuration to the storage device. This includes opting the device in to remote updates so that Raspberry Pi Connect can update it.
You must have physical access to the recipient device to update it for the first time, but once you’ve configured it, you can send updates remotely thereafter.
In Step 3, you generate an auth key to allow the recipient device to link to the Raspberry Pi Connect website. This auth key is tied to a single recipient device, so create a new key for each recipient device you want to update.
|
Note
|
You must be using a Raspberry Pi device running the latest version of Raspberry Pi OS (Trixie) to create the update. The recipient device must be a Raspberry Pi 4 or later. |
To update a recipient device with an A/B boot configuration:
Step 1: Install rpi-image-gen
-
On the Raspberry Pi, from the command line, run the following command to clone the rpi-image-gen repository from GitHub:
$ git clone https://github.com/raspberrypi/rpi-image-gen.git -
Navigate to the cloned directory, then install the dependencies by running the following commands:
$ cd rpi-image-gen
$ sudo ./install_deps.sh
Step 2: Prepare and configure the image
|
Tip
|
rpi-image-gen contains an example application, with layers and configuration, to build an image compatible with remote updates. |
For descriptions of the .yaml file metadata, see X environment metadata and Layer.
To prepare the image:
-
Navigate to the rpi-image-gen installation folder
-
Open
examples/ota/layer/ota.yaml -
Customise the following metadata:
-
X-Env-Layer-Name.
-
X-Env-Layer-Category.
-
X-Env-Layer-Desc.
-
X-Env-Layer-Reqs.
-
-
Open
examples/ota/config/ota.yaml -
Set the following environment variables:
-
Version. Used to determine the version boot image. Set a starting version number now and increment it accordingly with each update artefact you create in the future. If you don’t specify a version number, it defaults to 1.0.0.
-
Device hostname. Used across all images created for this device. Must be unique. If you don’t specify a device hostname, the default value
ota-device-1is created for each build.
-
-
(Optional) open
examples/ota/config/ota.yamland:-
Define additional packages to install at build time. For more information, see Packages.
-
Add wireless networking credentials. For more information, see Wireless Networking.
-
Step 3: Generate an auth key
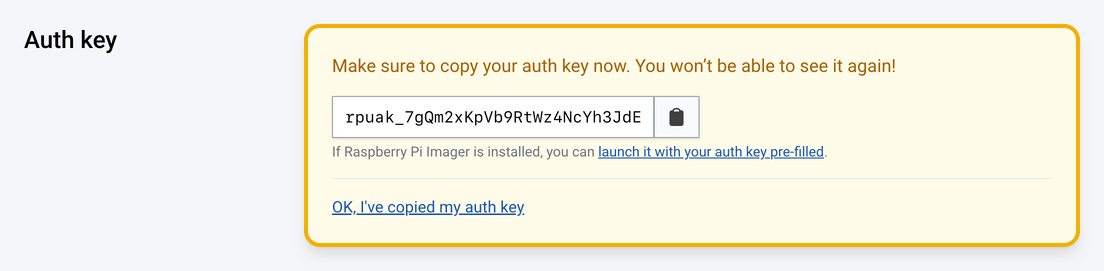
In this step, you create the auth key and copy it down for use in Step 4.
When you boot the recipient device after the A/B boot update (Step 6), it exchanges the auth key for an access token that is saved in the user data partition. This key persists across future updates, so you only have to generate it once.
For more information about creating auth keys for an organisation, see Create auth keys.
To generate the auth key:
-
Log in to Raspberry Pi Connect
-
Choose your organisation or Personal account from the account switcher at the top right.
-
Go to the Provisioning tab (for an organisation) or the Settings tab (for Personal), then select New in the Auth keys section (organisation) or Create new auth key (Personal).
-
Fill out the form, then select Create auth key.
-
Copy down the key.
Step 4: Build the A/B boot configuration image
Now that you’ve set up the application and created an auth key, create the boot configuration image using rpi-image-gen.
This creates a .img file that will be written to the storage device with Raspberry Pi Imager in Step 5.
To build the A/B boot configuration image:
-
From the command line, change directory to the rpi-image-gen folder.
$ cd rpi-image-gen -
Run the following command, replacing
rpuak_XXXwith the auth key you copied in Step 3 (organisation auth keys start withrpoak_).Raspberry Pi 5 and later:
$ ./rpi-image-gen build -S ./examples/ota/ -c ota.yaml -- IGconf_connect_authkey=rpuak_XXXRaspberry Pi 4:
$ ./rpi-image-gen build -S ./examples/ota/ -c ota.yaml -- IGconf_device_layer=rpi4 IGconf_connect_authkey=rpuak_XXXThe application generates the file and saves it in the /rpi-image-gen/work/image-x.x.x folder (where x.x.x corresponds to the version environment variable you set in Step 2).
Step 5: Write the image
Next, use Raspberry Pi Imager to create the operating system configuration and save it to the storage device.
|
Warning
|
In the example target below, (/dev/mmcblk0) is only used if you’re booting from another device, such as an NVMe SSD. Be careful not to overwrite the operating system.
|
To write the image:
-
If Raspberry Pi Imager is not already installed, run the following from the command line:
$ sudo apt install rpi-imager -
Open Raspberry Pi Imager from the Accessories menu in the graphical interface. Enter your password if prompted to.
-
Select the recipient device type: Raspberry Pi 4 or Raspberry Pi 5, then select Next.
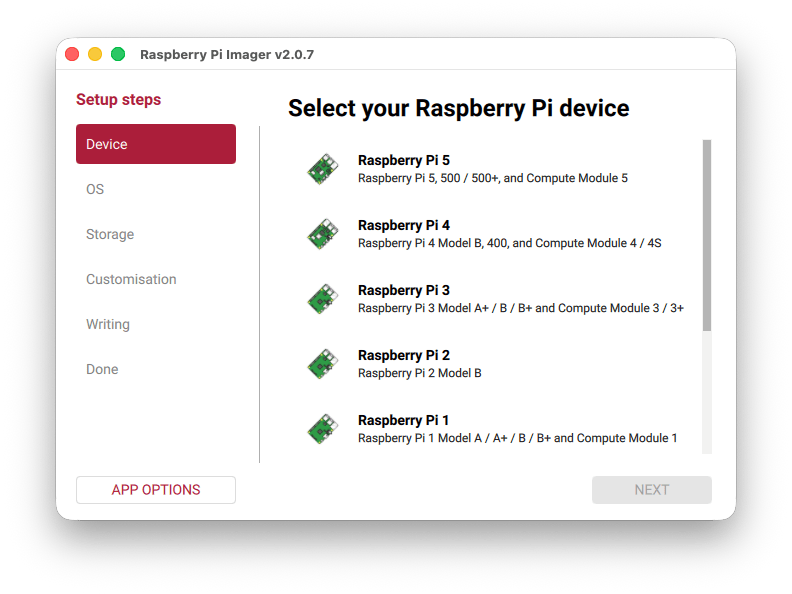 Raspberry Pi Imager is used to write the image.
 -
On the OS tab, scroll all the way to the bottom and select Use Custom.
-
Navigate to the
.imgfile you created in step 4, select it, then select Open. -
Select Next and choose the storage device to save the A/B boot configuration to.
-
Select Write, then follow the on-screen prompts to complete the writing process.
-
When Raspberry Pi Imager finishes writing the operating system, select Finish.
You can now safely remove the storage device in preparation for Step 6.
Step 6: Deploy the .img file to the recipient device
-
Power off the recipient device.
-
Attach the storage device from Step 5.
-
Power the recipient device on, then wait for it to boot with the new image.
-
Log in to Raspberry Pi Connect, then go to Devices.
The device appears on the Raspberry Pi Connect dashboard and the Remote update label appears beneath the device.
The device is now ready to update remotely using Raspberry Pi Connect.
Step 7: Confirm the deployed version
Confirm the version of the deployed image on the device is the same as the one you configured in Step 2.
To confirm the deployed image version:
-
Select the device in Raspberry Pi Connect.
-
Select Connect.
-
From the command line, enter:
$ cat /etc/rpi-issueThe command line returns something like the following:
Generated using rpi-image-gen e3828f885c860f15991468883d3b8484b0eaf9d8 on 2025-12-09
Artefact version: 1.0.0
Stage 2: Create update artefact
Now the device is configured for A/B booting, you can deploy update artefacts to it using Raspberry Pi Connect.
Update artefacts are created by rpi-image-gen as .tar.zst files. These are much smaller than the .img file you created in Stage 1, and are deployed in Stage 3 to the recipient device by Raspberry Pi Connect.
For the purposes of illustration, we continue to use the example update from Stage 1 here. Amend these procedures to reflect the path and naming of your own update .yaml file.
To build the update artefact:
Stage 3: Update remotely
Use Raspberry Pi Connect to deploy the update artefact to the recipient Raspberry Pi device.
Step 1: Deploy the artefact to the recipient device
Deploy the artefact from the Raspberry Pi Connect website, uploading the .tar.zst file you built in Stage 2, as described in Deploy the update artefact.
If the recipient device belongs to an organisation, host the artefact first, then deploy it using its URI and checksum, as described in Deploy remote updates in an organisation.
Step 2: Verify the update
When the deployment shows as Succeeded, connect to the recipient device using Raspberry Pi Connect and confirm the deployed version, as in Stage 1, Step 7:
$ cat /etc/rpi-issueThe command line returns something like the following, indicating that the Artefact version number has changed:
Generated using rpi-image-gen e3828f885c860f15991468883d3b8484b0eaf9d8 on 2025-12-09
Artefact version: 1.1.0
Enable remote shell at all times
Edit this on GitHub
Connect runs as a user-level service, not as root. As a result, Connect only works when your user account is currently logged in on your device. This can make your device unreachable if you reboot with automatic login disabled. To continue running Connect even when you aren’t logged into your device, enable user-lingering. Run the following command from your user account to enable user-lingering:
$ loginctl enable-linger|
Tip
|
We recommend enabling user-lingering on all headless Raspberry Pi OS Lite setups to prevent your device from becoming unreachable after a remote reboot. |
Disable the animated icon
To disable the animated icon when a screen sharing or remote shell session are in progress, right-click the Connect icon in the menu bar and select Configure Plugin….
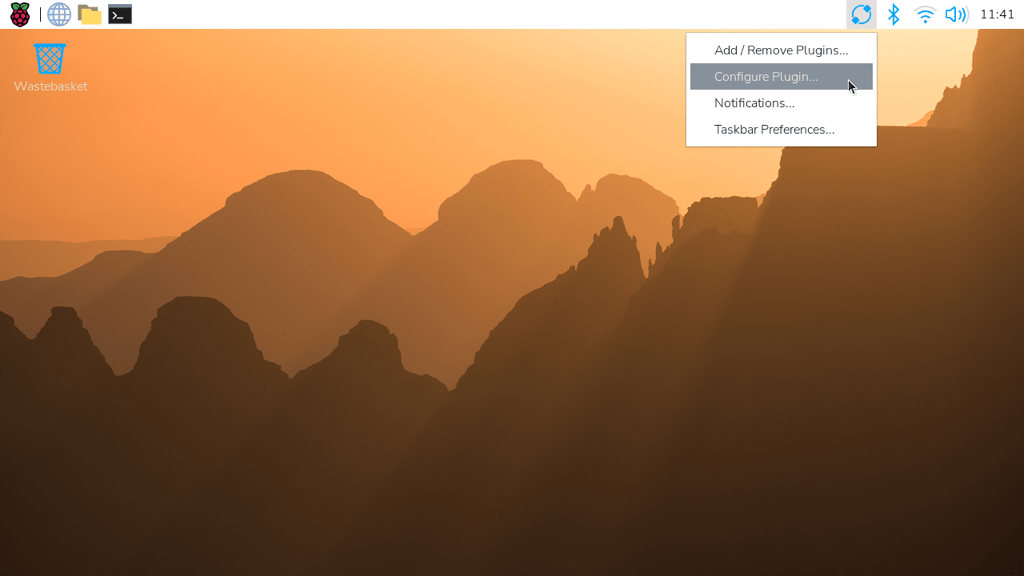
Select the Animate Icon toggle to switch to an alternate icon.
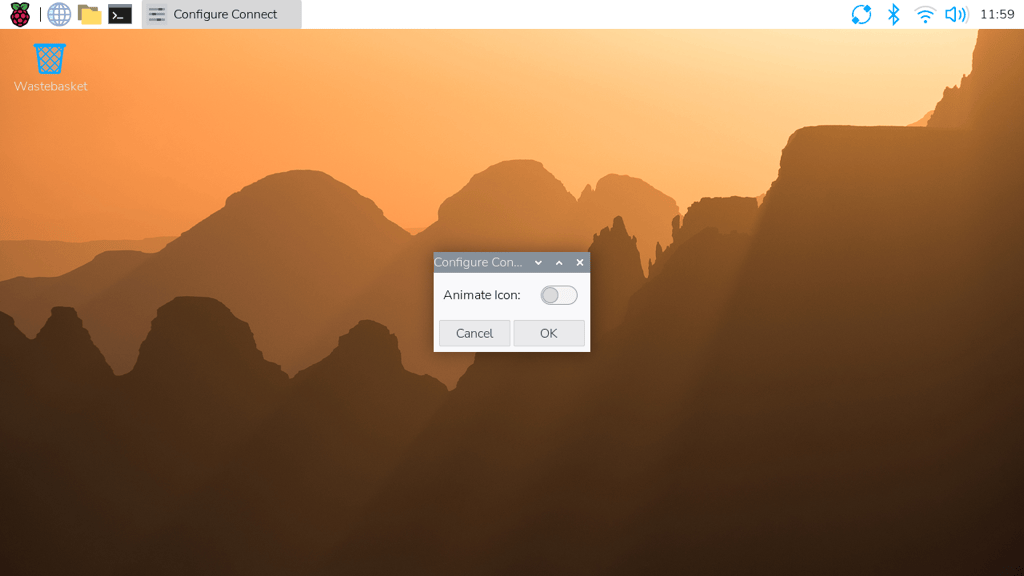
When a screen sharing or remote shell session is in progress, the Connect icon turns blue.
Manage devices
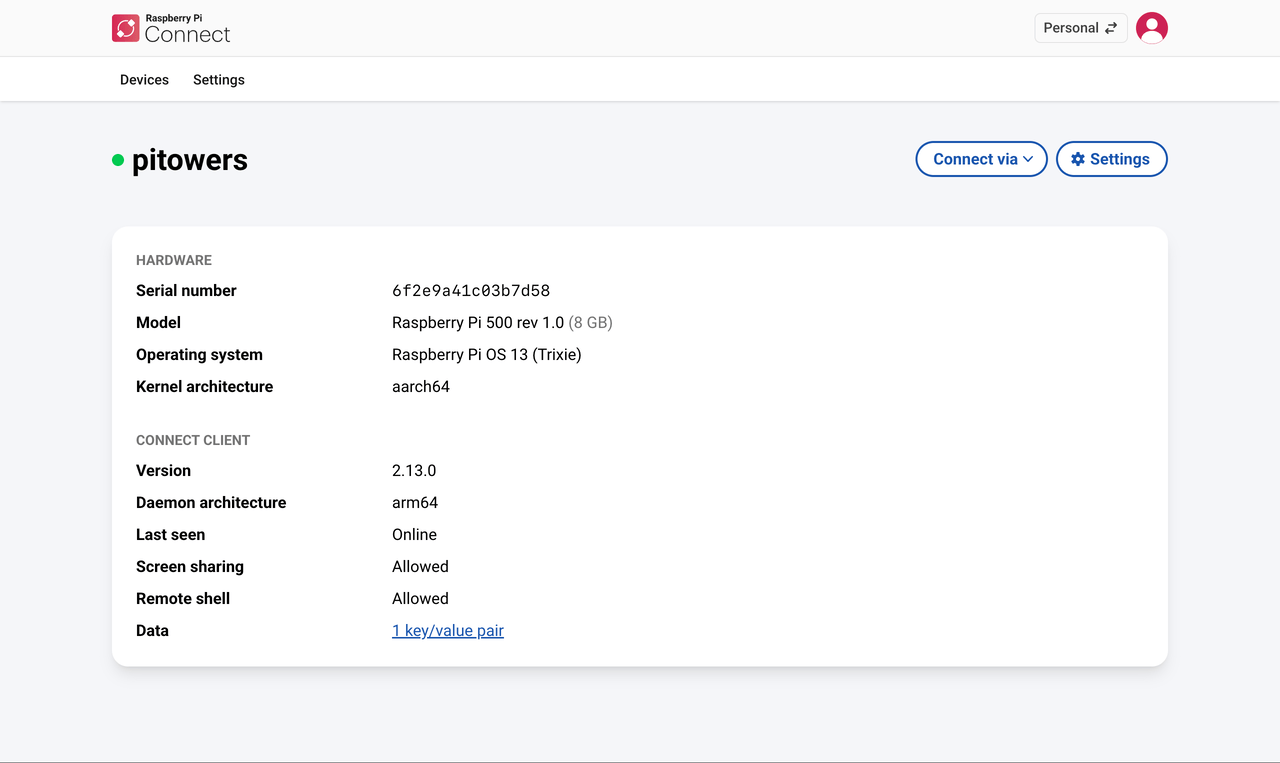
The Connect dashboard lists all of the devices linked with your Connect account and shows you the various ways you can access them.
Select a device name to open the device details page. This screen provides low-level information about your device.
To rename or delete the device, select Settings on the device page.
Deleting a device from Connect automatically signs you out of Connect on the device. The Connect icon in the menu bar turns grey and the menu only provides a Sign In… option.
Update
|
Warning
|
Upgrading Connect disconnects any screen sharing or remote shell sessions in progress. We don’t recommended using remote shell to upgrade Connect unless you’re running commands in a way that’ll survive disconnection, for example, using screen or tmux.
|
To update to the latest version of Connect, run the following command:
$ sudo apt update
$ sudo apt install --only-upgrade rpi-connect
If you installed Connect Lite, replace rpi-connect with rpi-connect-lite in the above command.
Disconnect a device from Connect
Run the following command on your device to sign out of your Raspberry Pi ID, which will disable your device on the Connect screen:
$ rpi-connect signoutAlternatively, select the Connect icon in the menu bar and choose "Sign Out".
|
Tip
|
To fully remove a device from your Connect account, remove it from the Connect dashboard. |
Uninstall
Run the following command to stop and remove Connect from a device:
$ sudo apt remove --purge rpi-connect|
Tip
|
If you installed Connect Lite, replace rpi-connect with rpi-connect-lite in the above command.
|
After uninstalling, the serial number of the device remains linked with your Connect account. The device still appears in the Connect dashboard, but can’t be used for remote access. If you install Connect again, even with a different SD card, on the same device, it will reuse the existing device name in the Connect dashboard.
To sever the link between a device and a Connect account, remove the device from the list of devices in the Connect dashboard.
Troubleshooting
Edit this on GitHub
Known issues
-
Screen sharing only supports sharing a single, primary display of your Raspberry Pi. When a Raspberry Pi is connected to multiple HDMI screens, Connect sometimes shares the contents of the secondary screen. You can work around this by right-clicking the desktop and changing the location of the taskbar in Desktop Preferences….
-
Connect requires a browser that implements ECMAScript 2022 (ES13) as it makes use of features unavailable in older browsers.
-
Browsers intercept certain keys and key combinations. As a result, you can’t type these keys into your Connect window. Screen sharing includes a toolbar to simulate some of the most popular intercepted keys.
-
Upgrading
rpi-connectandrpi-connect-liteusing Connect’s remote shell is not supported. The upgrade process will terminate all remote shell sessions and drop all connections. To upgrade Connect in a remote shell session, use a tool likescreenortmuxto ensure the process continues uninterrupted after your connection is closed. -
To upgrade from version 1 to version 2, you must first upgrade the package you currently have installed before switching between
rpi-connectandrpi-connect-lite. This ensures that Connect’s services properly migrate to the version 2 format. If you currently haverpi-connectinstalled, run the following command:$ sudo apt install --only-upgrade rpi-connectAlternatively, if you currently have
rpi-connect-liteinstalled, run the following command:$ sudo apt install --only-upgrade rpi-connect-liteYou see output similar to the following during the upgrade, indicating that Connect’s services have migrated to the version 2 format:
Replacing globally-enabled rpi-connect services with user-enabled ones...
Common issues
Screen sharing not available
If Connect states that screen sharing is unavailable, one or more requirements for screen sharing support are not met. To help debug the problem, rpi-connect and rpi-connect-lite include the doctor command. Use rpi-connect doctor to identify issues with screen sharing.
Run the following command:
$ rpi-connect doctorIf all is well, you see output similar to the following:
Screen sharing is supported by this version of rpi-connect
✓ Wayland compositor available
✓ Screen sharing services enabled and active
✓ Communication with Raspberry Pi Connect WebSocket server
✓ Communication with Raspberry Pi Connect API
✓ Authentication with Raspberry Pi Connect API
✓ Peer-to-peer connection candidate via STUN
✓ Peer-to-peer connection candidate via TURN
If there is an issue, you will see something like so:
Screen sharing is supported by this version of rpi-connect
✓ Wayland compositor available
✗ Screen sharing services enabled and active - Please run rpi-connect on to enable and start all required services
✓ Communication with Raspberry Pi Connect WebSocket server
✓ Communication with Raspberry Pi Connect API
✓ Authentication with Raspberry Pi Connect API
✓ Peer-to-peer connection candidate via STUN
✓ Peer-to-peer connection candidate via TURN

✗ Some checks failed
If you have repeated issues trying to run Connect’s required services, run the following commands to check their status in more detail:
$ systemctl --user status rpi-connect-wayvnc.service
$ journalctl --follow --user-unit rpi-connect-wayvnc.service
If the service fails to start or doesn’t exist, ensure that your environment meets the following criteria:
-
You use
rpi-connectversion 1.1.0 or later. -
You do not use
rpi-connect-lite, which lacks screen sharing support. -
You use a Wayland compositor such as wayfire or labwc, not X. You can control this setting through the Advanced Options in
raspi-config. -
You use a desktop environment supported by WayVNC, for example, Raspberry Pi Desktop. For instance, using KDE switches your Wayland compositor to kwin, which is unsupported.
-
You have an active graphical desktop session running as the same user as the one you signed into. For most, this means enabling Desktop Autologin in the System Options in
raspi-config.
Can’t connect after restarting or ending SSH session
Connect runs as a user-level service and is therefore only available if there is an active session for the user signed into the service. If you want remote shell access without also running another login session, enable user-lingering for your user, which will keep Connect running at all times.
For screen sharing, Connect can only share an existing graphical desktop session: it does not create entirely new sessions. There must already be a desktop session in progress. To start such a session automatically on boot, enable Desktop Autologin in the System Options in raspi-config.
Networking and firewall issues
Connect usually communicates between devices without requiring changes to your network or firewall. However, especially restrictive networks can sometimes block Connect communication. To help debug problems with such networks, rpi-connect and rpi-connect-lite include the rpi-connect doctor command. rpi-connect doctor runs a series of tests to check that Connect communication functions properly on your network.
To run these tests on your device, run the following command:
$ rpi-connect doctorIf Connect can communicate properly on your network, you see output similar to the following:
Screen sharing is supported by this version of rpi-connect
✓ Wayland compositor available
✓ Screen sharing services enabled and active
✓ Communication with Raspberry Pi Connect WebSocket server
✓ Communication with Raspberry Pi Connect API
✓ Authentication with Raspberry Pi Connect API
✓ Peer-to-peer connection candidate via STUN
✓ Peer-to-peer connection candidate via TURN
If Connect can’t communicate properly on your network, you’ll see an "x" instead of a check next to the failing test case. Ask your network administrator to enable the following connections on your network:
-
HTTPS requests to the Raspberry Pi Connect API and WebSocket server on port 443 of
api.connect.raspberrypi.comandws.connect.raspberrypi.com -
requests to Raspberry Pi Connect STUN or TURN servers on UDP port 3478 of all of the following:
-
stun.raspberrypi.com -
turn1.raspberrypi.com -
turn2.raspberrypi.com -
turn3.raspberrypi.com
-
-
requests to Raspberry Pi Connect TURN servers on TCP ports 3478 or 443 of all of the following:
-
turn1.raspberrypi.com -
turn2.raspberrypi.com -
turn3.raspberrypi.com
-
-
requests to Raspberry Pi Connect TURN servers on UDP ports 3478, 443, or 49152 → 65535 of all of the following:
-
turn1.raspberrypi.com -
turn2.raspberrypi.com -
turn3.raspberrypi.com
-
Remote update failures
If the A/B boot configuration or remote update process fails, refer to the following list of common faults and fixes.
You can also refer to the rpi-image-gen documentation and visit the Raspberry Pi Troubleshooting forum.
|
Tip
|
If you see an error, use Raspberry Pi Connect’s remote shell access to view the |
| Error | Suggested fix |
|---|---|
|
The recipient device must be able to locate the update file. Check that the device still has internet access. For a device in an organisation, open a remote shell connection to the recipient device, then use |
|
Make sure that you deployed the |
The deployment shows as Invalidated, with the reason |
Connect keeps an artefact you upload for two hours, then deletes it. The recipient device didn’t come online and start the deployment before that happened. Check that the device is online, then deploy the artefact again. |
No Deploy option appears next to the device in Raspberry Pi Connect. |
Enable OTA opt-in using the following command, then refresh your browser: |
View Connect status
To view the current status of the Connect service, run the following command:
$ rpi-connect statusThe command displays output similar to the following:
Signed in: yes
Subscribed to events: yes
Screen sharing: allowed (0 sessions active)
Remote shell: allowed (0 sessions active)
The output of this command indicates whether or not you are currently signed in to Connect, as well as the remote services enabled on your Raspberry Pi.
If you see output including "Raspberry Pi Connect is not running, run rpi-connect on", run rpi-connect on to start Connect.
Enable enhanced logging
You can enable debug logging for both rpi-connect and its dedicated WayVNC server for a detailed account of local operations on your Raspberry Pi.
Enable enhanced logging in rpi-connect
Add the environment variable RPI_CONNECT_VERBOSE=1 to /etc/default/rpi-connect, and restart Connect with the following command:
$ rpi-connect restartAlternatively, for versions prior to 2.7 override the rpi-connect service definition with the following command:
$ systemctl --user edit rpi-connectEnter the following lines of configuration between the comments:
[Service]
ExecStart=
ExecStart=/usr/bin/rpi-connectd -socket %t/rpi-connect-wayvnc.sock -v|
Note
|
You need both lines that begin with ExecStart=.
|
Finally, restart Connect with the following command:
$ rpi-connect restart
Enable enhanced logging in the dedicated wayvnc server
Override the rpi-connect-wayvnc service definition with the following command:
$ systemctl --user edit rpi-connect-wayvncEnter the following lines of configuration between the comments (including the -Ldebug flag):
[Service]
ExecStart=
ExecStart=/usr/bin/rpi-connect-env /usr/bin/wayvnc --config /etc/rpi-connect/wayvnc.config --render-cursor --unix-socket --socket=%t/rpi-connect-wayvnc-ctl.sock -Ldebug %t/rpi-connect-wayvnc.sock|
Note
|
You need both lines that begin with ExecStart=.
|
Finally, restart Connect with the following command:
$ rpi-connect restartSecurity
Edit this on GitHub
All connections between Raspberry Pi devices and the user’s browser use WebRTC: the same real-time communication technology used by Zoom, Microsoft Teams, and Google Meet.
End-to-end encryption
All screen sharing and remote shell access traffic is encrypted using DTLS between the Raspberry Pi device and the user’s browser. We don’t (and can’t) decrypt the traffic, ensuring your data remains private.
Every screen sharing and remote shell session uses a new WebRTC peer connection. For each connection, the Connect client on your Raspberry Pi device generates a fresh public and private key pair in memory, and your browser generates its own. The device never writes its private key to disk or sends it anywhere, and discards it when the session ends. The device and browser exchange their public keys and derive the keys that encrypt the session in a handshake directly between them, so our servers can’t derive those keys. The only key-related information that passes through our API is the fingerprint of each public certificate, which doesn’t allow decryption.
Everything in a session travels over this single encrypted channel: screen frames, keyboard and mouse input, clipboard data, remote shell input and output, and any credentials you enter during the session. None of this passes through our API. The API only exchanges the information needed to set up the connection, and receives device state such as whether the device is online, whether screen sharing is enabled, and the number of active sessions. Connection info, screen sharing status, and session count are encrypted at rest in our database.
Furthermore, traffic is mostly peer-to-peer, meaning that the encrypted traffic doesn’t pass through our infrastructure. Instead, the encrypted traffic is sent directly between your Raspberry Pi device and your browser. This makes it impossible for us to observe it.
Relay servers
In situations where direct peer-to-peer connections aren’t possible (for example, due to networking issues), only encrypted data is relayed through one of our TURN servers. These servers are hosted in London and California. Only your device and your browser hold the keys to decrypt this data, and it’s neither logged nor stored.
Connect selects a relay for your device and for your browser separately, based on the continent of each one’s IP address. Devices and browsers in Europe and Africa use the relays in London; those in the Americas, Asia, and Oceania use the relay in California. If the location can’t be determined, London is used. If your device and browser are assigned different relays, the session can be relayed through either or both of them.
Connect has no setting to restrict which relays are used or to disable relaying. If you require direct peer-to-peer connections only, you can block traffic to the TURN servers listed in Networking and firewall issues. Connect then only works between devices and browsers that can reach each other directly.
Connection setup
The Raspberry Pi Connect API temporarily stores the WebRTC offer and answer required to negotiate a connection, including the IP addresses and ports of your device and browser. All traffic to this API is encrypted using HTTP over TLS, supporting only TLS 1.2 and newer for security. This ensures that connection information is never sent in the clear. This metadata is encrypted and stored securely for at most one minute.
The offer from your browser is encrypted and stored. It is never parsed or rewritten. Only the Connect web application, acting on behalf of a signed-in user, can create an offer; devices can’t.
A session can only be started by a user who is signed in with a Raspberry Pi ID that owns the device, or that belongs to the organisation that owns it, and who has authenticated with Raspberry Pi ID within the past hour.
Data retention
Connect retains only the metadata needed to operate the service.
| Data | Retention |
|---|---|
IP addresses |
Not stored. IP addresses are used in memory to select the nearest relay and for rate limiting, and are included once in the notification email sent when a new device is linked. Audit log events store only the two-letter country code derived from the IP address. |
Connection setup information (WebRTC offers and answers) |
At most one minute, encrypted at rest |
Device heartbeat and state |
Current state only; no history is kept |
Device data (serial number, model, OS name and version, architecture, Connect version, hostname, and last seen time) |
For as long as the device is linked to an account; deleted with the device or the account |
Account data (name and email address) |
Encrypted at rest and held for the life of the account; deleted with the account |
Organisation audit log, including the start of each screen sharing and remote shell session with its timestamp, user, device, and country code |
90 days |
For Connect for Organisations customers, we provide an audit log to review activity from the past 90 days. Personal accounts have no connection log.
Security assessments
In January 2025, penetration testing and security analysts at Cure53 assessed the Raspberry Pi Connect web application and infrastructure, Raspberry Pi ID, and versions 2.2 to 2.3 of the Connect client software. You can read the full report on the Cure53 site.
For more details on WebRTC security, see A Study of WebRTC Security.
Security notifications
To be notified by email of significant security vulnerabilities in Raspberry Pi products, including Connect, subscribe using the Be notified of security vulnerabilities form on our security page.
To report a vulnerability, see Reporting a vulnerability.
Sub-processors
Raspberry Pi Ltd uses the following third parties to process personal data in order to provide Connect. None of them can access the contents of screen sharing or remote shell sessions, which are end-to-end encrypted between your Raspberry Pi device and your browser.
| Sub-processor | Purpose | Personal data | Location |
|---|---|---|---|
Hosting of the Connect service, including its database, email delivery, and TURN relay servers |
All account and device data held by Connect, IP addresses, and encrypted session traffic when a relay is used |
United Kingdom. The California TURN relay is in the United States, but it only forwards encrypted session traffic and stores nothing. |
|
Caching and delivery of static assets (images, stylesheets, and scripts) for the Connect website |
IP addresses and browser details of requests for static assets |
Global edge network |
|
Analytics warehouse (Google Cloud) and product analytics (Google Analytics) |
Account and device records (names and email addresses remain encrypted), and pseudonymous usage events containing device and session identifiers |
European Union (warehouse) and United States (analytics) |
|
Error monitoring |
Technical error reports, which can include device and organisation identifiers |
United States |
|
Geolocation of the IP address shown in the notification email when a new device signs in |
IP addresses |
United States |
|
Payment processing for Connect for Organisations subscriptions |
Billing contact details and payment information |
United States and Ireland |
|
Customer support |
Name, email address, and the contents of support requests |
United States |
This list was last updated on 15 September 2026.