Raspberry Pi OS
Raspberry Pi OS is the official operating system (OS) for Raspberry Pi computers and is free. We recommend Raspberry Pi OS for most Raspberry Pi use cases.
Raspberry Pi OS is based on the Debian Linux distribution and supports over 69,000 Debian packages. Raspberry Pi follows a staggered version of the Debian release cycle. Releases happen roughly once every two years. The latest version of Raspberry Pi OS is based on Debian Trixie. The previous version was based on Debian Bookworm.
OS installation
Edit this on GitHub
Raspberry Pi OS is installed using Raspberry Pi Imager, available for Windows, Mac, and Linux. For instructions, see Install using Imager. You can also download a disk image (ready-to-use file) of Raspberry Pi OS directly from our website and then write it to an SD card to start using your Raspberry Pi.
If you’re running a previous version of Raspberry Pi OS and want to use the latest major version, don’t perform an in-place update (updating the current system without reinstalling). Instead, start again by installing a new image of Raspberry Pi OS. For instructions, see Install using Imager.
|
Warning
|
Back up any important files from your old OS that you don’t want to lose. Installing a new OS overwrites everything on the SD card. |
Editions
Raspberry Pi OS comes in three editions:
-
Raspberry Pi OS (desktop with basic software) is the recommended edition offered in Raspberry Pi Imager. It provides a graphical desktop environment and includes applications such as Chromium and Firefox web browsers, VLC media player, and the Thonny Python environment.
-
Raspberry Pi OS Full (desktop with basic software and recommended applications), provides the same graphical desktop environment and applications as the default Raspberry Pi OS edition, but also includes the LibreOffice suite, KiCad, a Scratch programming environment, and many other applications.
-
Raspberry Pi OS Lite (a command-line-only version without a graphical desktop). This edition is useful for headless servers, embedded systems, or older Raspberry Pi models, such as the original Raspberry Pi, Raspberry Pi 2, and Raspberry Pi Zero.
Architecture
Raspberry Pi OS is available in both 64-bit and 32-bit versions. Choose the version that best matches your Raspberry Pi’s hardware:
-
The 64-bit version is designed for newer Raspberry Pi models that have 64-bit processors, like Raspberry Pi 3, 4, and 5. It can run both 64-bit and 32-bit software, but can also handle more memory (RAM) and is faster for tasks that require more computing power.
-
The 32-bit version is designed for older Raspberry Pi models that have 32-bit processors, like the original Raspberry Pi, Raspberry Pi 2, and Raspberry Pi Zero. It uses less memory and might be more compatible with older software and hardware.
Manage software and firmware updates
Edit this on GitHub
There are two ways to update your current operating system:
-
APT-based. We recommend this for most users. Use it to update the software, kernel, and stable firmware of your current Raspberry Pi OS installation. For instructions, see Update your current Raspberry Pi software.
-
rpi-update. Use this for experimental or pre-release kernel and firmware testing, development, or specific bug fixes. For instructions, see Update pre-release firmware.
Normal firmware updates are included in APT updates (raspi-firmware package); rpi-update is only appropriate for developers and testers, or when you’re specifically instructed by Raspberry Pi engineers to use it.
If, instead of updating your current operating system, you want to upgrade from a previous version of Raspberry Pi OS to a new version (for example, from Bookworm to Trixie), reinstall the operating system from a new image. For instructions, see Upgrade to a new major version.
Update your current Raspberry Pi software
Keep the software on your Raspberry Pi up to date. This helps to keep your Raspberry Pi secure from vulnerabilities and ensures that you get the latest bug fixes. It also updates your Linux kernel and firmware.
The following instructions describe how to keep your current installation of Raspberry Pi OS up to date within the same major version of the operating system you’re running (for example, Trixie). They don’t upgrade your Raspberry Pi OS to a new major release (for example, from Bookworm to Trixie). For instructions on upgrading your OS, see Upgrade to a new major version.
We recommend using APT to keep your Raspberry Pi software up to date. You can also use APT to find a specific package or tool, inspect a package’s metadata, install a specific package, and uninstall a specific package. For instructions, see Manage software packages.
To use APT to update your current Raspberry Pi software with the latest fixes, Linux kernel, and firmware, run the following commands regularly:
-
Update your package list. APT maintains a list of available software sources in
/etc/apt/sources.listand/etc/apt/sources.list.d/; run the following command to refresh your list of available software packages:$ sudo apt update -
Update your installed packages to their latest versions. Now that you have a list of what new versions are available, run the following command to download and install the updates. Because Raspberry Pi OS changes package dependencies more often that Debian, we recommend that you use
full-upgradeinstead of the standardupgrade:$ sudo apt full-upgradeBefore continuing with the update, check that you have enough free disk space. If
sudo apt full-upgradesays that it needs extra space to complete the update, you can check that your system has at least that much free space available usingdf -h. You can then clean up downloaded files to make more space as described in Clean up files.
Update pre-release firmware
rpi-update is a command-line tool used to install experimental or pre-release firmware on a Raspberry Pi. On the Rasberry Pi 4 and 5, it also updates the EEPROM bootloader.
rpi-update downloads the latest pre-release version of the Linux kernel, its matching modules, device tree files, and the latest version of the VideoCore firmware. It then installs these files into an existing Raspberry Pi OS install.
|
Warning
|
Pre-release firmware isn’t guaranteed to work and can introduce instability, rendering your system unreliable or unbootable. |
All source data used by rpi-update comes from the rpi-firmware repository, which contains a subset of data from the official firmware repository.
rpi-update is intended for use by developers and engineers for testing, development, and specific bug fixes. In most cases, you don’t need to use rpi-update, and you should only do so if recommended by a Raspberry Pi engineer; for routine updates, we strongly recommend using APT instead, as described in Update your current Raspberry Pi software.
-
Make a backup of your system.
-
Run the following command to initiate the update:
$ sudo rpi-update -
Reboot your Raspberry Pi for the changes to take effect:
$ sudo reboot
For more information, see Updating Raspberry Pi firmware.
Downgrade firmware to the last stable release
If updating to the latest pre-release firmware causes issues, you can revert to the last stable firmware and then reboot for the downgrade to take effect:
$ sudo apt update
$ sudo apt install --reinstall raspi-firmware
$ sudo reboot
This reinstalls the officially supported firmware from Raspberry Pi OS, restoring system stability.
Manage software packages
From the Terminal, APT is the default package manager used to install, update, and remove software within the Raspberry Pi OS you’re currently running. You control it using Terminal commands like apt-cache and apt install.
From the Desktop, you can use the Preferences > Add / Remove Software tool to manage software using the graphical interface.
Search for software
To find a specific package or tool, use apt-cache search followed by a keyword. This returns a list of packages with names and descriptions that include the keyword. For example, to show all packages related to raspi:
$ apt-cache search raspiView package details
To view detailed information about a package, use apt-cache show followed by a package name. This displays information such as package version, size, and dependencies. For example, to view more detailed information about the raspi-config package:
$ apt-cache show raspi-configInstall a package
To install a specific package on your Raspberry Pi, use sudo apt install followed by the package name:
$ sudo apt install <package-name>This returns the amount of disk space that the package needs and you’re asked to confirm the installation. To confirm the installation, enter Y followed by Enter or Return on your keyboard. To skip the confirmation prompt and automatically answer 'yes' at the time that you install the package, add -y to the command:
$ sudo apt install -y <package-name>Uninstall a package
To uninstall a specific package on your Raspberry Pi, use sudo apt remove followed by the package name:
$ sudo apt remove <package-name>This returns the amount of disk space that removing the package gives you and you’re asked to confirm the removal of the package. To confirm the removal, enter Y followed by Enter or Return on your keyboard to confirm the installation. To skip the confirmation prompt and automatically answer 'yes' at the time that you uninstall the package, add -y to the command:
$ sudo apt remove -y <package-name>To completely remove all traces of the package, including configuration files, use purge instead of remove:
$ sudo apt purge <package-name>Check disk space
Before installing or updating software on your Raspberry Pi, check the available storage using the following command:
$ df -hClean up files
APT stores downloaded packages (.deb files) in /var/cache/apt/archives. During installation, APT downloads these packages and then copies files from these packages to the correct installation locations. Depending on the software you’ve installed, package files can take up a lot of disk space. Use the following command to delete old downloaded package files:
$ sudo apt cleanUpgrade to a new major version
Rather than an in-place upgrade on your existing boot media, we strongly recommend that you use a clean install to upgrade the OS version on your Raspberry Pi, like moving from Bookworm to Trixie. This involves using Raspberry Pi Imager to flash a new OS image onto new boot media.
The following instructions require:
-
A new storage device for your boot media (typically a microSD card), and a way to connect it to a computer (for example, a USB card reader).
-
A computer to write a new OS image to your new boot media, and to store and move data between boot media.
The following instructions assume that you’re using a microSD card as your new boot media and Raspberry Pi Imager to install a new OS image onto that boot media. If you’re using a different type of storage for your boot media, modify the steps below as appropriate.
-
Create a backup of your current boot media.
|
Warning
|
This step permanently deletes all files on the storage device you choose to use. Back them up before continuing. |
-
Prepare a new storage device with the new OS. On a new storage device, install a new OS image with the latest Raspberry Pi OS version. For instructions, see Install using Imager.
-
Copy your existing files and configurations. Use a storage device to copy important files from your Raspberry Pi.
-
Insert the new boot media into your Raspberry Pi. Insert the storage device containing the new OS into your Raspberry Pi.
-
Boot your Raspberry Pi. Connect your Raspberry Pi to power and power it on.
Convert Raspberry Pi OS Lite into Raspberry Pi OS Desktop
You can use APT to add the packages that turn the Lite version into the Desktop version.
-
Install your preferred desktop windowing system.
-
To install Wayland (recommended), run:
$ sudo apt install rpd-wayland-core -
To install X, run:
$ sudo apt install rpd-x-core
-
-
Install the Raspberry Pi theme and Control Centre.
$ sudo apt install rpd-theme $ sudo apt install rpd-preferences -
Add the applications.
$ sudo apt install rpd-applications $ sudo apt install rpd-utilities $ sudo apt install rpd-developer $ sudo apt install rpd-graphics -
Add the extra features for your chosen windowing system, such as screenshot and remote desktop capabilities.
-
For Wayland, run:
$ sudo apt install rpd-wayland-extras -
For X, run:
$ sudo apt install rpd-x-extras
-
-
Restart your Raspberry Pi to enter the desktop environment.
$ sudo reboot
You now have all the packages that comprise Raspberry Pi OS Desktop.
If you want to return to the Lite version of Raspberry Pi OS, you can remove these packages. Alternatively, to have the Lite experience without removing the desktop packages you’ve installed, follow the instructions in Boot to console or desktop to set your Raspberry Pi to boot to the command line.
You can also install the recommended applications included in Raspberry Pi OS Full by going to your Raspberry Pi main menu and selecting Preferences > Recommended Software.
Play audio and video
Edit this on GitHub
Raspberry Pi OS comes with VLC media player pre-installed. You can use VLC to play video and audio files. VLC uses hardware acceleration in Raspberry Pi OS, and supports many popular audio and video file formats.
VLC media player
VLC GUI
To play an audio or video file from Raspberry Pi Desktop, double-click on a file in the file manager. This automatically launches VLC to play the file. Alternatively, from the Sound & Video menu, launch VLC Media Player. Then, from the Media menu, select Open File… and navigate to the file you want to play.
By default, Raspberry Pi OS sends audio to your monitor over HDMI. To output audio to a different interface, such as the headphone jack or USB speakers, right-click on the speaker icon in the system tray and select an option.
vlc CLI
You can also launch VLC from the command line. For the examples below, we used a short clip from Big Buck Bunny. To download this clip from Raspberry Pi, run the following command:
$ wget --trust-server-names http://rpltd.co/big-buck-bunnyTo play the clip in VLC from the command line, run the following command:
$ vlc big-buck-bunny-1080p.mp4To prevent the VLC GUI staying open after your file has finished playing, add the --play-and-exit flag:
$ vlc --play-and-exit big-buck-bunny-1080p.mp4To play a video in fullscreen mode (which can result in smoother playback in some circumstances), add the --fullscreen flag:
$ vlc --play-and-exit --fullscreen big-buck-bunny-1080p.mp4Play audio and video on Raspberry Pi OS Lite
Unlike the full version of Raspberry Pi OS, VLC doesn’t come pre-installed on Raspberry Pi OS Lite. To play video and audio on Raspberry Pi OS Lite with VLC, install the required packages for playback without a desktop:
$ sudo apt install --no-install-recommends vlc-bin vlc-plugin-baseFor the examples below, we used a short audio clip. To download this clip from Raspberry Pi, run the following command:
$ wget --trust-server-names http://rpltd.co/startup-musicTo play the clip in VLC from the command line, run the following command:
$ cvlc --play-and-exit computer-startup-music.mp3Specify an audio output device
To force audio output to a particular device, pass the alsa value to the the -A option to use ALSA audio output, and the --alsa-audio-device option to specify an audio output device:
$ cvlc --play-and-exit -A alsa --alsa-audio-device <alsa-device> computer-startup-music.mp3Replace the <alsa-device> placeholder with one of the following options:
| ALSA device | Description |
|---|---|
|
The headphone jack |
|
The HDMI output on devices with a single HDMI port (Zero models, CM4S, Compute Modules prior to CM4, and Flagship models prior to Raspberry Pi 4) |
|
The HDMI0 output on Flagship models since Raspberry Pi 4B, Compute Modules since CM4, and Keyboard models |
|
The HDMI1 output on Flagship models since Raspberry Pi 4B, Compute Modules since CM4, and Keyboard models |
|
Tip
|
Use the following command to get a list of all ALSA devices on your Raspberry Pi: |
Specify a video output device
To force the video output to a particular device, use the --drm-vout-display option to specify a video output device:
$ cvlc --play-and-exit --drm-vout-display <drm-device> big-buck-bunny-1080p.mp4Replace the <drm-device> placeholder with one of the following options:
| DRM device | Description |
|---|---|
|
The HDMI output on a Raspberry Pi Zero, or Raspberry Pi Model 1, 2 or 3; or the HDMI0 output on a Raspberry Pi 4, 5, or 400 |
|
The HDMI1 output on Flagship models since Raspberry Pi 4B, Compute Modules since CM4 (including CM4S), and Keyboard models |
|
The Raspberry Pi Touch Display or Raspberry Pi Touch Display 2 |
|
The second DSI output for models with multiple DSI ports (Flagship models since Raspberry Pi 5, and Compute Module models since CM5) |
|
Tip
|
Use the following command to get a list of all DRM devices on your Raspberry Pi: |
Specify both audio and video output devices
You can combine audio and video output options. For example, to direct video output to the touchscreen, and audio output to the headphone jack, use the following combination of the commands above:
$ cvlc --play-and-exit --fullscreen --drm-vout-display DSI-1 -A alsa --alsa-audio-device sysdefault:CARD=Headphones your_video.mp4Improve stream playback performance
If you have a raw H.264 stream, like those captured from a Raspberry Pi Camera Module, you can improve playback performance in VLC by wrapping the stream inside a container format such as MP4. You can use ffmpeg to convert stream content into a container file. For example, the following command converts a stream named video.h264 to a MP4 container named video.mp4 at 30fps:
$ ffmpeg -r 30 -i video.h264 -c:v copy video.mp4Utilities
Edit this on GitHub
There are several useful command-line utilities pre-installed in Raspberry Pi OS.
kmsprint
The kmsprint tool can be used to list the display-modes supported by the monitors attached to the Raspberry Pi. Use kmsprint to see details of the monitors connected to the Raspberry Pi, and kmsprint -m to see a list of all the display modes supported by each monitor. You can find source code for the kmsprint utility on Github.
vclog
vclog displays log messages from the VideoCore GPU from Linux running on the Arm. It needs to be run as root.
sudo vclog --msg prints out the message log, whilst sudo vclog --assert prints out the assertion log.
vcgencmd
The vcgencmd tool is used to output information from the VideoCore GPU on the Raspberry Pi. You can find source code for the vcgencmd utility on GitHub.
To get a list of all commands supported by vcgencmd, use vcgencmd commands. Some useful commands and their required parameters are listed below.
vcos
The vcos command has two useful sub-commands:
-
versiondisplays the build date and version of the firmware on the VideoCore -
log statusdisplays the error log status of the various VideoCore firmware areas
get_throttled
Returns the throttled state of the system. This is a bit pattern. A bit being set indicates the following meanings:
| Bit | Hexadecimal value | Meaning |
|---|---|---|
0 |
|
Undervoltage detected |
1 |
|
Arm frequency capped |
2 |
|
Currently throttled |
3 |
|
Soft temperature limit active |
16 |
|
Undervoltage has occurred |
17 |
|
Arm frequency capping has occurred |
18 |
|
Throttling has occurred |
19 |
|
Soft temperature limit has occurred |
measure_temp
Returns the temperature of the SoC as measured by its internal temperature sensor.
On Raspberry Pi 4, measure_temp pmic returns the temperature of the PMIC.
measure_clock [clock]
This returns the current frequency of the specified clock. Accepts the following clock values:
| clock | Description |
|---|---|
|
Arm core(s) |
|
GPU core |
|
H.264 block |
|
Image Sensor Pipeline |
|
3D block |
|
UART |
|
PWM block (analogue audio output) |
|
SD card interface |
|
Pixel valves |
|
Analogue video encoder |
|
HDMI |
|
Display Parallel Interface |
For example, vcgencmd measure_clock arm
measure_volts [block]
Displays the current voltages used by the specific block. Accepts the following block values:
| block | Description |
|---|---|
|
VC4 core voltage |
|
SDRAM Core Voltage |
|
SDRAM I/O voltage |
|
SDRAM Phy Voltage |
otp_dump
Displays the content of the OTP (one-time programmable) memory inside the SoC. These are 32-bit values, indexed from 8 to 64. See the OTP bits page for more details.
get_config [configuration item|int|str]
Displays the value of the configuration setting specified: alternatively, specify either int (integer) or str (string) to see all configuration items of the given type. For example, the following command returns the total memory on the device in megabytes:
$ vcgencmd get_config total_mem
get_mem type
Reports on the amount of memory addressable by the Arm and the GPU. To show the amount of Arm-addressable memory, use vcgencmd get_mem arm; to show the amount of GPU-addressable memory, use vcgencmd get_mem gpu. On devices with more than 1 GB of memory, the arm parameter will always return 1 GB minus the gpu memory value, since the GPU firmware is only aware of the first 1 GB of memory. To get an accurate report of the total memory on the device, see the total_mem configuration item and the get_config section above.
codec_enabled [type]
Reports whether the specified codec type is enabled. Possible options for type are AGIF, FLAC, H263, H264, MJPA, MJPB, MJPG, MPG2, MPG4, MVC0, PCM, THRA, VORB, VP6, VP8, WMV9, WVC1. Because the H.265 HW block on the Raspberry Pi 4 and later device families isn’t part of the VideoCore GPU, its status isn’t accessed by this command.
Accessibility options
Edit this on GitHub
Visual aids
Users of Raspberry Pi OS with visual impairments can find helpful tools in the Recommended Software menu.
We offer Orca screen reader to ease navigation of Raspberry Pi Desktop. Additionally, we offer screen magnifier to increase the readability of UI and screen elements.
Orca screen reader
You can install Orca screen reader from the Recommended Software section of the main Raspberry Pi menu. Alternatively, press Ctrl + Alt + Space to automatically install Orca.
When booting Raspberry Pi OS for the first time after installing a new image, an automatic spoken reminder plays after 30 seconds. This reminder provides instructions on how to install Orca.
Use Python on a Raspberry Pi
Edit this on GitHub
Raspberry Pi OS comes with Python 3 pre-installed. Interfering with the system Python installation can cause problems for your operating system. When you install third-party Python libraries, always use the correct package-management tools.
On Linux, you can install python dependencies in two ways:
-
use
aptto install pre-configured system packages -
use
pipto install libraries using Python’s dependency manager in a virtual environmentImportantFrom Raspberry Pi OS Bookworm onwards, you can only use pipto install into a Python Virtual Environment (venv). This change was introduced by the Python community, not by Raspberry Pi: for more information, see PEP 668.
Install Python packages using apt
Packages installed via apt are packaged specifically for Raspberry Pi OS. These packages usually come pre-compiled, so they install faster. Because apt manages dependencies for all packages, installing with this method includes all of the sub-dependencies needed to run the package. And apt ensures that you don’t break other packages if you uninstall.
For instance, to install the Python 3 library that supports the Raspberry Pi Build HAT, run the following command:
$ sudo apt install python3-build-hatTo find Python packages distributed with apt, use apt search. In most cases, Python packages use the prefix python- or python3-: for instance, you can find the numpy package under the name python3-numpy.
Install Python libraries using pip
Bookworm changes to pip installation
From Raspberry Pi OS Bookworm onwards, you cannot install libraries directly into the system version of Python.
Instead, install libraries into a virtual environment (venv). To install a library at the system level for all users, install it with apt.
Attempting to install a Python package system-wide outputs an error similar to the following:
$ pip install buildhat
error: externally-managed-environment

× This environment is externally managed
╰─> To install Python packages system-wide, try apt install
  python3-xyz, where xyz is the package you are trying to
  install.

  If you wish to install a non-Debian-packaged Python package,
  create a virtual environment using python3 -m venv path/to/venv.
  Then use path/to/venv/bin/python and path/to/venv/bin/pip. Make
  sure you have python3-full installed.

  For more information visit http://rptl.io/venv

note: If you believe this is a mistake, please contact your Python installation or OS distribution provider. You can override this, at the risk of breaking your Python installation or OS, by passing --break-system-packages.
hint: See PEP 668 for the detailed specification.
Python users have long dealt with conflicts between OS package managers like apt and Python-specific package management tools like pip. These conflicts include both Python-level API incompatibilities and conflicts over file ownership.
From Raspberry Pi OS Bookworm onwards, packages installed via pip must be installed into a Python virtual environment (venv). A virtual environment is a container where you can safely install third-party modules so they won’t interfere with your system Python.
Use pip with virtual environments
To use a virtual environment, create a container to store the environment. There are several ways you can do this depending on how you want to work with Python:
-
per-project environments
-
per-user environments
Many users create separate virtual environments for each Python project. Locate the virtual environment in the root folder of each project, typically with a shared name like env. Run the following command from the root folder of each project to create a virtual environment configuration folder:
$ python -m venv envBefore you work on a project, run the following command from the root of the project to start using the virtual environment:
$ source env/bin/activateYou should then see a prompt similar to the following:
(env) $When you finish working on a project, run the following command from any directory to leave the virtual environment:
(env) $ deactivateInstead of creating a virtual environment for each of your Python projects, you can create a single virtual environment for your user account. Activate that virtual environment before running any of your Python code. This approach can be more convenient for workflows that share many libraries across projects.
When creating a virtual environment for multiple projects across an entire user account, consider locating the virtual environment configuration files in your home directory. Store your configuration in a folder whose name begins with a period to hide the folder by default, preventing it from cluttering your home folder.
Use the following command to create a virtual environment in a hidden folder in the current user’s home directory:
$ python -m venv ~/.envRun the following command from any directory to start using the virtual environment:
$ source ~/.env/bin/activateYou should then see a prompt similar to the following:
(.env) $To leave the virtual environment, run the following command from any directory:
(.env) $ deactivateCreate a virtual environment
Run the following command to create a virtual environment configuration folder, replacing <env-name> with the name you would like to use for the virtual environment (for example, env):
$ python -m venv <env-name>|
Tip
|
Pass the --system-site-packages flag before the folder name to preload all of the currently installed packages in your system Python installation into the virtual environment.
|
Enter a virtual environment
Then, execute the bin/activate script in the virtual environment configuration folder to enter the virtual environment:
$ source <env-name>/bin/activateYou should then see a prompt similar to the following:
(<env-name>) $The (<env-name>) command prompt prefix indicates that the current terminal session is in a virtual environment named <env-name>.
To check that you’re in a virtual environment, use pip list to view the list of installed packages:
(<env-name>) $ pip list
Package    Version
---------- -------
pip        23.0.1
setuptools 66.1.1
The list should be much shorter than the list of packages installed in your system Python. You can now safely install packages with pip. Any packages you install with pip while in a virtual environment only install to that virtual environment. In a virtual environment, the python or python3 commands automatically use the virtual environment’s version of Python and installed packages instead of the system Python.
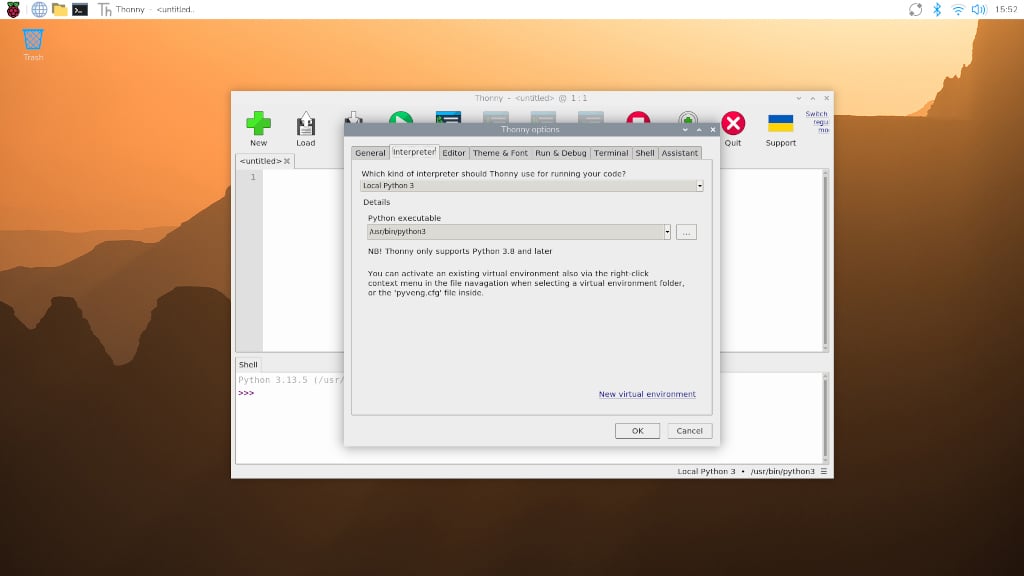
Use the Thonny editor
We recommend Thonny for editing Python code on the Raspberry Pi.
By default, Thonny uses the system Python. However, you can switch to using a Python virtual environment by clicking on the interpreter menu in the bottom right of the Thonny window. Select a configured environment or configure a new virtual environment with Configure interpreter….
Use GPIO from Python
Edit this on GitHub
Using the GPIO Zero library makes it easy to control GPIO devices with Python. The library is comprehensively documented at gpiozero.readthedocs.io.
For information about GPIO hardware, see GPIO hardware.
LED control
The following example code controls an LED connected to GPIO17:
from gpiozero import LED
from time import sleep

led = LED(17)

while True:
    led.on()
    sleep(1)
    led.off()
    sleep(1)
Run this in an IDE like Thonny, and the LED will blink on and off repeatedly.
LED methods include on(), off(), toggle(), and blink().
Read button state
The following example code reads the state of a button connected to GPIO2:
from gpiozero import Button
from time import sleep

button = Button(2)

while True:
    if button.is_pressed:
        print("Pressed")
    else:
        print("Released")
    sleep(1)
Button functionality includes the properties is_pressed and is_held; callbacks when_pressed, when_released, and when_held; and methods wait_for_press() and wait_for_release.
Control an LED with a button
The following example code reads the state of a button connected to GPIO2, and lights an LED connected to GPIO17 when the button is pressed:
from gpiozero import LED, Button

led = LED(17)
button = Button(2)

while True:
    if button.is_pressed:
        led.on()
    else:
        led.off()
Alternatively:
from gpiozero import LED, Button

led = LED(17)
button = Button(2)

while True:
    button.wait_for_press()
    led.on()
    button.wait_for_release()
    led.off()
or:
from gpiozero import LED, Button

led = LED(17)
button = Button(2)

button.when_pressed = led.on
button.when_released = led.off