What the blink is my IP address?
Picture the scene: you have a Raspberry Pi configured to run on your network, you power it up headless (without a monitor), and now you need to know which IP address it was assigned.
Matthias came up with this solution, which makes your Raspberry Pi blink its IP address, because he used a Raspberry Pi Zero W headless for most of his projects and got bored with having to look it up with his DHCP server or hunt for it by pinging different IP addresses.
How does it work?
A script runs when you start your Raspberry Pi and indicates which IP address is assigned to it by blinking it out on the device’s LED. The script comprises about 100 lines of Python, and you can get it on GitHub.
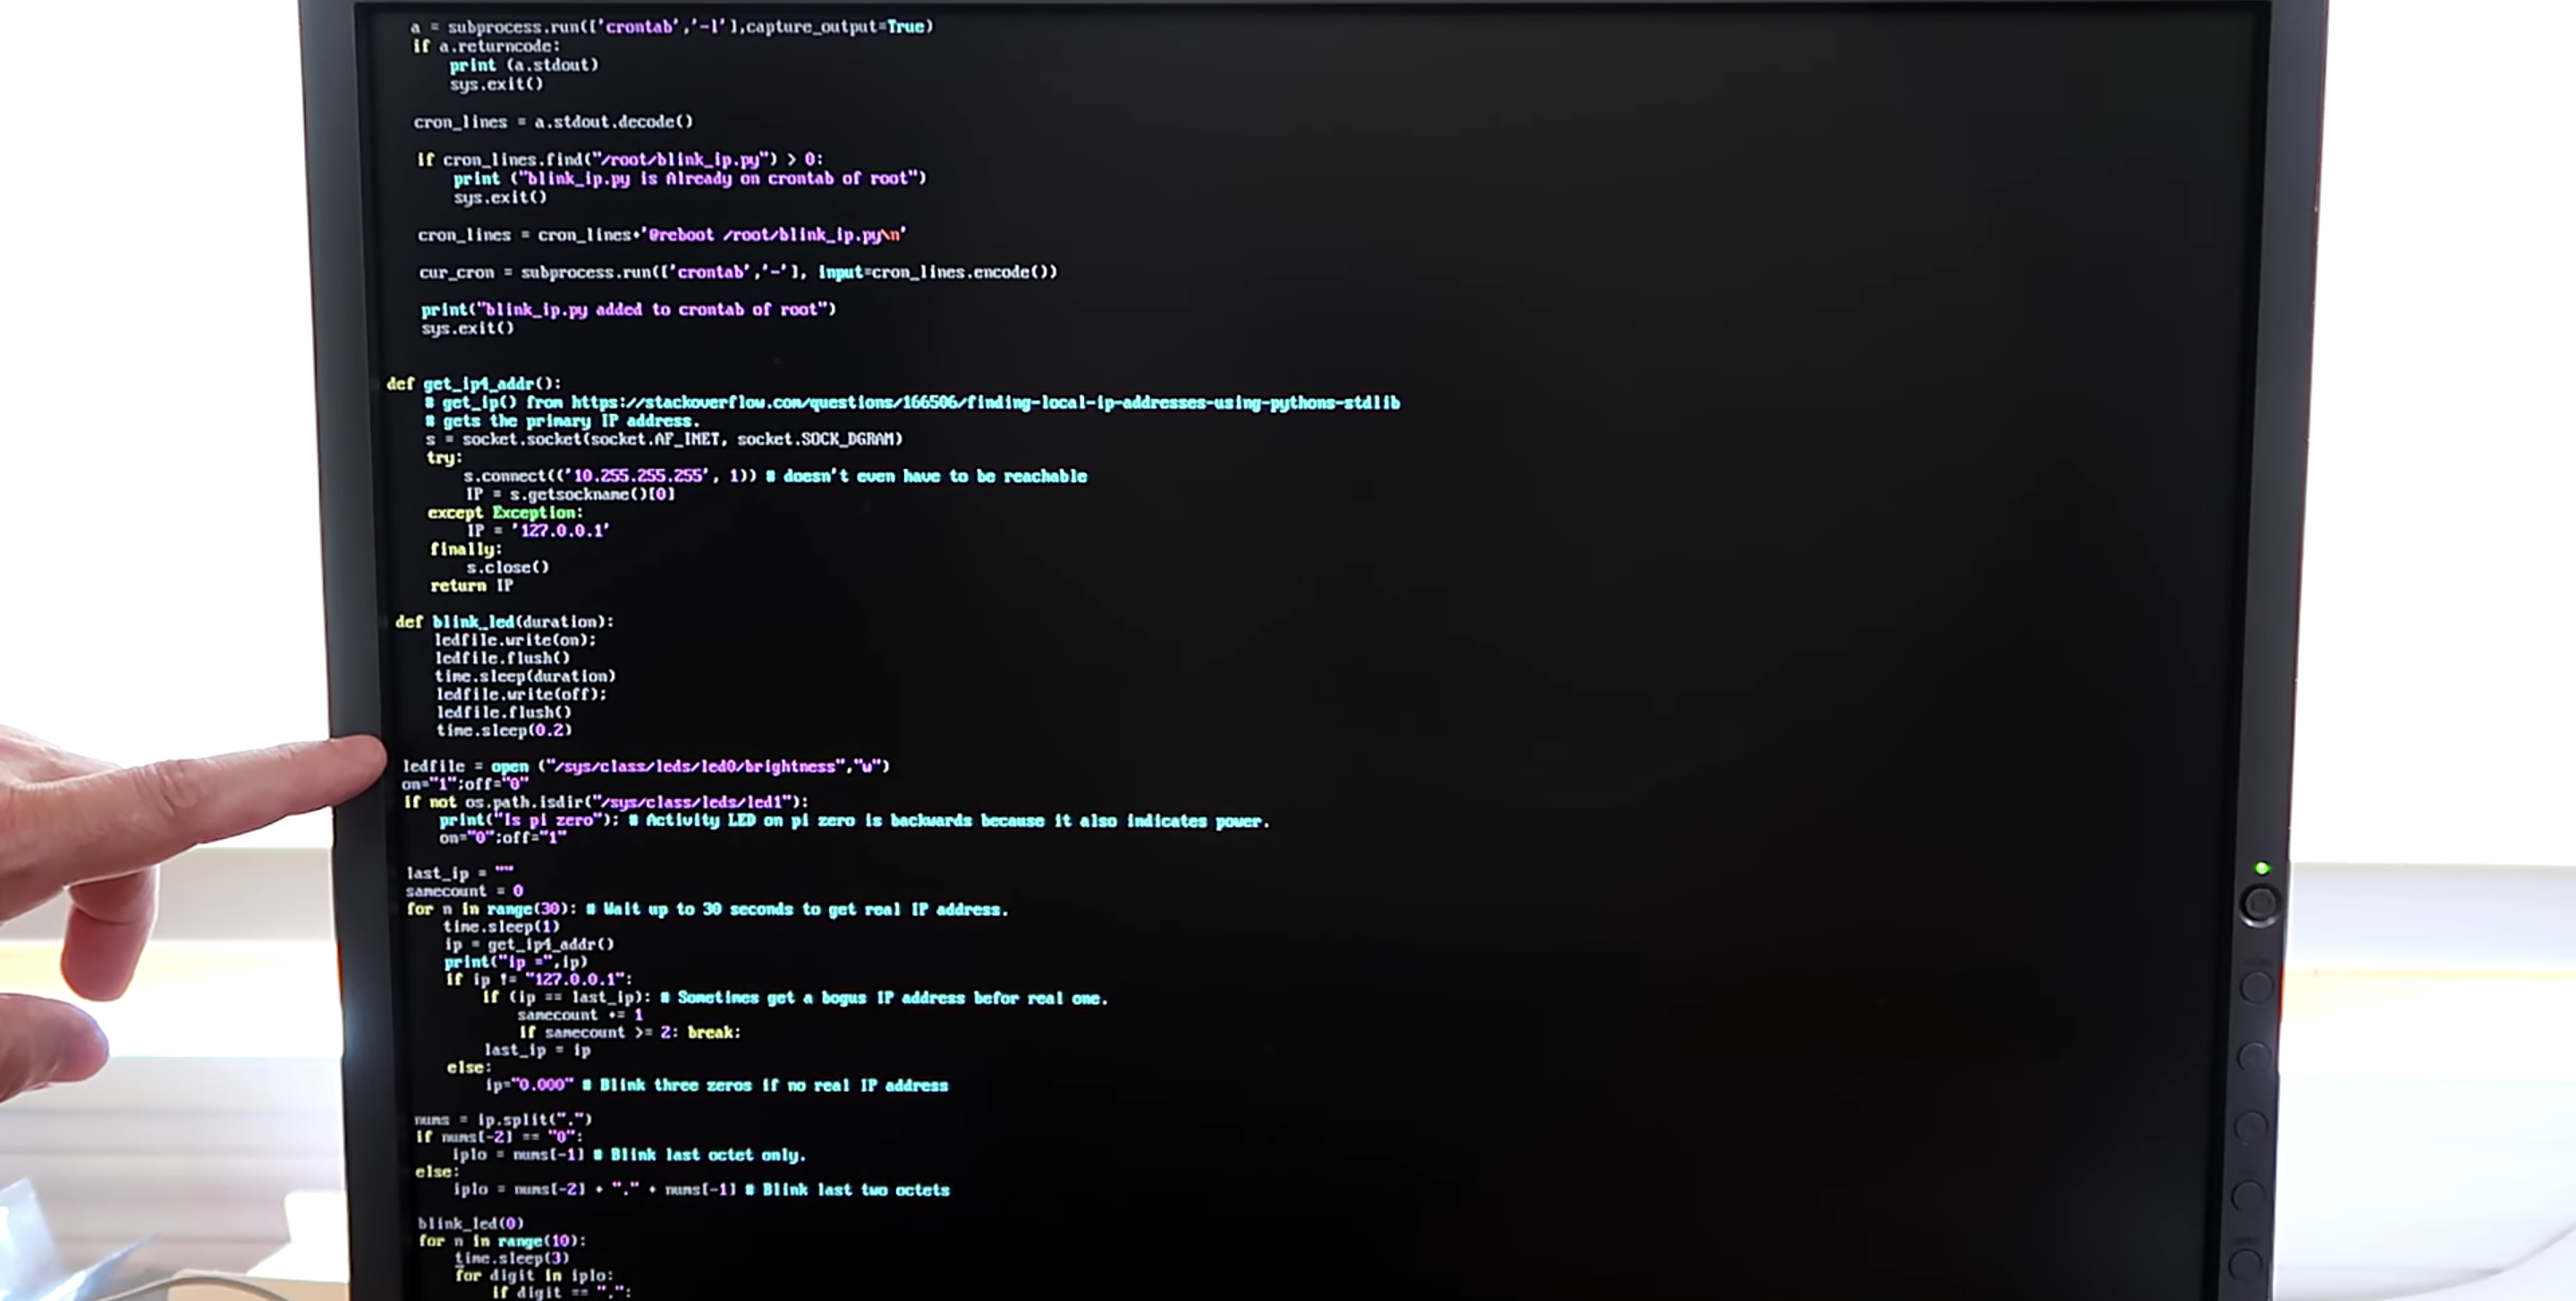
The power/status LED on the edge of the Raspberry Pi blinks numbers in a Roman numeral-like scheme. You can tell which number it’s blinking based on the length of the blink and the gaps between each blink, rather than, for example, having to count nine blinks for a number nine.
Blinking in Roman numerals
Short, fast blinks represent the numbers one to four, depending on how many short, fast blinks you see. A gap between short, fast blinks means the LED is about to blink the next digit of the IP address, and a longer blink represents the number five. So reading the combination of short and long blinks will give you your device’s IP address.
You can see this in action at this exact point in the video. You’ll see the LED blink fast once, then leave a gap, blink fast once again, then leave a gap, then blink fast twice. That means the device’s IP address ends in 112.
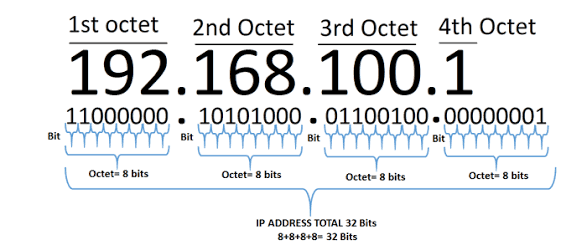
What are octets?
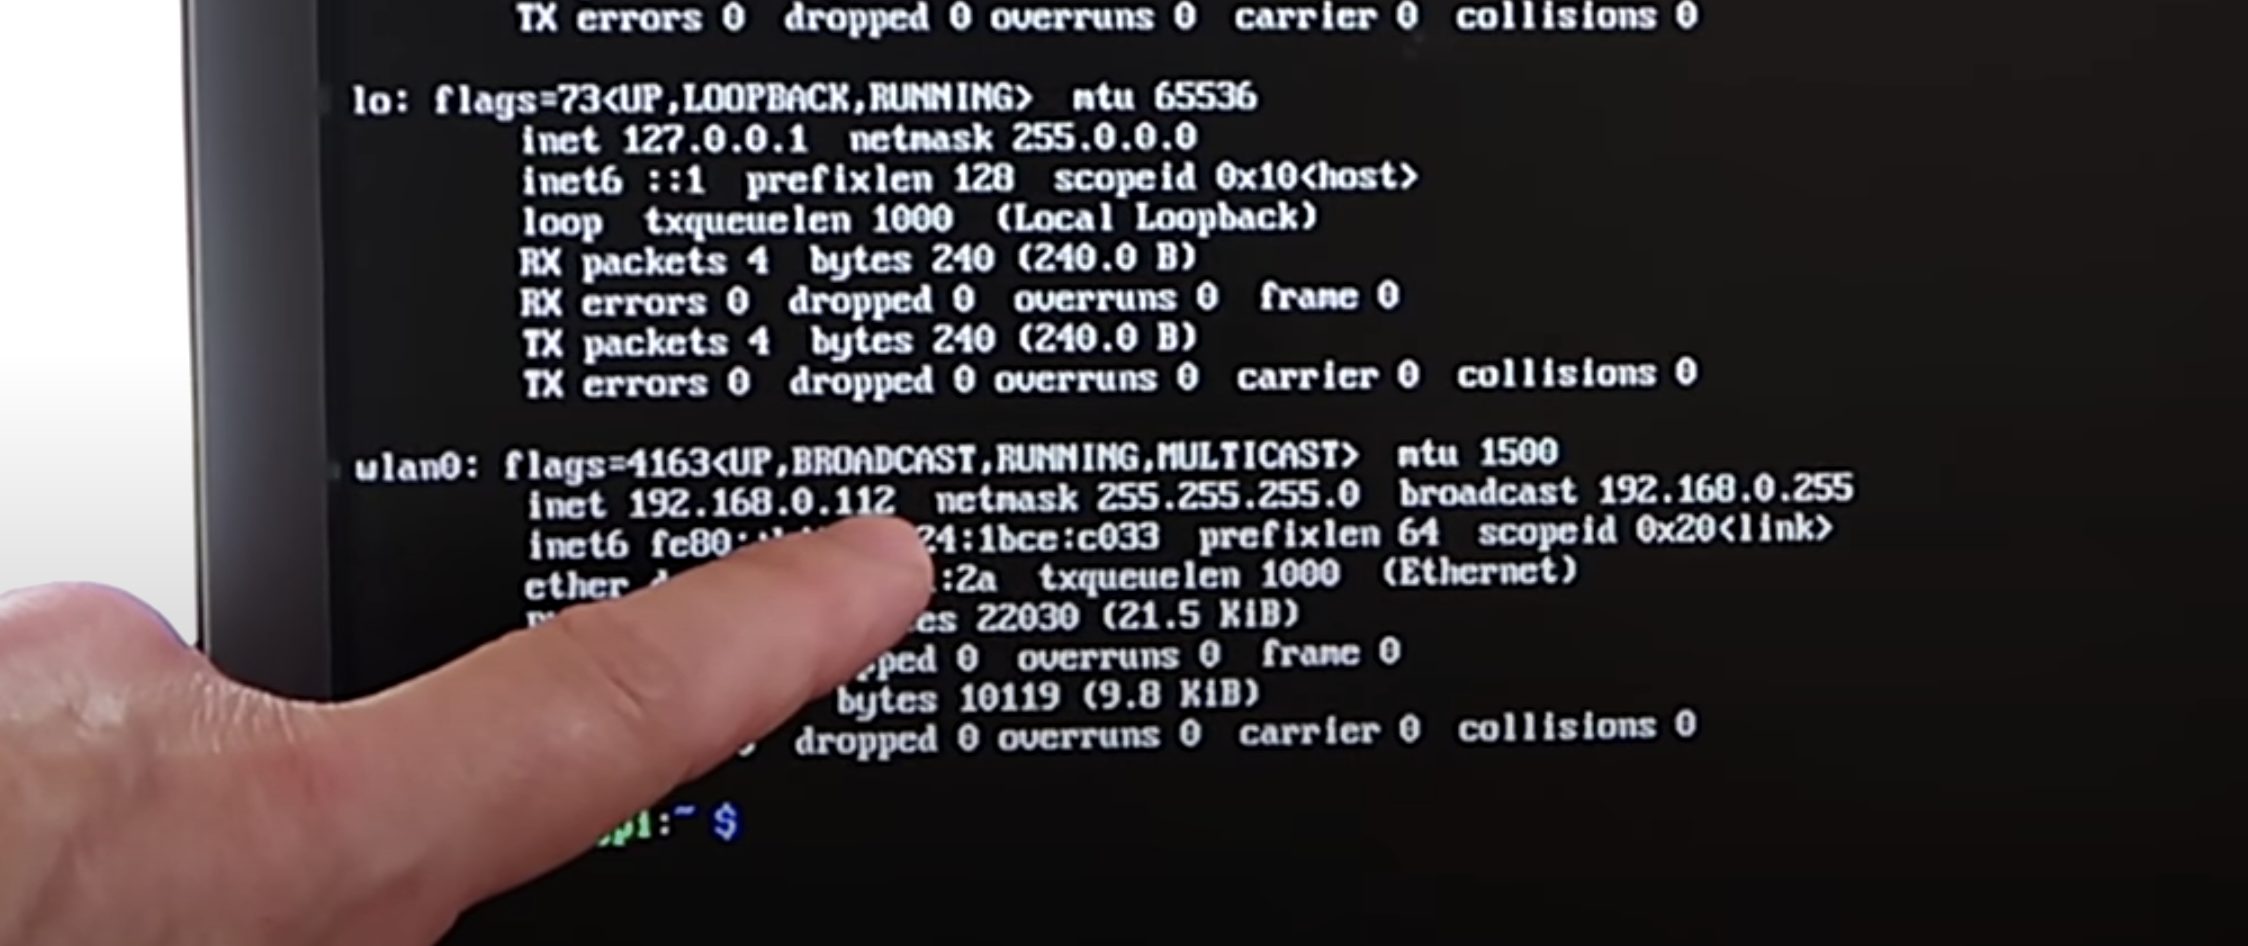
Luckily, you usually only need to know the last three numbers of the IP address (the last octet), as the previous octets will almost always be the same for all other computers on the LAN.
The script blinks out the last octet ten times, to give you plenty of chances to read it. Then it returns the LED to its default functionality.
Which LED on which Raspberry Pi?
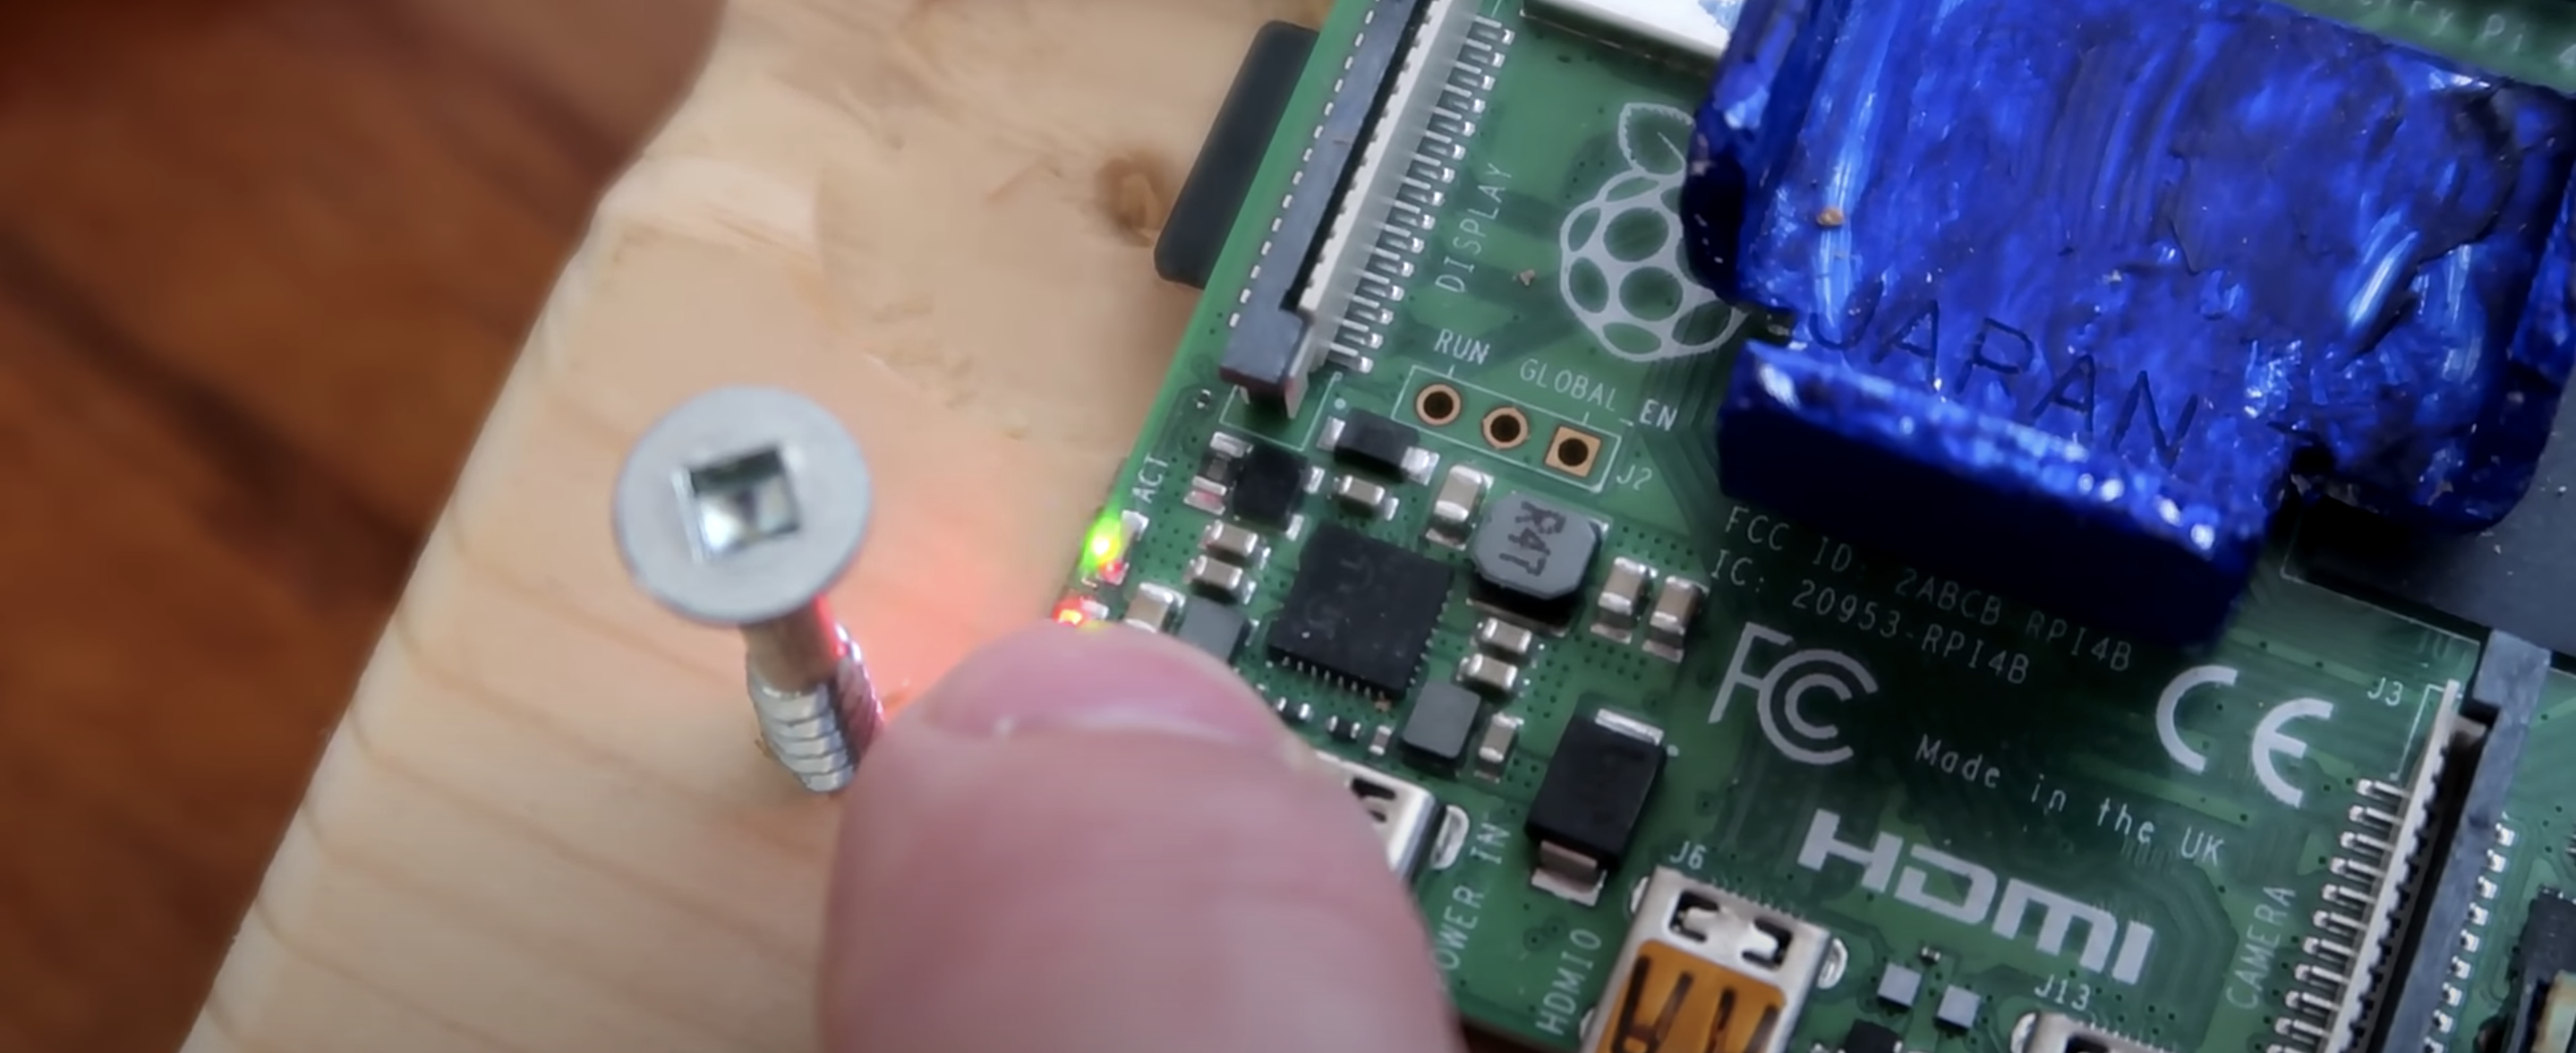
On a Raspberry Pi Zero W, the script uses the green status/power LED, and on other Raspberry Pis it uses the green LED next to the red power LED.
Once you get the hang of the Morse code-like blinking style, this is a really nice quick solution to find your device’s IP address and get on with your project.


26 comments
Richard Blundell
From the source it looks like it actually blinks the last *two* octets if its IP address does not end with 0.x. So if your LAN uses 192.168.1.x like mine it will blink 1 first and then the last octet, whereas if your LAN uses 192.168.0.x it will just blink the final number. Looks pretty handy, because I find myself setting up headless pi devices all the time.
Jona
As an alternative, it could have deduce what to emit with the netmask. Netmask in 255.255.255.0 -> play last byte. Netmask in 255.255.0.0 -> play last two bytes. Implementation should take care that a byte is not always 0 or 255 (255.255.192.0 is a valid netmask).
Tobias
Why? In your own network that’s so useless. You can just use zeroconf and connect to your Pi with .local
Hansen
I think it is awesome if implemented to esp8266/esp32 devices.
Min
There’s another project use BLE to setup WiFi is also very handy
https://github.com/PiSugar/sugar-wifi-conf
Norman Dunbar
Am I missing something here? When I’ve got some Pis (what’s the plural of Pi?) running headless, and I think I’ll have to connect to them one day, I give them a static IP address plus, add them to my /etc/hosts file.
No guesswork or counting required – especially as my Pis are cased and the blinken-lights are somewhat obscured.
That’s not to say I don’t love the idea of this….
Cheers,
Norm.
Norman Dunbar
PS. Also, they all come online with a URL of “hostname.local”.
Florin B
Even more simple he could program it to just send the IP to a server that listen in the network – can be as low as an old smartphone.
Bob
I think you’re missing the point that a default sd card image sets DHCP to automatic, so you would need to edit the config files on the card before inserting it into the pi.
Personally, I have a few files and scripts that I copy or run directly after writing the image, so I can change the default user/password, connect to my WiFi, customise my .xinitrc and preconfigure a few other basics, but this is not really something a beginner should be required to do.
Norman Dunbar
Hi Bob,
It isn’t necessary to edit dhcpcd.conf to use a static ip, it’s easier to have the router assign a static address based on the Pi’s MAC address.
I am of course, assuming that all routers these days have that feature. Assuming things is usually my downfall!
Cheers,
Norm.
Bern
Exactly!!!
Samuel Virgo
I get my raspberry pi’s IP with email (it sends a message to my gmail)
Michael
Why all that? You don’t tend to remember MAC addresses of your connected devices, it becomes second nature after soany years unless it’s a corporate or large setup. Morse code to an LED seems more and new to remember… But good work otherwise. Why aren’t we setting up MAC access on router side or static on setup?
RevDrew
Or just install Fing on your phone and scan the network.
This seems like a lot of unnecessary extra steps to me.
Interesting but over complicating it.
Chris Broughton
Just FYI I believe you mean Morse code, not roman numerals, for a series of short and long blinks. Love the idea, it’d be neat if the board had a built in feature where if you have say 2 gpio pins connected on boot it would blink out or maybe speak through the audio jack the ip address.
Helen Lynn
It’s the same concept as Morse but the encoding of the digits is different from real Morse, and based on Roman numerals (or at least clock-face ones, with IIII for 4). I think I’d have a better shot at deciphering this than remembering the Morse encoding for numbers. I like the idea of having it speak the address even more.
Nick
I run my pis with a static ip and overlay root (https://github.com/chesty/overlayroot) and when I disable initramfs and restart to modify the sd card, they normally fly off to some other ip. With r/w root the network is eth0, on overlay it is a somewhat random string. This would help find them again without logging into the router…
Michael
I just look at the dhcp server or router and see what ip is leases to the mac address of the pi
Mike
So many serious replies !
Sometimes you have to communicate via a “narrow” channel like an LED and this shows how you can do that. Yes, you can have the new device do GET to an HTTP server or use mDNS (when it works) or consult your router’s DHCP server as to the allocated IP address. But this is a fun way to do it.
Stand by for serious discussion of the practical limitations of a watermelon as enclosure.
Matt Hawkins
I alway use a coconut to enclose my Pi. So much more practical than a water melon. On the other hand it’s harder to paint.
Jeff Richtman
Matthias is one of those people with an amazing mind! I have followed his videos for several years and he’s always trying things “just to see if he can”. Which is a very useful trait more people should have in my opinion.
Magnet0
Why not use “arp – a” to fetch ip of pi
Or else you can assign or bind mac/ip in your router.
Leão
Awesome implementation, but ‘avahi’ is there and so much easy and powerful. ¯\__(ツ)__/¯
Ian Simpson
Good idea. Yes there are easier ways but it is useful if you are teaching students and want them to work a little for their Pi time! I developed something similar for my class and later a BETT 2017 Raspberry Pi workshop that used binary to blink the last octet. https://sites.google.com/view/csteach/hackableclassroom/1
Ferowin
Or you could just assign it a static IP address during setup.
jbudd
There is also a bash script to flash the Pi’s IP address on the PWR LED. Discussed at https://www.raspberrypi.org/forums/viewtopic.php?f=63&t=279419
Comments are closed