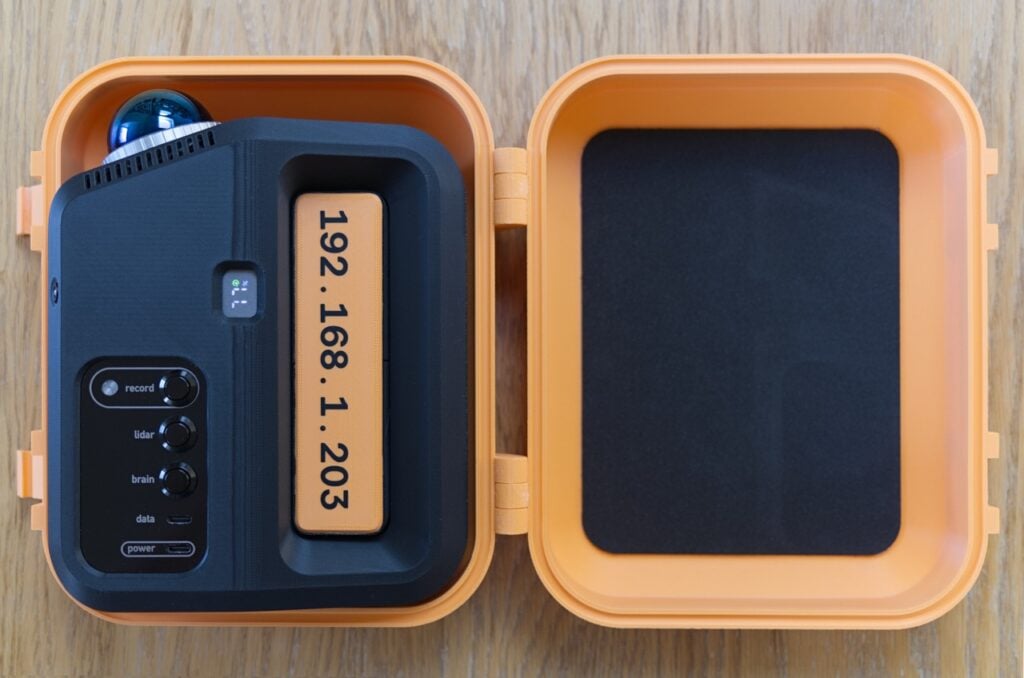
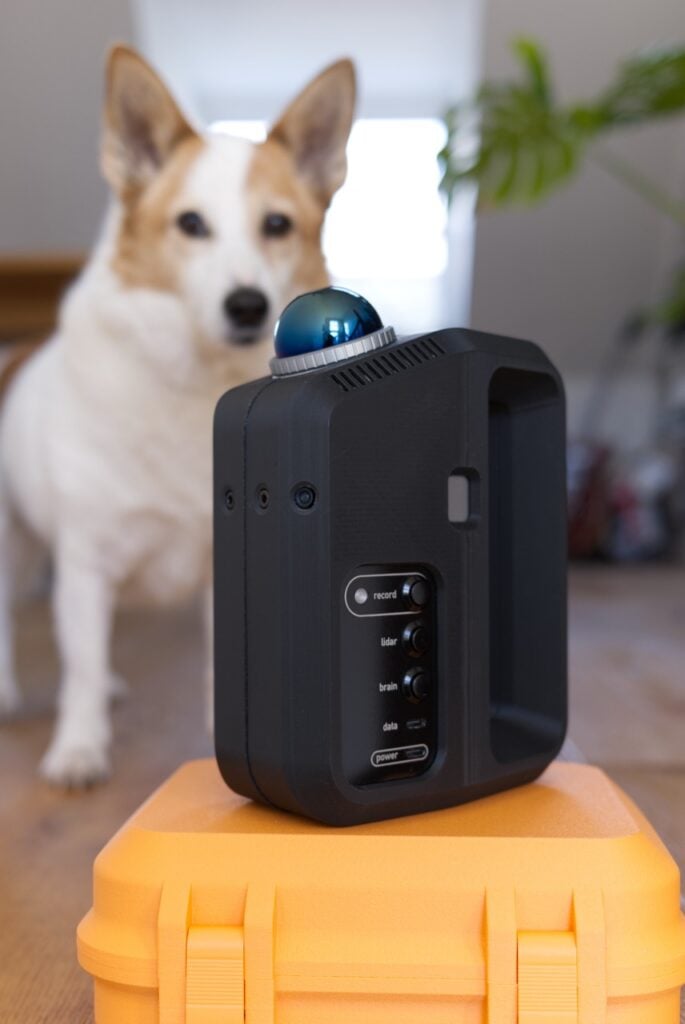
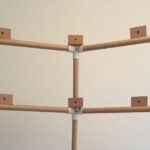
Peppe’s ghost LiDAR scanner
The maker of this LiDAR sensor thinks that its 3D-printed shell evokes a “jumbo-sized juice container or Ghostbusters gizmo”. It’s running on a Raspberry Pi 5 and happily capturing the world as a point cloud.

Family inspiration
The build is named after the maker’s late grandfather, Peppe, who was a real eccentric and tinkerer. The family jokes that the maker is possessed by Peppe’s ghost, because when they go down tinkering rabbit holes, they can’t stop. They’re an industrial designer by day and have always been a bit obsessed with machines and how they “see” — hence the idea to build their own LiDAR scanner from scratch. Raspberry Pi turned out to be the perfect brain for the job, being small, capable, and — best of all — completely hackable.
How it works
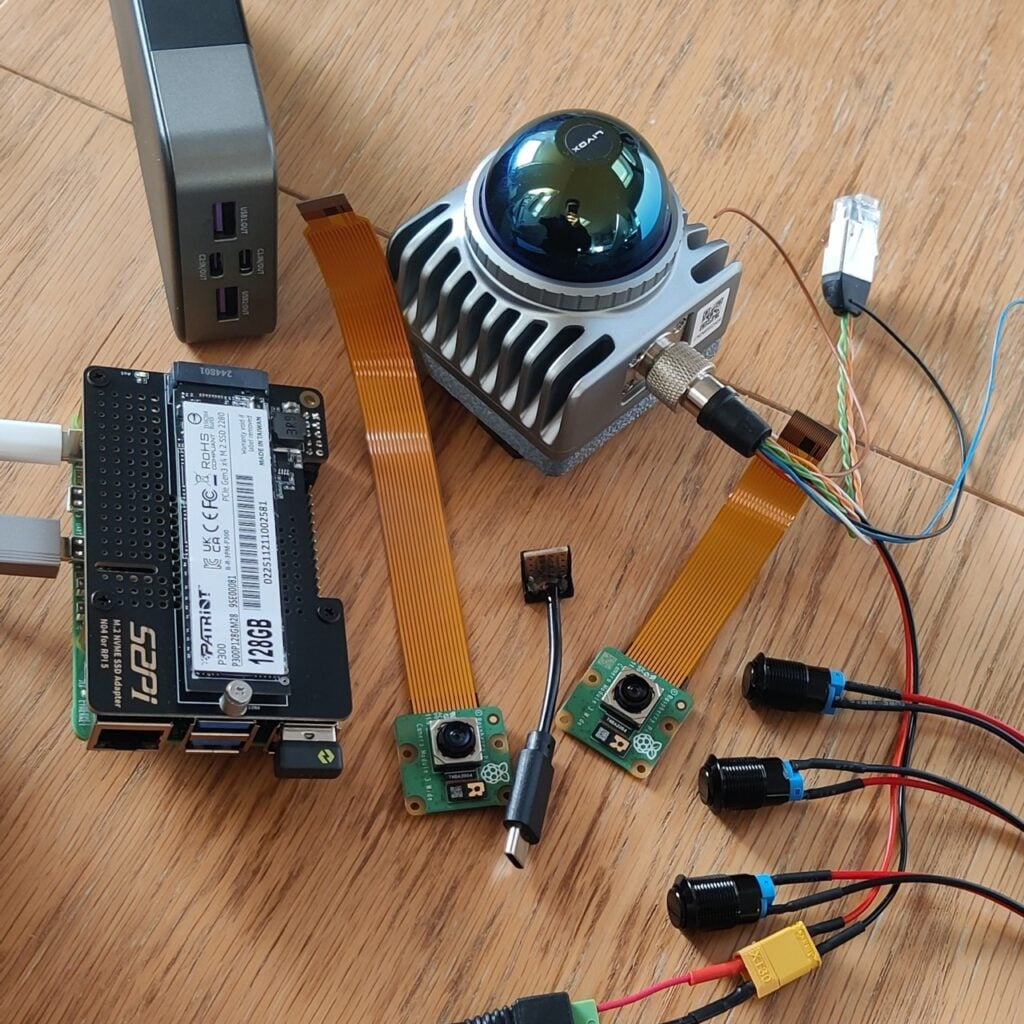
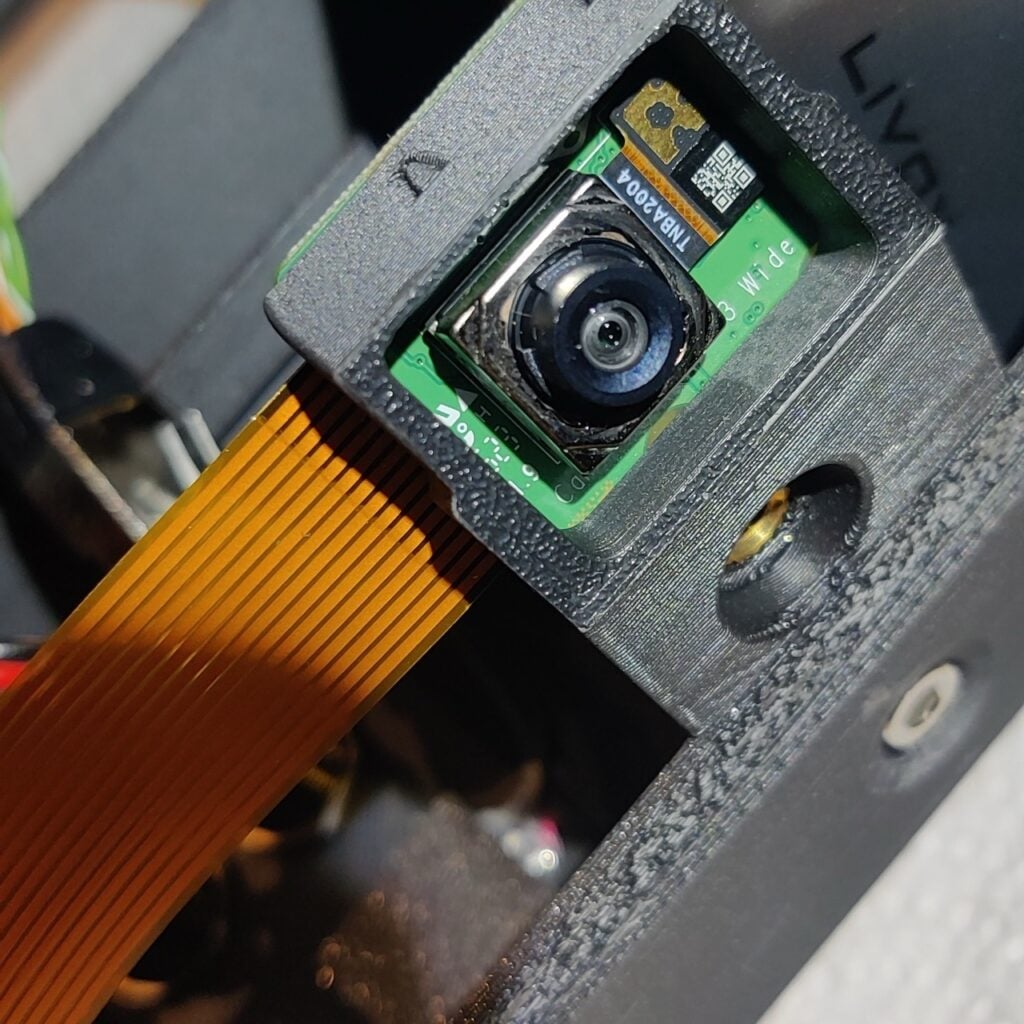
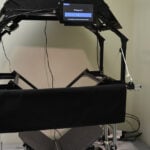
Inside the 3D-printed Ghostbusters-esque shell, a Raspberry Pi 5 juggles a lot. Two Raspberry Pi camera modules plug in to the CSI ports for synchronised RGB colour capture. The built-in real-time clock on Raspberry Pi 5 came in super handy for this build, since LiDAR, cameras, and IMU need to run perfectly in sync. The LiDAR sensor sends its data via the Ethernet port. A few chunky buttons and a status LED connect to the GPIO pins, so you can see when scans have started and stopped without the need for a screen. An SSD is mounted on top to handle the huge amount of incoming point cloud data. The scans get heavy fast, and Raspberry Pi 5 handles every byte without breaking a sweat.

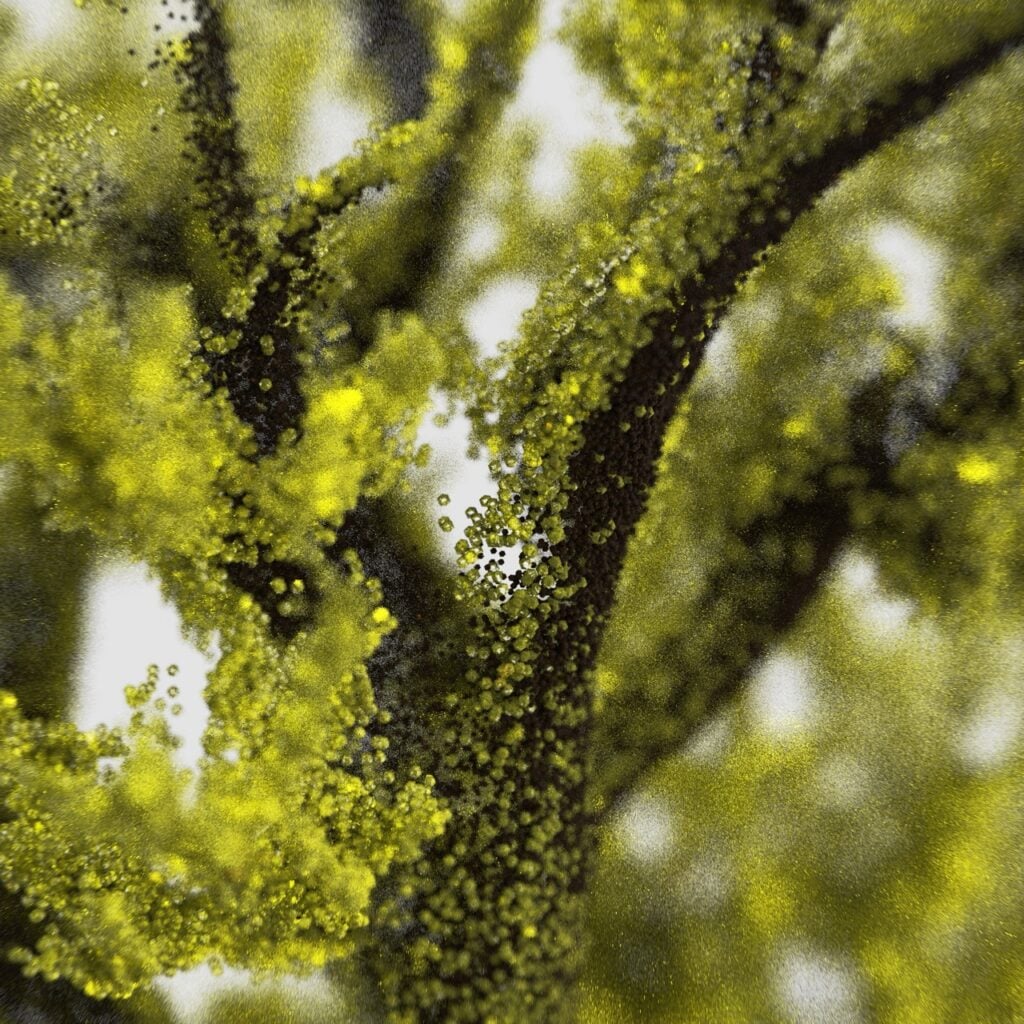
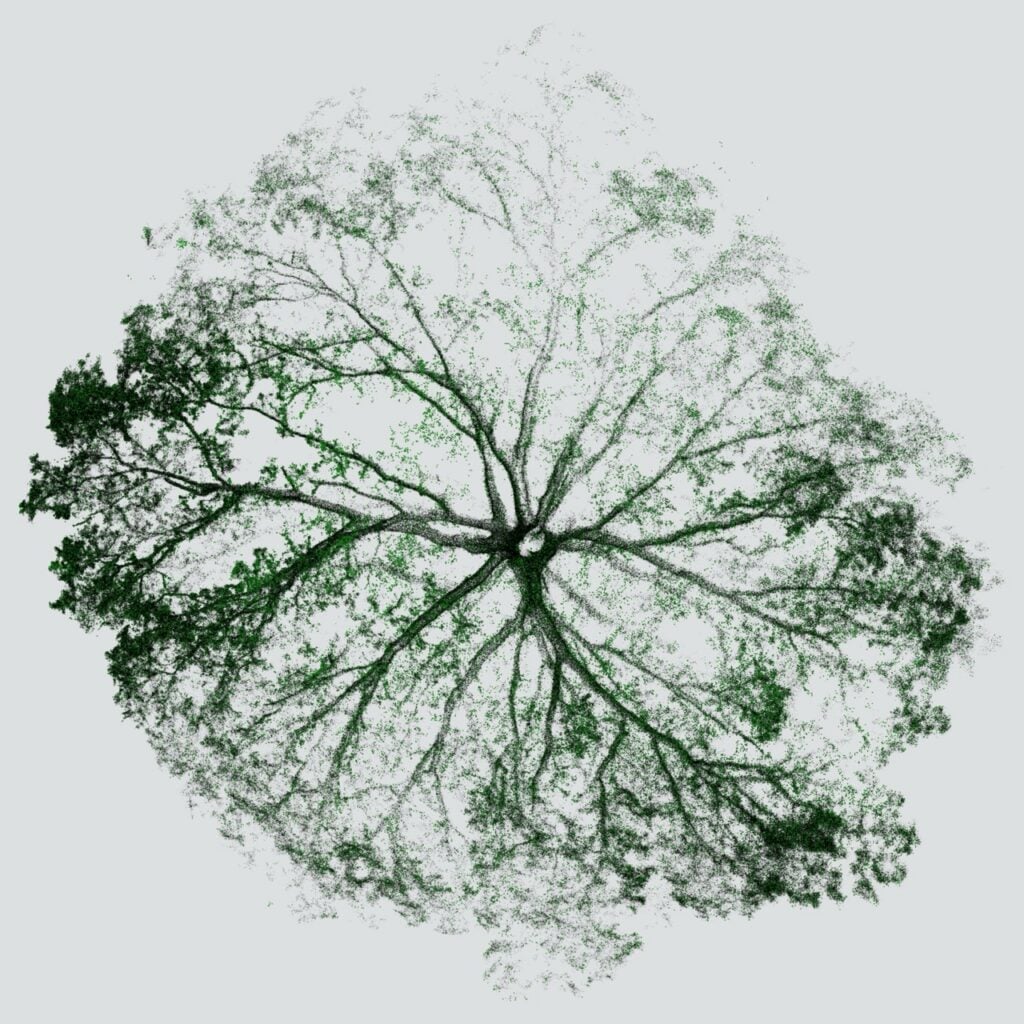
The maker has taken the scanner out into the world to capture point clouds of landmarks, and posted the results to Instagram as short videos. The response has been wonderful, with designers, architects, and robotics enthusiasts piling into the comments asking how they built it; many were surprised a Raspberry Pi could pull this off (we weren’t!). Invitations have come in to take the device around the world to help with all kinds of missions, including cave mapping, ancient tree appreciation, archaeology, and even some vigilante pothole scanning.
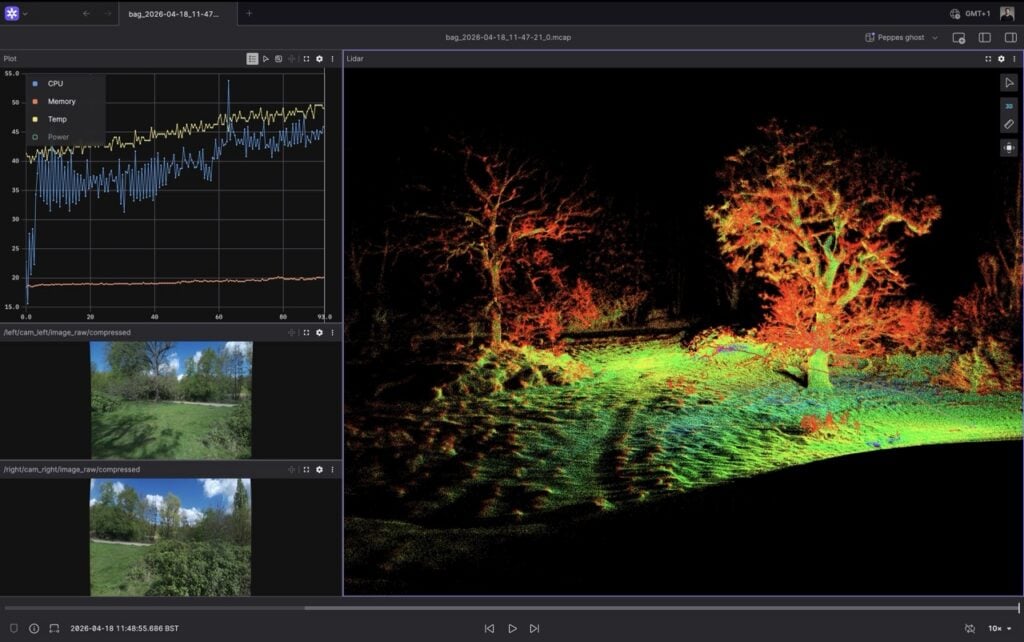
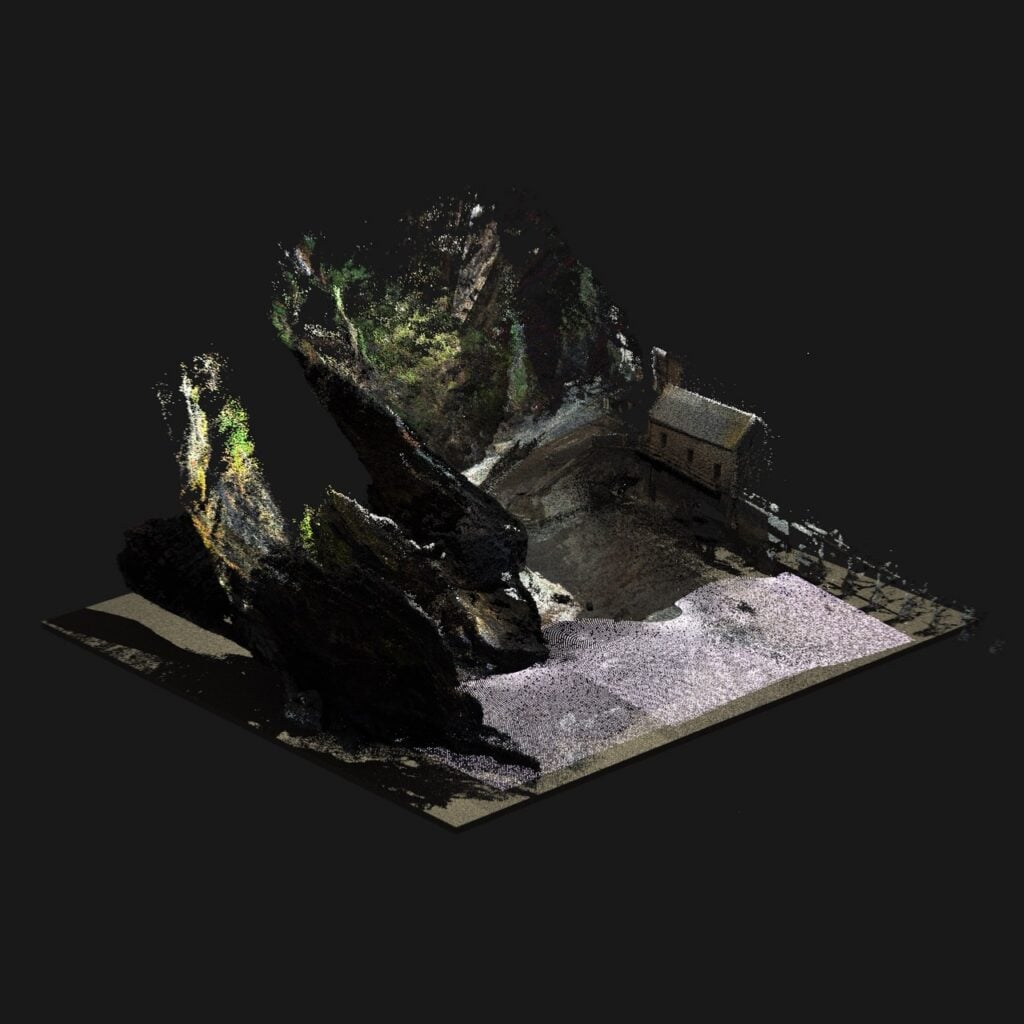

There are many more incredible images on the project’s official Instagram, but for now we’ll leave you with this detailed walkthrough of the machine in action. It’s voiced by its talented, if enigmatic, maker.


14 comments
Jump to the comment form
Michiel
Wow!
Real lidar scanning! Looks wonderful would love to make one ans show accessebility :)
Keep going!
Marjan Markovic
This is awesome, congratulations to maker, this was tough project for sure. I would love to build something like this!
Peppes Ghost
Thanks! I am planning on sharing the build plan soon. Follow me on Instagram, and I will share the updates there.
Redlegjed
Very nice project.
Any chance of posting it on something like github for those ‘old’ people who aren’t into this social media stuff?
James C Moses
I’m not on Instagram is it possible for you to update me otherwise?
nocturne.op.15
your project looks absolutely awesome and I really dream about something like this to digitalize real world places e.g. for disabled people or locations that are not publicly accessible.
If you will ever make it publicly available, I also vote for something oldscoolish like github, instagram is mostly a junk network.
San Brewer
Its fantastic how well the handheld system is self contained, their instagram has gaussian splats generated eith the colour and pointcloud data, super super cool!
Himanshu
Really cool project. I assume you only used the rpi for data capture and did the SLAM algorithm in postprocessing. Can you share which SLAM algorithm you used. I also have a small hobby lidar and would love to try this setup at my end.
Peppes Ghost
not quite – the SLAM is happening on the Raspberry Pi 5. the only post processing is the colouring and some ROR and SOR filtering, but thats not necessary, since the pointcloud comes clean. I am using Fast-Lio2 for it. Runs well on the RPI5. ( 60%CPU, including recording 2x 2k RGB)
Michael
While waiting for the full write-up, can you tell me what lidar sensor you are using?
Great work, congratulations
crx
Its a Livox Mid 360S. costs ~1k. AliTools is your friend for reverse image shopping.
Paul
Looks fantastic. What IMU are you using? Does it drift much over time?
peppes_ghost
I use the built-in IMU from the Lidar sensor. Very glad that they come as a bundle, so I don’t need to worry about aligning them.
Sohi
Nice job, how much is the totall price?
And what about software, with which software do you process the raw point cloud? And can we collect a gcps (ground control point) and add it in the the software to process?