Sublimation printing: how to transfer prints onto mugs and PCBs | HackSpace #56
A sublimation printer looks and works a lot like an ordinary inkjet printer. You load paper into it (although it does have to be proper sublimation paper), plug it into your computer, and press print. So far, so ordinary.

The word sublimation means to turn from a solid into a gas without being a liquid in between. This stage – the sublimation – is what happens after you’ve printed onto paper. It means you can turn the, now solid, ink into gas and transfer it onto other objects.
When we say other objects – there’s a wide range of stuff that you can transfer sublimation prints onto, but not everything. It has to have a coating that will accept the ink. In most cases, this means buying a pre-prepared ‘blank’, although you can get laminates and varnishes that will let you coat the surface yourself.
Once you have the printed sheet and the object to impress the image on, you just need to stick the paper on with heat-resistant tape (aka Kapton tape), and heat-press it on. This is another limitation on the range of objects that you can transfer images onto – you have to be able to heat-press them.

For flat surfaces, it’s pretty easy with a standard heat-press. You can also get cylindrical presses for mugs. Beyond that, it’s a bit challenging. For industrial uses, you can get heat-presses that can make custom shapes, but that’s probably a little excessive for hobbyist use.
You have to be able to heat the whole lot up to about 200°C, so it’s not ridiculously high temperatures. We have heard of people having success using convection ovens and heat-shrink to hold the designs in place, but we’ve not tried this, and it’s probably best not to do it in an oven that’s also used for food.
We’ve been testing out a range of different materials and blanks. Mugs, jigsaws, photo-slates, (slates with a flat side that has a layer of sublimation-friendly coating), and fabric.
It’s helpful to me if a process is a little tricky or has a few gotchas. This gives me something to write about in the article. The problem is, everything went very smoothly. In fact, the only problem we had in the whole process was a mug heat-press that just kept beeping at us, but reading the manual and working out what button to press sorted that out.
Different materials require slightly different temperatures, and can require radically different times. As far as I can tell, heavy things like ceramics that take a long time to heat up require longer than lighter things, like jigsaw blanks. However, you should be able to get the right time from wherever you get your blanks, if not, you’ll just have to experiment for a bit. About 60 seconds at 190°C was the quickest we did (jigsaws), and 240 seconds at 205°C was the longest (slate blanks). If you get a sepia tint, leaving your images looking like they are a few hundred years old, then you’ve probably overheated the ink.
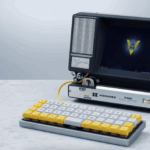
As a final test, we tried sublimating ink onto a PCB, just to see what happens. The initial results were really good. While the ink did not have a great deal of effect on the FR4, it stuck extremely well to silk-screened areas.
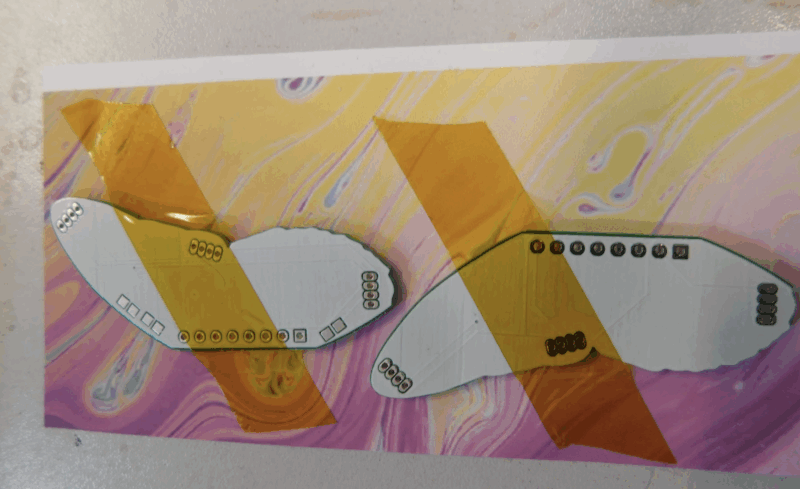
This meant that we couldn’t just sublimate print onto any PCB we wanted – we had to design specific PCBs covered in silkscreen to take the ink. I’ve always wanted to make a butterfly PCB. Long-term readers with a very good memory may remember that HackSpace mag, issue 1, featured a butterfly PCB from the now-defunct Boldport Club. In that, they’d used two different silkscreen colours to create the decorative effect but, in mine, I could just print whatever I wanted.

This was just a test, so I wanted something that would look good, but not take too long to design. I settled for a circuit that linked up three through-hole RGB LEDs. The design was one wing, but I could just flip it over to create the other wing.
These came back a week or so later, and it was time to try them out. I didn’t have a specific pattern in mind (this was still a test, so I didn’t want to spend ages on it before knowing if it’d work), so I printed off a swirling colour image that I found online, stuck a couple of wings to it, crossed my fingers, and started the heat-press.

The result isn’t quite perfect. The image doesn’t quite have the detail that I’ve been able to get on some surfaces. I’m not yet sure if that’s a result of the inherent properties of the silkscreen, or if I just haven’t yet dialled in the settings (the PCBs only arrived a few days before we went to press, so I haven’t been able to properly test the process out yet). So far, it seems like the ink is very prone to overheating with PCBs. The best results that I have had are at 180°C for 60 seconds, but it’s still early days.
This is definitely a ripe area for experimentation if you’re interested in making artistic PCBs.
HackSpace magazine issue 56 out NOW!
Each month, HackSpace magazine brings you the best projects, tips, tricks and tutorials from the makersphere. You can get HackSpace from the Raspberry Pi Press online store or your local newsagents.

As always, every issue is free to download in PDF format from the HackSpace magazine website.
No comments
Comments are closed