Digitising film reels with Pi Film Capture
Joe Herman’s Pi Film Capture project combines old projectors and a stepper motor with a Raspberry Pi and a Raspberry Pi Camera Module, to transform his grandfather’s 8- and 16-mm home movies into glorious digital films.
We chatted to him about his Pi Film Capture build at Maker Faire New York 2016:
What inspired Pi Film Capture?
Joe’s grandfather, Leo Willmott, loved recording home movies of his family of eight children and their grandchildren. He passed away when Joe was five, but in 2013 Joe found a way to connect with his legacy: while moving house, a family member uncovered a box of more than a hundred of Leo’s film reels. These covered decades of family history, and some dated back as far as 1939.

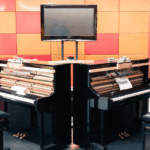
Kodachrome film reels of the type Leo used
This provided an unexpected opportunity for Leo’s family to restore some of their shared history. Joe immediately made plans to digitise the material, knowing that the members of his extensive family tree would provide an eager audience.
Building Pi Film Capture
After a failed attempt with a DSLR camera, Joe realised he couldn’t simply re-film the movies — instead, he would have to capture each frame individually. He combined a Raspberry Pi with an old Super 8 projector, and set about rigging up something to do just that.
He went through numerous stages of prototyping, and his final hardware setup works very well. A NEMA 17 stepper motor moves the film reel forward in the projector. A magnetic reed switch triggers the Camera Module each time the reel moves on to the next frame. Joe hacked the Camera Module so that it has a different focal distance, and he also added a magnifying lens. Moreover, he realised it would be useful to have a diffuser to ‘smooth’ some of the faults in the aged film reel material. To do this, he mounted “a bit of translucent white plastic from an old ceiling fixture” parallel with the film.
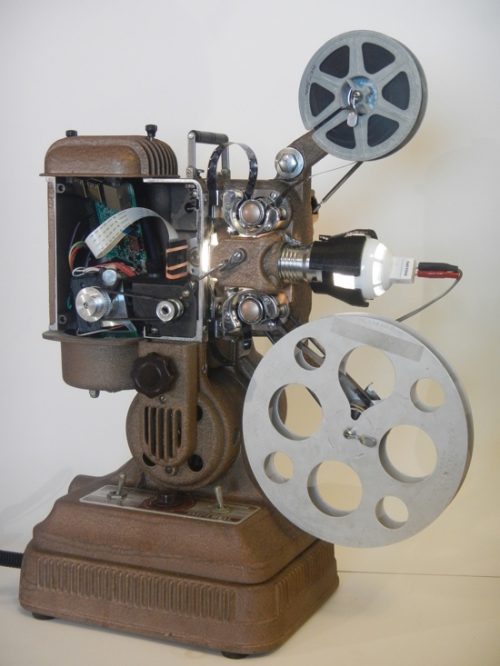
Joe’s 16-mm projector, with embedded Raspberry Pi hardware
Software solutions
In addition to capturing every single frame (sometimes with multiple exposure settings), Joe found that he needed intensive post-processing to restore some of the films. He settled on sending the images from the Pi to a more powerful Linux machine. To enable processing of the raw data, he had to write Python scripts implementing several open-source software packages. For example, to deal with the varying quality of the film reels more easily, Joe implemented a GUI (written with the help of PyQt), which he uses to change the capture parameters. This was a demanding job, as he was relatively new to using these tools.
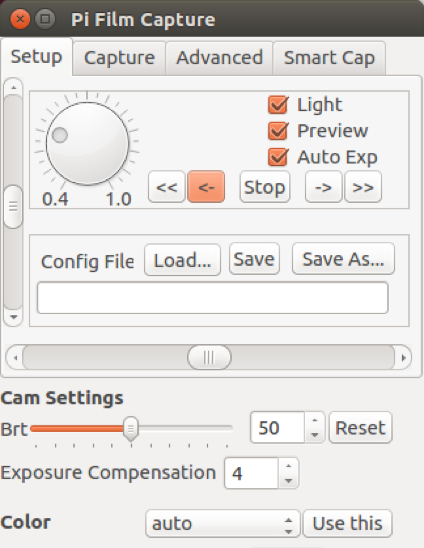
The top half of Joe’s GUI, because the whole thing is really long and really thin and would have looked weird on the blog…
If a frame is particularly damaged, Joe can capture multiple instances of the image at different settings. These are then merged to achieve a good-quality image using OpenCV functionality. Joe uses FFmpeg to stitch the captured images back together into a film. Some of his grandfather’s reels were badly degraded, but luckily Joe found scripts written by other people to perform advanced digital restoration of film with AviSynth. He provides code he has written for the project on his GitHub account.
For an account of the project in his own words, check out Joe’s guest post on the IEEE Spectrum website. He also described some of the issues he encountered, and how he resolved them, in The MagPi.
What does Pi Film Capture deliver?
Joe provides videos related to Pi Film Capture on two sites: on his YouTube channel, you’ll find videos in which he has documented the build process of his digitising project. Final results of the project live on Joe’s Vimeo channel, where so far he has uploaded 55 digitised home videos.
We’re beyond pleased that our tech is part of this amazing project, helping to reconnect the entire Herman/Willmott clan with their past. And it was great to be able to catch up with Joe, and talk about his build at Maker Faire last year!
Maker Faire New York 2017
We’ll be at Maker Faire New York again on the 23-24 September, and we can’t wait to see the amazing makes the Raspberry Pi community will be presenting there!
Are you going to be at MFNY to show off your awesome Pi-powered project? Tweet us, so we can meet up, check it out and share your achievements!


7 comments
k
A lot of times the whole reason you need to convert is because the projection device has become missing or broken over the years. It would be nice to see a 3d printable version of this.
Joe Herman
K, there are a several projects that are doing exactly what you suggested, including the Kinograph project, which is attempting high-quality transfers of 16 & 35mm films.
I chose to use reclaimed projectors because they’re still widely available and affordable, and they manage of all the film handling with a level of precision difficult to achieve with most 3d printers. Outsourcing the mechanical engineering in this way allowed me to spend more time on the software.
On a more emotional level, there’s something very appealing to me about reusing equipment from the same era when these films were originally shot. Old projectors are beautiful pieces of technology, and it feels like a privilege to give them a new purpose in life.
(That said, very brittle or damaged films would be better handled with a specialized device that didn’t use a claw to advance the film. I was lucky to be working mostly with well-preserved reels.)
Joe Herman
If I can do a little more self-promotion, I’ll be back with the project at NYC Maker Faire 2017, if anyone wants to check it out in person. (Also in the booth will be my cousin Mike, who’s working on performing high-speed high-res captures with a Canon DSLR.)
Will McClure
Joe: I did some editing in Adobe Premiere using digital captures of 6 reels of 16mm film that was taken in the 30’s as home movies. It was mostly shot on black & white film, but there was also a color reel from the 50’s. I noticed that every time the shutter opened to expose the film, there were 3 or 4 frames of completely exposed film, which for digital captures of 24 or 30 frames per second is a very period of time. Yet, when I cut out those frames, and added a short fade of 10 frames (especially from black), it had a real effect on the overall project. Great job on this setup!
Phil Spiegelhalter
A technique I have used with 9.5mm and 8mm/S8mm film and damaged perforations is to run the film in reverse/ upside down, as the opposite edge of the perforation is often undamaged. Then flip the video result etc as needed.
Other experiments of course are replacing hot bulbs with an LED panel, and adapt a slim video microscope camera to replace the projection lens. Not forgetting also to carefully file the film gate to be more open, so as to reveal all of the originally exposed film ( including even the perforations – so as to be able to use them for reference positioning – eg with ‘flashscan’ exposure when the perf is in the correct place ). linked-to-speed brightness allows adequate illumination for focussing when stationary, and matching brightness when moving.
Using an LED with
Paul Hurm
I love the idea of this project since I have some family film going back at least as far as the 1939 world’s fair and my father riding dressage at Culver Academy in Indiana circa the same time period.
A main concern I have had is with heat from the bulbs so if anyone comes up with a LED or other cool light source solution please let me know at typicalfrenchkiddies.com or at the email address “hidden” in my signature below.
I will definitely be reading this project in greater detail!
Paul Hurm
at gmail.
Ed Willmott
Joe Herman is a Rockstar!
-Cousin Ed
Comments are closed