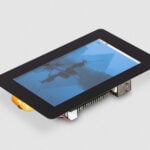
A new 10″ Raspberry Pi Touch Display 2, available now at $80
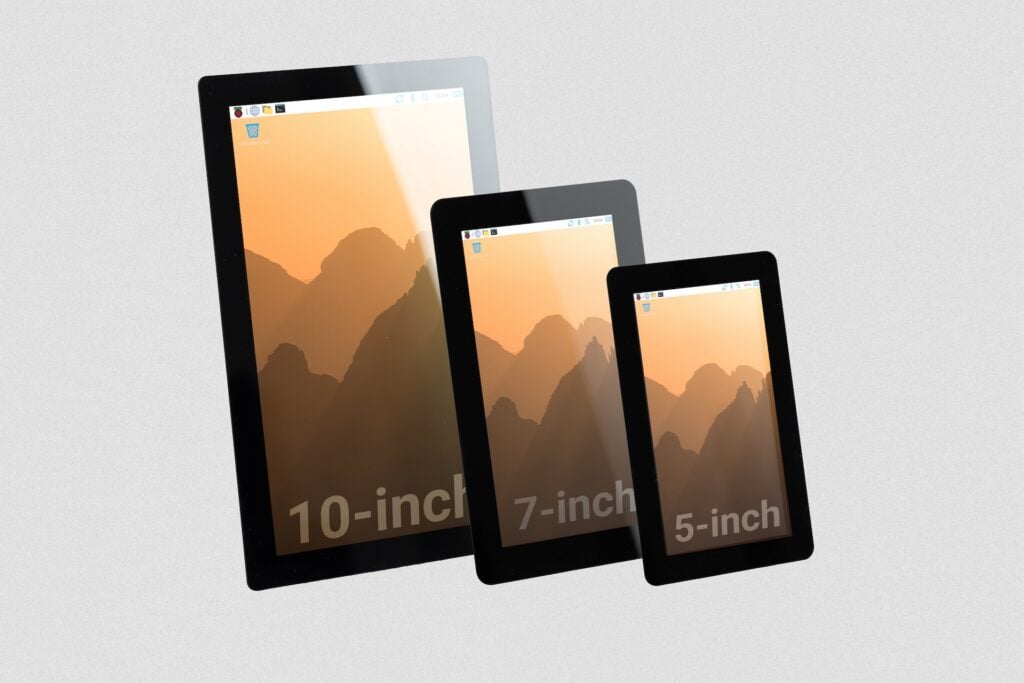
Regular readers will be familiar with the 7″ Raspberry Pi Touch Display 2, which refreshed our original Touch Display product with a slimmer form factor and higher-resolution panel. Since its 2024 launch, we’ve released a 5″ variant, bringing the same high resolution and easy setup to a smaller footprint that suits more compact end devices and deployments.
Today, we are excited to go one step further — and three inches bigger — with the new 10″ Raspberry Pi Touch Display 2, available to buy now at $80.
Sometimes bigger is better
Physical size is not the only upgrade. Our new 10″ display features a higher 1200×1920–pixel resolution, a more generous 85-degree viewing angle, and a touchscreen controller with support for ten-finger touch, up from five-finger touch in the 5″ and 7″ variants.
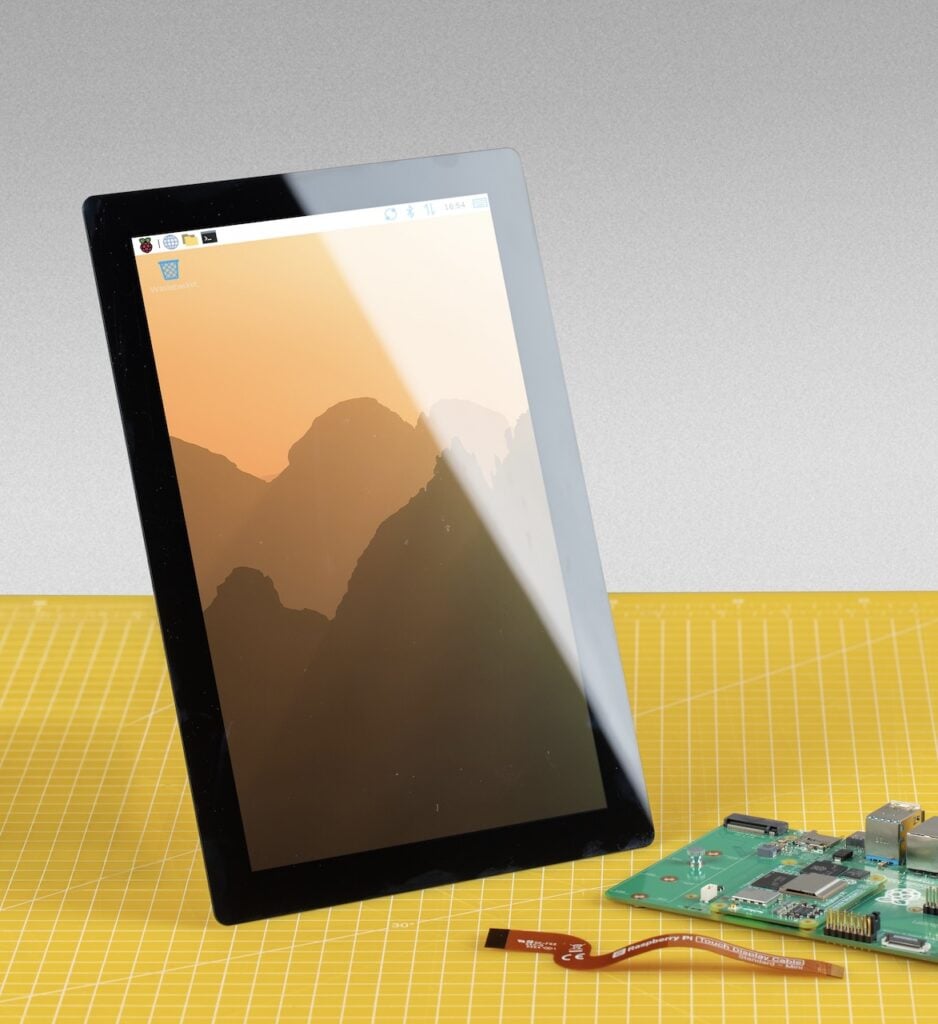
As with all our display products, the 10″ Raspberry Pi Touch Display 2 integrates seamlessly with the rest of the Raspberry Pi ecosystem. It is powered directly from the host Raspberry Pi, and comes with all the necessary cables, connectors, and mounting hardware. The capacitive touchscreen benefits from full driver support in Raspberry Pi OS — simply update the operating system and EEPROM bootloader on your Raspberry Pi 5 or Raspberry Pi Compute Module (any model, with a Raspberry Pi Compute Module IO Board or another suitable motherboard), connect the display to the device, and go.
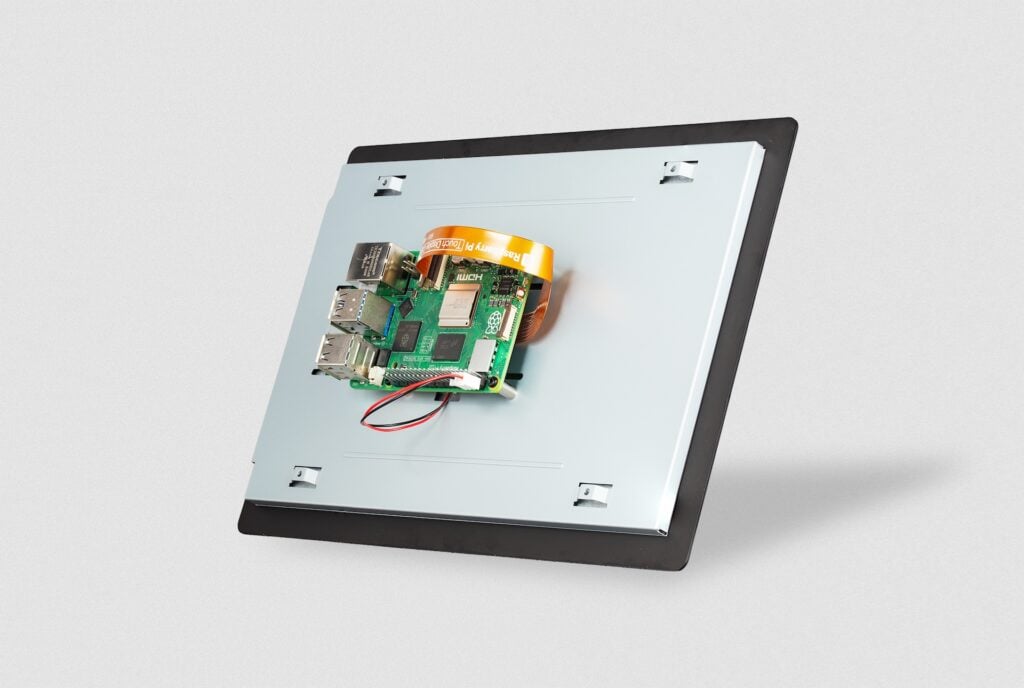
The 10″ Touch Display 2 is not compatible with Raspberry Pi 4 or earlier models, or with the Raspberry Pi Zero series. While previously released Touch Displays use only two lanes of DSI data to communicate with the host Raspberry Pi — which works well with the older display connector on Raspberry Pi 1, 2, 3 and 4 — the higher resolution of the new 10″ variant requires four DSI lanes. This in turn requires our narrower, but higher-bandwidth, ribbon cable and the newer display connector found only on Raspberry Pi 5 and the Compute Module IO boards. For display options you can use with earlier Raspberry Pi computers, take a look at the 5″ and 7″ variants of Raspberry Pi Touch Display 2, or consider the Raspberry Pi Monitor.
From dashboards to desktops to ambitious builds
The 10″ Raspberry Pi Touch Display 2 is a perfect fit for a wide range of applications, including home automation dashboards, kiosks, robotics interfaces, digital signage, gaming systems, workshop or lab equipment control panels, and more. We have no doubt you’ll find uses for it beyond anything we could possibly imagine.
The 10″ Raspberry Pi Touch Display 2 is available to buy now from our worldwide network of Raspberry Pi Approved Resellers.


46 comments
Jump to the comment form
ukscone
Very nice.
Do you know if any of the usual suspects are working on a case for it yet.
Paul Webster
From memory, this fulfils a very old commitment by Eben from around the time of the very first touch display release that a 10-inch variant would come.
If someone ran it at a lower resolution or with infrequent updates … could an adapter site between it and older RPi models to make it work?
Paul Webster
Old video from back at time of launch of first screen- in this one it is not a promise but a plan … 2:40 into the video. 11 years later and here we are!
Not a complaint at all just a recognition that some things take time.
https://youtu.be/ZHRhiCPXFIA?is=oQ5xKeQnaU01n7tw
Dave Stevenson
Sadly no, it can’t be run on 2 data lanes with earlier standard Pis. It will work on Compute Modules 1/3/4 on DISP1 though.
We did investigate 2 lane mode, but this display does a load of things within panel based on the video clock (even touch screen polling!), and it goes wrong in weird ways if it’s not getting a 60Hz overall refresh rate.
I’ll try to dig out my notes to see if we ever got it vaguely reasonable behaviour from it, but it will never be officially supported.
Govert
Pi + Active Cooler + M.2/SSD HAT does not have an easy power solution for the displays. Please make a nice plan for this – it’s the natural combination for a lovely little computer.
andy smith
With four standoffs, I made a sandwich of screen –> M2 board –> Pi 5 with active cooler facing away from screen and card. It gets no hotter than an identical unit with no M.2 ham in the sandwich. unit with screen and m.2 shows no problems of under voltage or under power with offical pi5 PSU
crumble
Which power states are supported?
Can we turn it off an on again by software?
Ssm
It says $80, but is that NZ dollars (applies to where I’m reading this from) or US dollars just because? Thx.
Raspberry Pi Staff Bianca McLean
US Dollars
Salvador Limones
It’s $97 + tax + shipping in the US (pishop.us).
Raspberry Pi Staff Helen Lynn
We’ll take a look.
Anders
Possibly there are tariffs applied.
Raspberry Pi Staff Helen Lynn
You are of course correct and I should’ve clocked that!
Raspberry Pi Staff Bianca McLean
That extra cost isn’t us marking up the price, it’s a US import tariff (25%) on goods made in China. It’s set by customs, not by us, so it can vary a bit depending on where you buy from.
Jan
So that could be a nice Home Assistant display. If we could get a nice case for it, to hang on the wall.
Jeff Remec
LOL, it’s not $80 at CanaKit.
Raspberry Pi Staff Helen Lynn
We always set prices in US dollars (because that’s the currency in which we buy componentry), and they always exclude shipping costs and any applicable taxes (because those vary greatly between regions). US$80 is very close to the CA$114.95 at which CanaKit is listing the new display, so their pricing is correct, as we’d expect from our long-term partner.
Scott Allendorf
And when you switch the Canakit site to USD, the 114.95 CAD becomes 97.00 USD…
solar3000
Here. Take my money.
mark
great to see this. is there a screen / energy saver function, so this can function like a laptop or desktop computer?
will the display automatically power down on its own if it hasn’t been touched for say a minute or two, or if the raspberry pi os desktop goes to the lock screen?
will touching the screen automatically turn it back on and wake up the raspberry pi os to the lock / password entry screen?
or does one need to fully shut down the OS in order to turn the touchscreen display off?
AndrewS
Yes, you can enable Screen Blanking from the Display tab in the Control Centre application (which you can find in the Preferences menu).
Last time I checked, the lock screen (which you can access from the Shutdown… menu item) didn’t have onscreen-keyboard support.
mark
thank you, good to hear.
ah, if that is still the case and if someone who codes Raspberry Pi OS is reading this, please enable the on screen keyboard for the touch display on the lock screen. having it able to function like a computer or tablet would be great.
Jeff Geerling
I wrote up a little script for ‘kiosk mode’ with the 7″ display (and I’m going to test on the 10″), and you can enable Screen Blanking to disable the screen after a set period of time.
I wish the Pi could also go into a sleep mode, but using only 2-3W at idle with the display off is okay for some use cases still.
One annoying thing is when you tap to wake the screen (at least last time I checked), it performs a ‘click’ where you tapped, it doesn’t ignore that first touch. That can be a little dangerous if you have an HMI like an on/off switch that can be touched.
mark
great to hear, please keep us posted if it also works on the 10″ screen when you test it.
hopefully someone who codes Raspberry Pi OS can update it so the first touch is ignored, so nothing is accidentally clicked.
Nick
Hey, Jeff! :)
If your script is web-based, you could easily add an overlay on top of the UI when it’s supposed to sleep/go blank. When you touch that, the overlay gets display:none and all is fine.
Mr.Rabbit
Again this is described as a portrait screen. Is it possible to use it in landscape, both software-wise but also in terms of IPS-related viewing angle?
AndrewS
Yes. The screen can be rotated using the Screens tab in Control Centre. Viewing angles can be found in the Product Brief (linked to from the product page).
solar3000
hhhmmm……canakit.com has been down all day.
Christian Hatley
After all these months, I’ve been blessed by another new product! Can you please consider a dedicated case for this glorious screen? I can’t find a third-party case that fits my needs since my RTC battery is attached to it.
Ron de Jong
I would love to buy a 15″+ Raspberry Pi 5/6 Laptop with rgb led keyboard as my daily driver ❤️ please make it happen…
Ben S
Please make a 4K version. 1080p is insufficient for my needs.
Winfried BOETTCHER
Could someone better explain, how the connection between the Raspi5 and the screen is established? I understand that the flat interface cable starts on the Raspi board. If the other end fits in the screen, it is a rather rigid connection not suitable for an office use. And if on top of the raspi board there is a memory extension card, will there be enough place to fit the flat cable?
AndrewS
See the instructions at https://www.raspberrypi.com/documentation/accessories/touch-display-2.html#connect-to-a-10-inch-touch-display-2 (and also look at the photo in the article above) – the intention is that you use 4 of the supplied screws to physically attach the Raspberry Pi to the back of the display.
And if by “memory extension card” you mean https://www.raspberrypi.com/products/m2-hat-plus/ then yes, this has a cut-out slot for the FFC to fit through.
NousViz
I like the smaller displays that are flush with the small device. Otherwise I think the ones with larger screens could be practical around the house.
gebi
Great display and perfect for kodi. Is it possible to mirror to a TV with 1920×1080 resolution? E.g. with two black borders on top and on the bottom of the display?
Raj Thawani
I want to purchase the this 10 inch raspberry pi 2 display in the India , What is the purchase link of the 10 inch display
Raspberry Pi Staff Ashley
https://www.raspberrypi.com/products/touch-display-2/?variant=touch-display-2-10-inch-portrait
Suresh Viswanathan
I purchased and received received one from robu.in and Silverline each in the last week.
Allen
Could you please advise where we can obtain the CAD and STP files for this product?
We noticed that the dimensions (length, width, and thickness) indicated in the PDF drawing seem to be slightly different from the actual product measurements. Could you kindly help confirm the correct mechanical dimensions or provide the latest 3D drawings for reference?
Thank you very much for your support.
Suresh Viswanathan
I’d like to second it. I just designed an enclosure based on the dimensions in drawing shared publicly only find discrepancies across the board. Also the position of the connectors for designing the cutouts is missing. Equally important would be the STEP file which is also mission. Having that would make life so much simpler.
The same information and files are available for the 5″ & 7″ displays ar the same location
Suresh Viswanathan
Also the thickness of the panel doesn’t match the totals of each layer – I just wanted to point out that that the dimensions in the documentation are completely out of sync with the actual product.
solar3000
For those who live near one, I just picked up a 10 in at Microcenter for $79 USD.
Steven
Can this be used with a small VESA mount? I see the 4 holes in the corners, but not sure if they’d be strong enough or deep enough for mounting successfully. I do see Pimoroni has a stand for it now, but I was curious about mounting.
Tom Murray
Will you be releasing longer mini to mini cables like you did you standard to mini?
Also confirming the drawings don’t match the physical device.
Steve Silvi
The image of the screens at the top of the page is a bit misleading. It cannot stand up either vertically or horizontally on its own. You would need an enclosure or stand to make that happen, and I can’t find one anywhere that works for the 10″ screen.
David Deas
Is there any chance of a future product with a white bezel? Most houses have white walls and I would love to use this for my mounted screens.