You can’t eat our birthday cake because it is full of LEDs
It’s our birthday! Happy birthday to us. We’re a leap-year baby, so while today marks only the third time our official birth date of 29 February has rolled around, we’re actually twelve years old. We have been informed that we don’t get double the presents just because we are simultaneously turning three and twelve, alas.
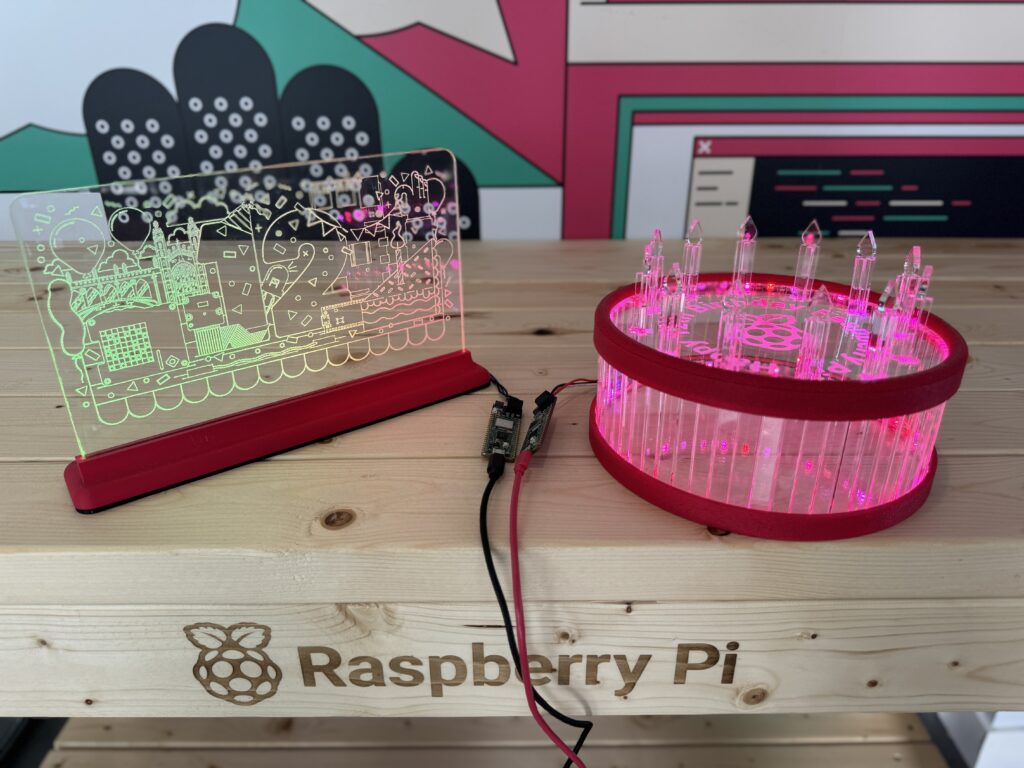
Anyway, our Maker in Residence, Toby, made us a cake and a card this year, so naturally the former isn’t edible and the latter is paperless and unsigned. However, they’re both full of LEDs and powered by Raspberry Pi, so we’ll let him off.

Our illustrator Sam designed the lovely graphic above, featuring the number 12 surrounded by Raspberry Pi hardware and the iconic architecture of our home town of Cambridge, UK. Toby imported it into Lightburn then etched it onto an acrylic birthday card with a laser cutter. He designed the birthday cake in Fusion 360 and Lightburn; individually laser-cut acrylic pieces are glued together between two red rings to form the sides of the cake, with a laser-etched disc forming the top.
Custom raspberry red filament
All the red bits you see on both the card and the cake were designed in Fusion 360 and 3D printed in the custom raspberry red filament made by our friends at Micro Center.
Sparkly lights
Lighting the birthday card is a strip of NeoPixels running along the bottom edge of the acrylic panel. When you turn them on, the light floods upwards through the clear panel and is diffused by the etched design, picking out the elements of the drawing. The lights in the cake are hiding at the top and bottom behind the red rings.
Toby used Adafruit’s NeoPixel strips in these builds — one strip in the birthday card and two inside the cake. He likes them because they’re individually addressable, so you can control every LED separately, rather than having the whole strip change colour as one.

This means Toby was able to select several colours to diffuse through his birthday builds. The strip lighting up the birthday card is set to “rainbow”: all the colours of the rainbow flow left to right across the panel. The cake’s LED strips are set to “sparkle”, and twinkle in the closest colour he could get to raspberry red. It’s pretty pinky, but we’ll let him off.
RP2040 power
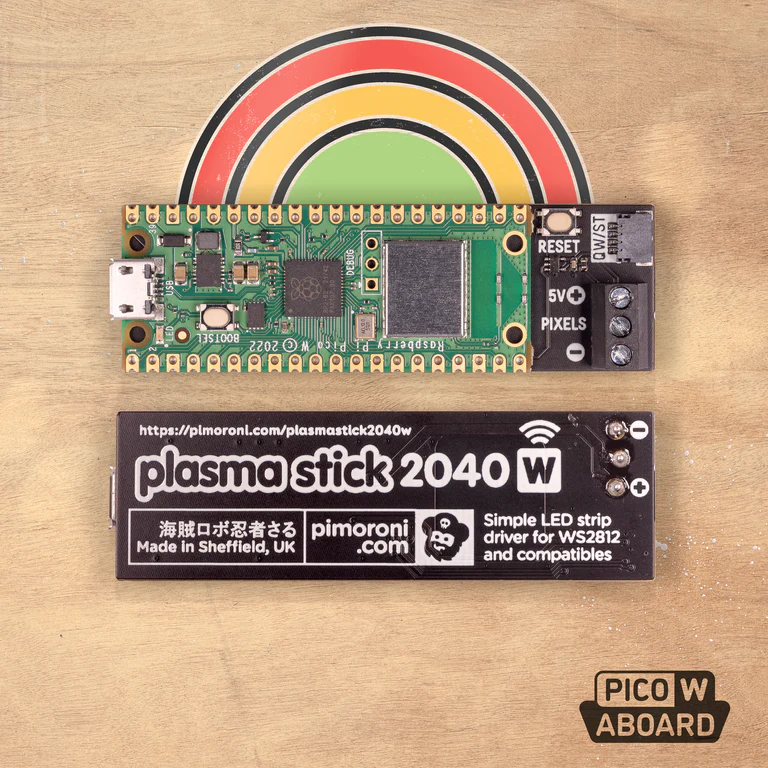
A Raspberry Pi Pico W aboard Pimoroni’s Plasma Stick 2040 W runs the light show for each build. Toby is using a USB battery pack plugged directly into the Plasma Stick for power, so they’re both portable and can be toted around our party guests.
Come to our birthday party!
Which reminds us: if you’re coming along to our birthday bash on Saturday, you’ll be able to see these in person, along with loads of other Raspberry Pi-powered gadgets from the Pi Towers Maker Lab. CamJam is hosting us at the William Gates Building in Cambridge, UK, from 10am – 5pm on Saturday 1 March. Our CEO Eben Upton will be there, and he’s taking part in a Q&A panel at 2.20pm together with Gordon Hollingworth (CTO – Software) and James Adams (CTO – Hardware). Come along if you’d like the chance to ask them (almost) anything.

Visit the event listing for more info and remember to scroll to the bottom and click through to CamJam’s site to register your attendance. Don’t forget to wish us a happy third and/or twelfth birthday in the comments before you go. Be nice. We love you.


10 comments
Memotech Bill
The events listing link is returning 404.
Is there any way of un-registering for a workshop. I registered for the 14:00 AI, but then realised it clashes with Eban’s panel. I then tried to register for the 10:15 workshop instead, but it says I am already registered for that workshop.
Stewart Watkiss
Happy birthday !!
So much has changed since the launch of the first Raspberry Pi. I look forward to seeing how much it improves over the next 12 years.
Raspberry Pi Staff Liz Upton
Hope you’re coming to the Jam on Saturday, Stewart: don’t think I’ve seen you since before the pandemic!
Raspberry Pi Staff Toby Roberts
Maker’s top tips:
When soldering your Neopixels, take care not to create a short circuit in your connections. The soldering pads are closely spaced and very small, increasing the risk of shorts. If a short circuit does occur, it often affects only the first Neopixel. In this case, simply snip away the damaged Neopixel and begin soldering from the second LED in the sequence.
The data line for your 5 Volt Neopixels should also carry a 5 Volt signal. However, GPIO pins typically output only 3.3 Volts, which may suffice for some types of Neopixels. If not, you’ll need to incorporate a 3.3V to 5V logic level converter into your setup. Thankfully, these converters are readily available online at a low cost.
Alternatively, consider using a device like the Plasma Stick 2040 W, as used in this project. This not only provides a stable 5 Volt data line but also features screw terminals for those who prefer not to solder.
What are you waiting for? Bling that thing!
barleyguy
Happy Birthday. :-)
I was hoping you would announce a product today, like a Raspberry Pi 500 maybe. I think we all agree that there needs to be a Raspberry Pi 500. With a m.2 slot in the bottom.
Cheers.
Nikita Zasyadko
Happy Birthday!
You have done a lot in these 12 years!
Raspberry Pi Staff Ashley Whittaker — post author
Considering the “12” was only 3 according to modern calendars, that’s extra impressive
Nick
Happy birthday! :)
Raspberry Pi Staff Ashley Whittaker — post author
Thaaaaank you Nick. You coming to the party tomorrow or do live a bajillion miles away?
Kristine
Today is also a birthday of https://deltaexecuter.com roblox project.
Comments are closed