Make a Side Pocket-esque pool game | Wireframe #36
Recreate the arcade pool action of Data East’s Side Pocket. Raspberry Pi’s own Mac Bowley has the code.
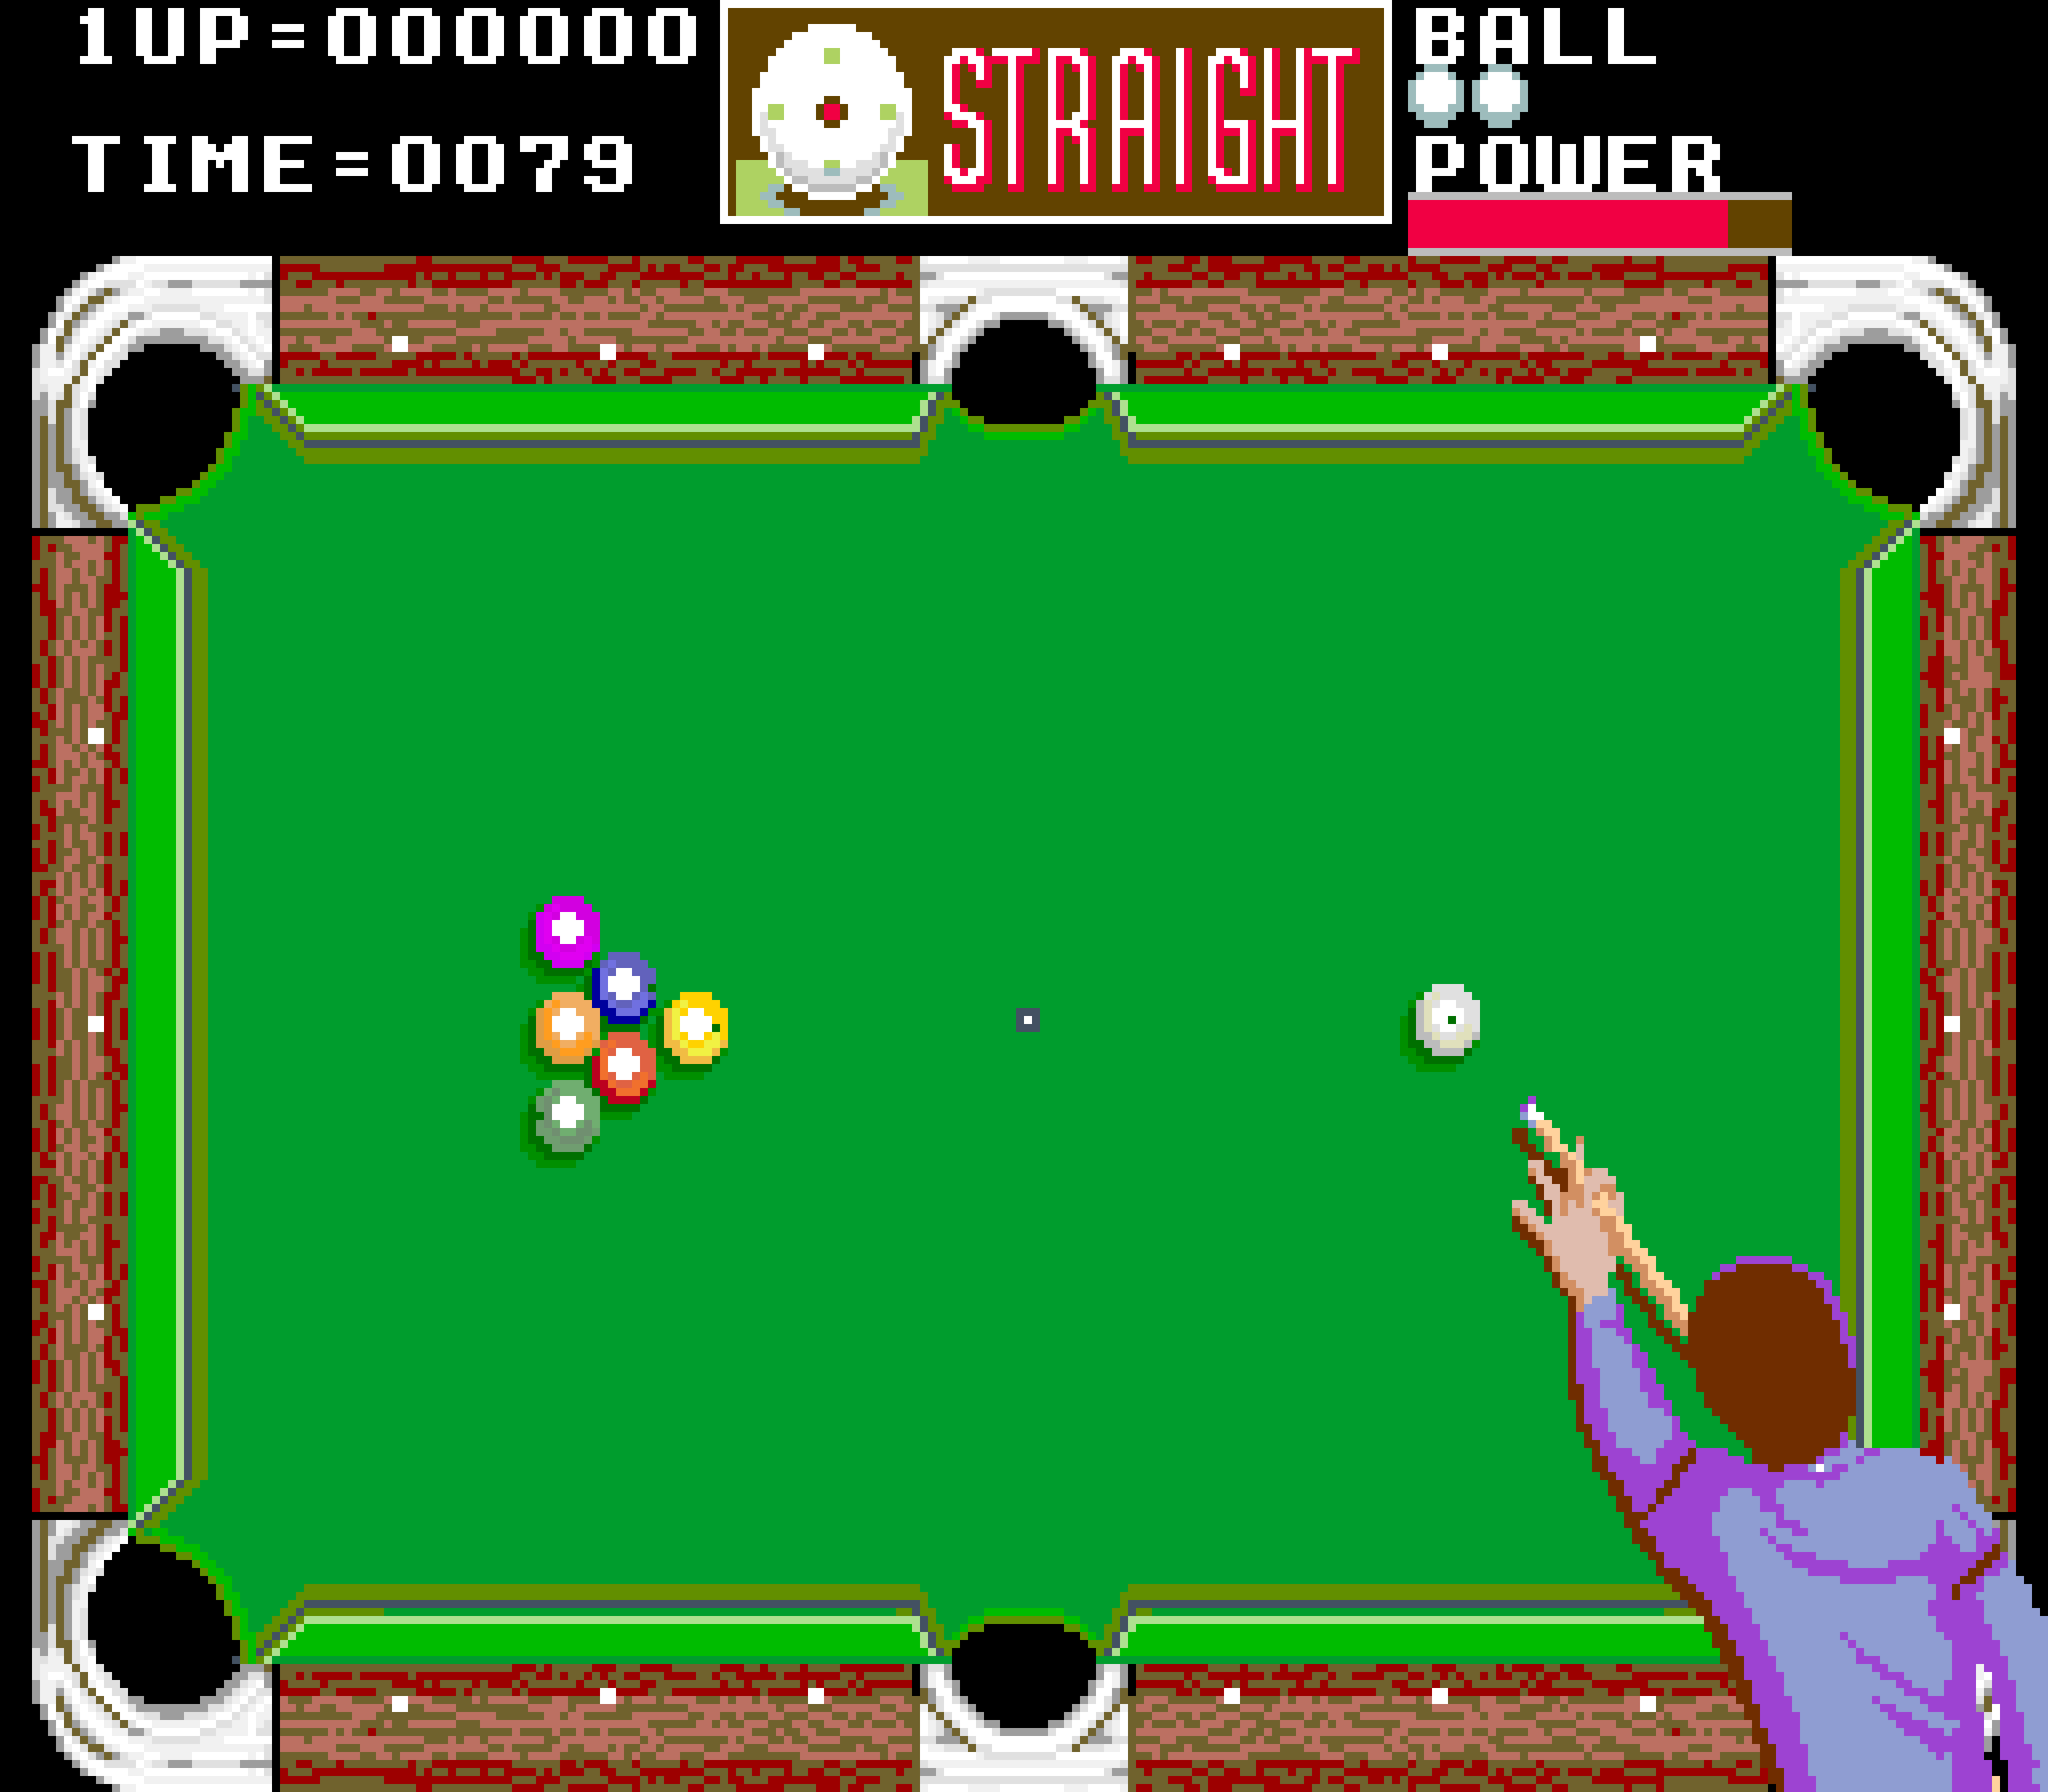
In the original Side Pocket, the dotted line helped the player line up shots, while additional functions on the UI showed where and how hard you were striking the cue ball.
Created by Data East in 1986, Side Pocket was an arcade pool game that challenged players to sink all the balls on the table and achieve a minimum score to progress. As the levels went on, players faced more balls in increasingly difficult locations on the table.
Here, I’ll focus on three key aspects from Side Pocket: aiming a shot, moving the balls, and handling collisions for balls and pockets. This project is great for anyone who wants to dip their toe into 2D game physics. I’m going to use the Pygame’s built-in collision system as much as possible, to keep the code readable and short wherever I can.
Making a pool game
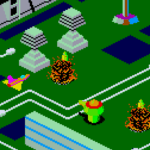
Before thinking about aiming and moving balls, I need a table to play on. I created both a border and a play area sprite using piskelapp.com; originally, this was one sprite, and I used a rect to represent the play area (see Figure 1). Changing to two sprites and making the play area an actor made all the collisions easier to handle and made everything much easier to place.
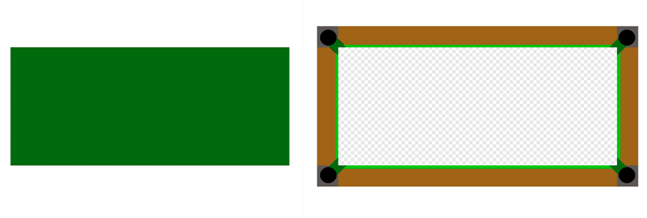
Figure 1: Our table with separate border. You could add some detail to your own table, or even adapt a photograph to make it look even more realistic.
For the balls, I made simple 32×32 sprites in varying colours. I need to be able to keep track of some information about each ball on the table, such as its position, a sprite, movement, and whether it’s been pocketed or not – once a ball’s pocketed, it’s removed from play. Each ball will have similar functionality as well – moving and colliding with each other. The best way to do this is with a class: a blueprint for each ball that I will make copies of when I need a new ball on the table.
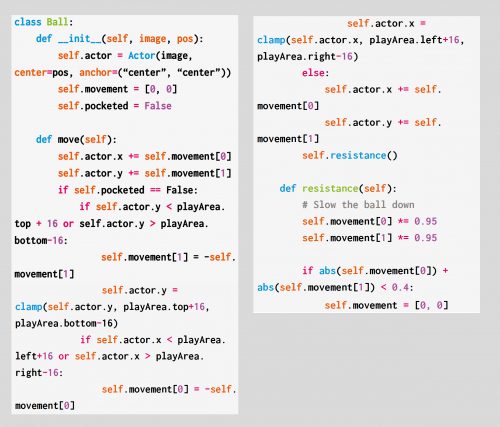
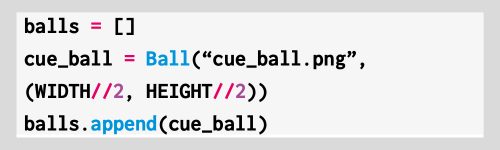
The best part about using a class is that I only need to make one piece of code to move a ball, and I can reuse it for every ball on the table. I’m using an array to keep track of the ball’s movement – how much it will move each frame. I also need to make sure it bounces off the sides of the play area if it hits them. I’ll use an array to hold all the balls on the table.
To start with, I need a cue ball:
Aiming the shot
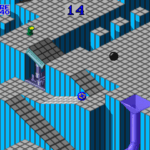
In Side Pocket, players control a dotted line that shows where the cue ball will go when they take a shot. Using the joystick or arrow buttons rotated the shot and moved the line, so players could aim to get the balls in the pockets (see Figure 2). To achieve this, we have to dive into our first bit of maths, converting a rotation in degrees to a pair of x and y movements. I decided my rotation would be at 0 degrees when pointing straight up; the player can then press the right and left arrow to increase or decrease this value.
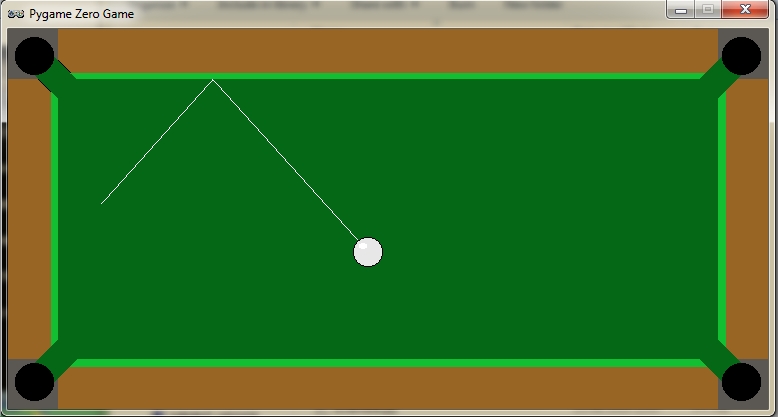
Figure 2: The dotted line shows the trajectory of the ball. Pressing the left or right arrows rotates the aim.
Pygame Zero has some built-in attributes for checking the keyboard, which I’m taking full advantage of.
At 0 degrees, my cue ball’s movement should be 0 in the x direction and -1 in y. When the rotation is 90 degrees, my x movement would be 1 and y would be zero; anything in between should be a fraction between the two numbers. I could use a lot of ‘if-elses’ to set this, but an easier way is to use sin and cos on my angle – I sin the rotation to get my x value and cos the rotation to get the y movement.
I can then use those x and y co-ordinates to create a series of points for my aiming line.
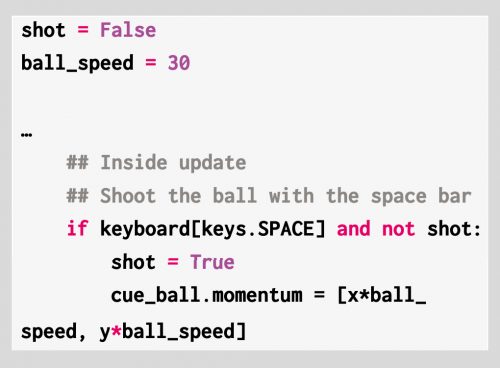
Shooting the ball
To keep things simple, I’m only going to have a single shot speed – you could improve this design by allowing players to load up a more powerful shot over time, but I won’t do that here.
When the shot variable is True, I’m going to move all the balls on my table – at the beginning, this is just the cue ball – but this code will also move the other balls as well when I add them.
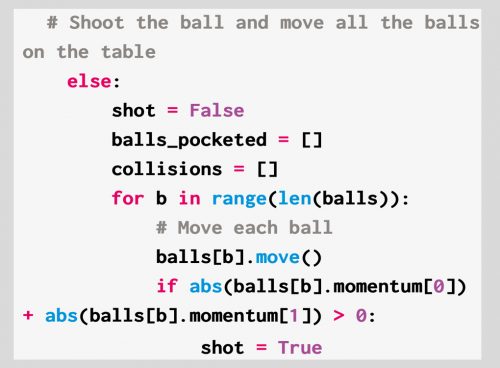
Each time I move the balls, I check whether they still have some movement left. I made a resistance function inside the ball class that will slow them down.
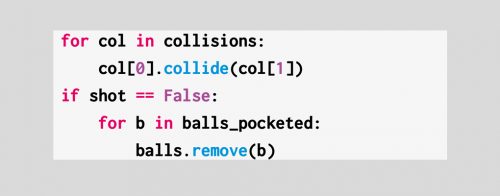
Collisions
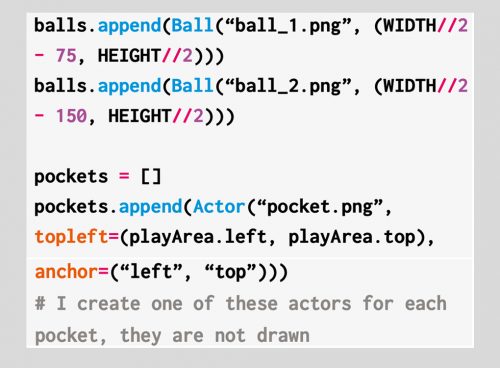
Now for the final problem: getting the balls to collide with each other and the pockets. I need to add more balls and some pocket actors to my game in order to test the collisions.
Each ball needs to be able to collide with the others, and when that happens, the direction and speed of the balls will change. Each ball will be responsible for changing the direction of the ball it has collided with, and I add a new function to my ball class:
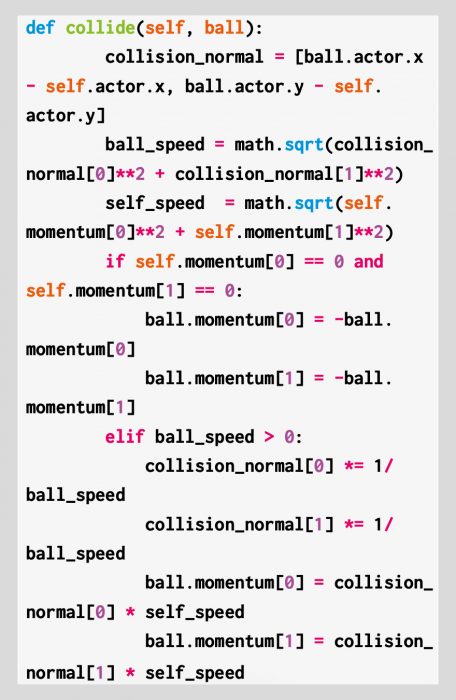
When a collision happens, the other ball should move in the opposite direction to the collision. This is what allows you to line-up slices and knock balls diagonally into the pockets. Unlike the collisions with the edges, I can’t just reverse the x and y movement. I need to change its direction, and then give it a part of the current ball’s speed. Above, I’m using a normal to find the direction of the collision. You can think of this as the direction to the other ball as they collide.
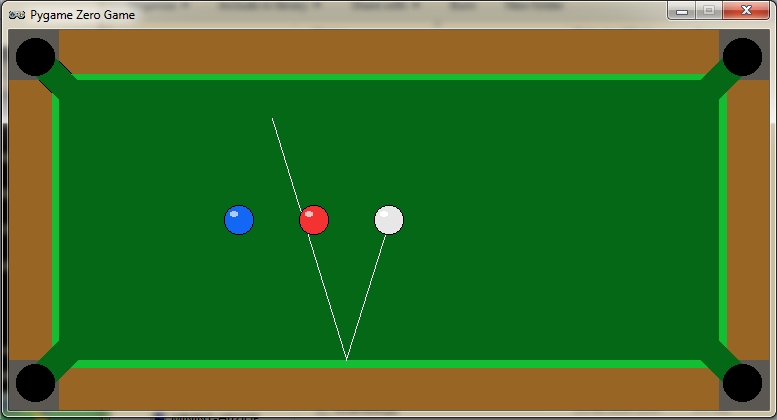
Our finished pool game. See if you can expand it with extra balls and maybe a scoring system.
Handling collisions
I need to add to my update loop to detect and store the collisions to be handled after each set of movement.
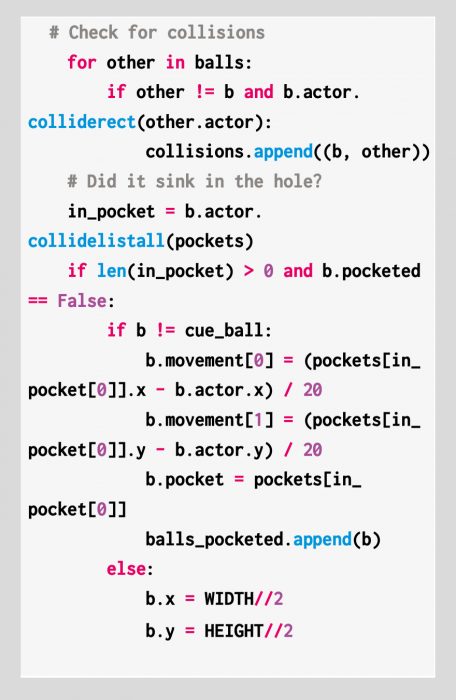
First, I use the colliderect() function to check if any of the balls collide this frame – if they do, I add them to a list. This is so I handle all the movement first and then the collisions. Otherwise, I’m changing the momentum of balls that haven’t moved yet. I detect whether a pocket was hit as well; if so, I change the momentum so that the ball heads towards the pocket and doesn’t bounce off the walls anymore.
When all my balls have been moved, I can handle the collisions with both the other balls and the pockets:
And there you have it: the beginnings of an arcade pool game in the Side Pocket tradition. You can get the full code and assets right here.
Get your copy of Wireframe issue 36
You can read more features like this one in Wireframe issue 36, available directly from Raspberry Pi Press — we deliver worldwide. And if you’d like a handy digital version of the magazine, you can also download issue 36 for free in PDF format.
Make sure to follow Wireframe on Twitter and Facebook for updates and exclusive offers and giveaways. Subscribe on the Wireframe website to save up to 49% compared to newsstand pricing!

1 comment
asia sultan
good
Comments are closed