Build a digitally sovereign second brain
We thought we’d go big this Maker Monday, what with it being the serious business of Back to School and all. Here’s a tutorial from the latest issue of Raspberry Pi Official Magazine that shows you how to keep everything in your brain organised and searchable, from notes to appointments and ideas.
A while ago, we read the book Building a Second Brain by Tiago Forte (Figure 1). It starts with the idea that we are all a little overloaded and bombarded with information, and how overwhelming it can be to not be able to retrieve the information that we need at a later time. The foundation of a Second Brain is to increase the capture and cataloguing rate of information, and the book delves into lots of custom systems to tag, organise, prioritise, and retrieve information. This Personal Knowledge Management (PKM) idea feels similar to the ideas of David Allen and the older, but still brilliant, ‘Getting Things Done’ system.
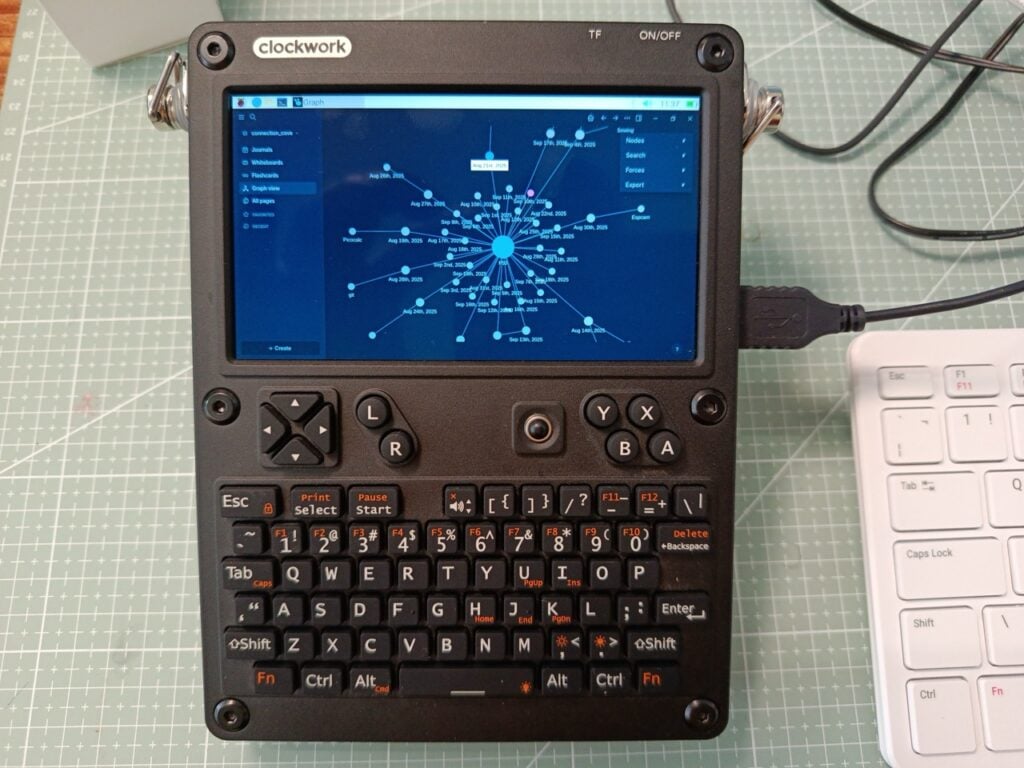
At the heart of these PKM systems is the concept of ubiquitous capture: the idea that, as a start, we need to capture the information of interest. This is also an idea in journalling and is basically being proactive about note-taking. The question then is how to store these bits of information. There are lots of options.
The end of sticky notes
There’s nothing wrong with a pile of sticky notes (or index cards, which are the author’s favourite) and a pen; however, you can quickly end up with a huge pile of notes which need to be physically stored and searched. Of course, lots of people have moved to software applications. Many of the popular operating systems for mobile devices will include some form of note-taking application, and there are many that require you to make an account and store your data in the cloud, so it’s a nice challenge to build a system that doesn’t store your information on another person’s computer. Finally, the solutions we explore here use open source projects so we can examine the code should we need to maximise our privacy and security.

The solution we are going to explore is centred around Logseq, a privacy-focused open source knowledge management system. It’s a really rich piece of software with more features than most people will use, and we’ll only really cover the basics, although the basics are incredibly powerful. Later in the article we’ll use Syncthing, another open source project, to synchronise our second brain created in Logseq across multiple devices. Syncthing is a peer-to-peer continuous file synchronisation tool, which means that it can sync data without passing that data through the cloud/a company’s server. It also encrypts and decrypts the data in transit, so you are nice and secure whilst the data is moving. It’s totally OK to just install Logseq on one machine and have a play with it to see if it can meet your needs.
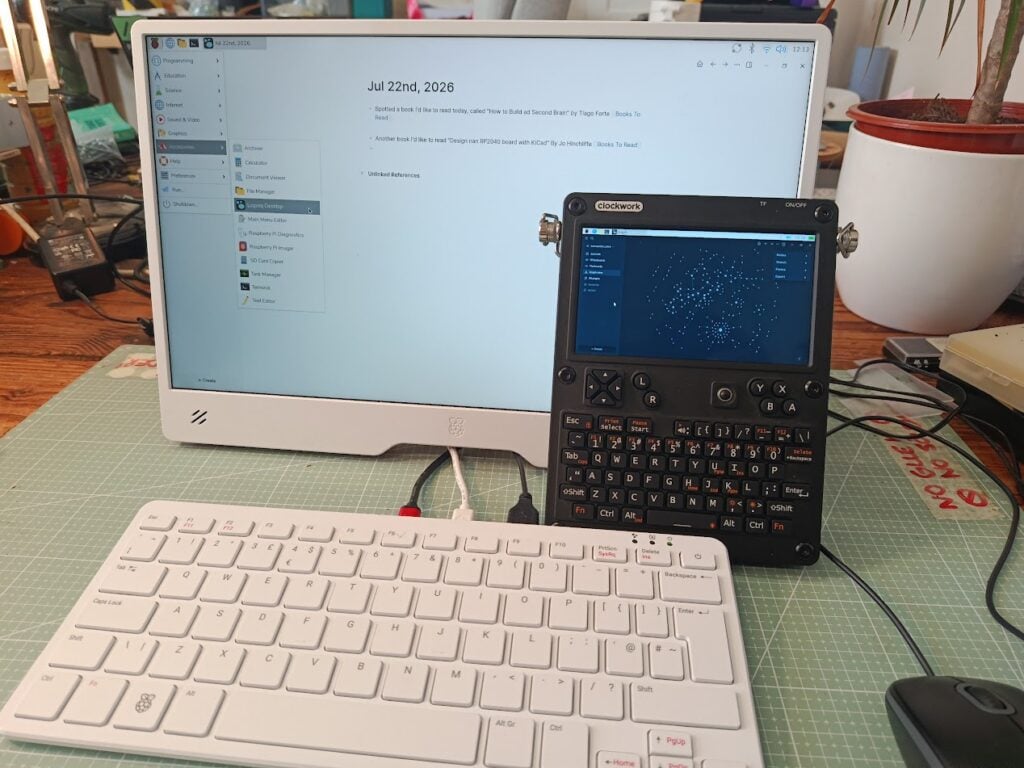
We began by installing Logseq on a Raspberry Pi 500 (Figure 2), but note that the procedure outlined below is the same for any Raspberry Pi board; so, for example, we have this system currently set up on the Raspberry Pi 500, a Raspberry Pi Zero, and our Uconsole, which contains the Raspberry Pi Compute Module 4 board.
Currently, the only option to install a build of Logseq is via Snap. So, if working from a fresh Raspberry Pi OS installation, we’ll need to install the Snap package manager. If you already have Snap installed on your system, then you can skip to installing Logseq.
To install Snap and then Logseq, open the Terminal application and, at the prompt, enter:
$ sudo apt updateWe can then install the latest version of Snap using:
$ sudo apt install snapdWe then need to reboot Raspberry Pi 500:
$ sudo rebootOnce the machine has rebooted, open the Terminal application; we need to install a Snap package called ‘snapd’:
$ sudo snap install snapdWith Snap installed and set up, we can then go ahead and install Logseq using:
$ sudo snap install logseq –channel =ogWith Logseq now installed, you will be able to launch it using the desktop applications menu at Accessories > Logseq Desktop. On launch, Logseq will open a demo page showing a journal-style entry for the current date (Figure 3). In this entry is a basic tutorial on how Logseq works and some of its functions.
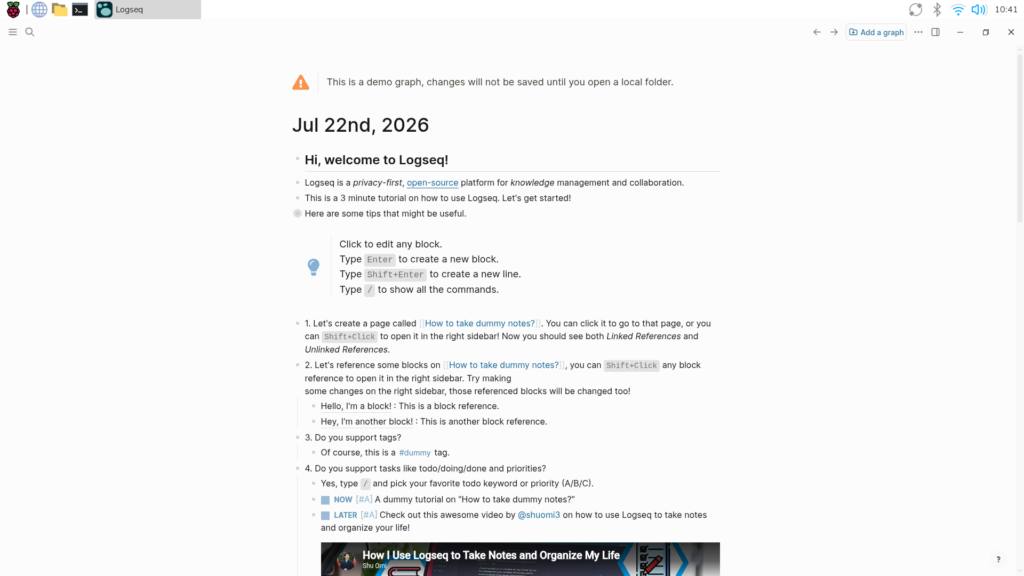
In Logseq terminology, when you create a collection of notes and potentially other assets, you insert them into a ‘graph’. Scrolling on the current demo page, you should find a section where Logseq wants us to specify a folder it can use to contain all our information. You can use an existing folder, but it’s probably better to create a new folder. Click to ‘add a graph’ and then give your folder the title that you want your second brain system to be called; we went with ‘2nd_Brain’, rather unimaginatively. This OG version of Logseq will, in this specified folder, store all the data you input into the system. It essentially creates Markdown files and also stores any uploaded assets (PDFs, pictures, audio, etc.) to an assets subfolder. This means that you could manually copy this entire folder, move it to another machine, and open it in another installation of Logseq.
Filling the brain with information
With the file specified and a new graph created, let’s put some basic information into our second brain system. Whenever you open Logseq, it will create an empty journal page for the current day. Each of these journal dates will become a page item in our system. So let’s type something in the currently empty journal page.
As an example, we typed a note: ‘Spotted a book I’d like to read today, called “How to Build a Second Brain” by Tiago Forte’ (Figure 4). Now imagine we wrote a note about a different book every day. Currently the only way to return to this piece of information in the future is if we remember the date or use the search function. If we’d forgotten the name of the book, however, we could only really search for terms like ‘book’, which might generate a lot of returned results. What we need is to tag our information. Tagging is the secret sauce of Logseq that makes it incredibly useful.
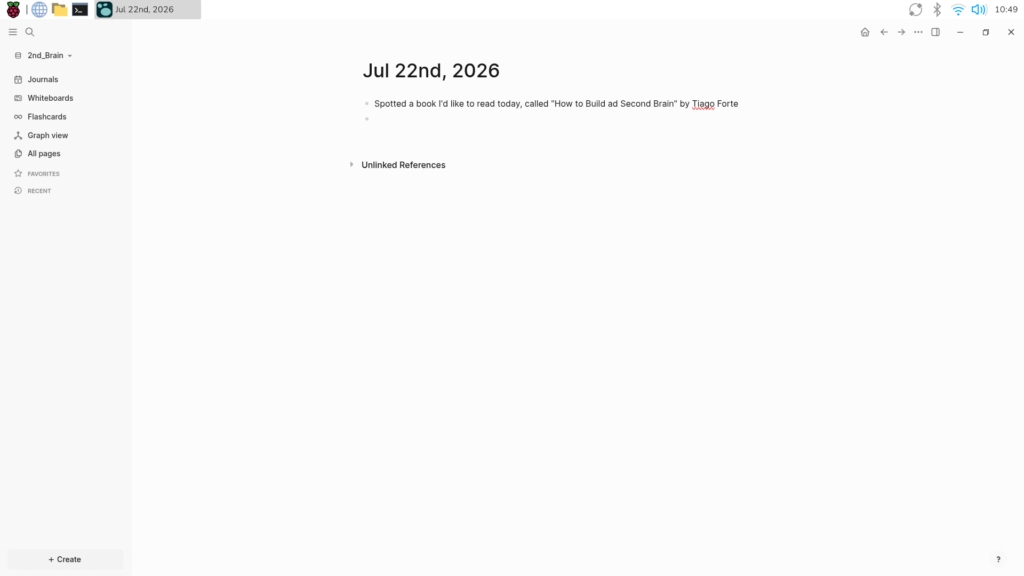
Figure 4: Adding a note without a tag is fine, but the only way to rediscover that tag is to either remember the date it was made or the exact contents
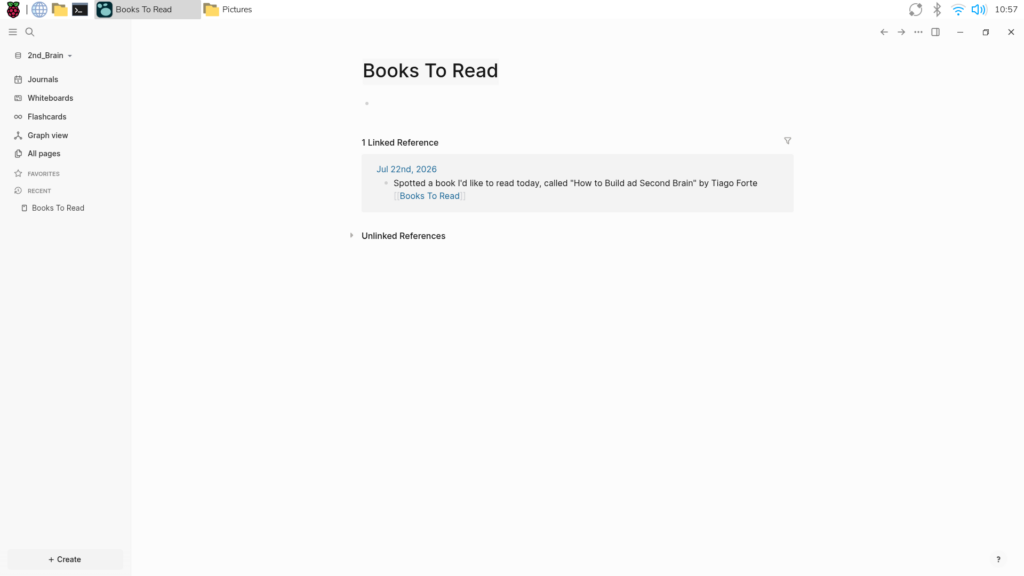
To add a tag to a piece of information, we place the tag term inside two pairs of square brackets. Let’s return to the line we entered earlier and write at the end of the line (though tags can be placed anywhere in text) ‘[[Books To Read]]’ and then press ENTER. Note that the tag text will become a clickable link (Figure 5). If we click that tag, the link then takes us to a new page, as every tag we add to Logseq becomes a new page. On the new [[Books To Read]] page, we will see the reference to our line, ‘… “How to Build a Second Brain” by Tiago Forte’. If we click the back arrow in the upper toolbar, we can navigate back to our journal. Let’s add a second line, ‘Another book I’d like to read, “Design an RP2040 Board with KiCad” by Jo Hinchliffe’. This line will always be listed in the current journal page, but again we can add the [[Books To Read]] tag as we did previously and it will be populated to that tag page. If we write a book title every day into separate journal entries, so long as we use the [[Books To Read]] tag, they will all appear on the tag page (Figure 6). Note that in the image we made a typo in the book title; in a way, this doesn’t matter — just be sure to spell your tags correctly!
However, tags are free and unlimited, so it’s worth tagging information widely with lots of tags, thinking about how you might remember them in the future. As an example, in our second brain Logseq setup, we have some Customs and Excise tariff numbers; these numbers are unique for different types of goods that you sell, and it can be quite hard when faced with a new item to research and identify the correct tariff number as they are quite complex and there are a lot of them. It’s definitely the type of information you want to keep note of rather than have to discover every time. If we consider how we might think about these numbers, it’s pretty clear to tag them as [[Tariff]], but sometimes we might think [[Customs]] or might want the tariff number for a particular product or project, so we might use the [[Product Name]] as a tag. Adding multiple tags to items of information increases your chances of finding your way back to the info when needed, as the same piece of information will appear regardless of which tag you remember or use in the future.
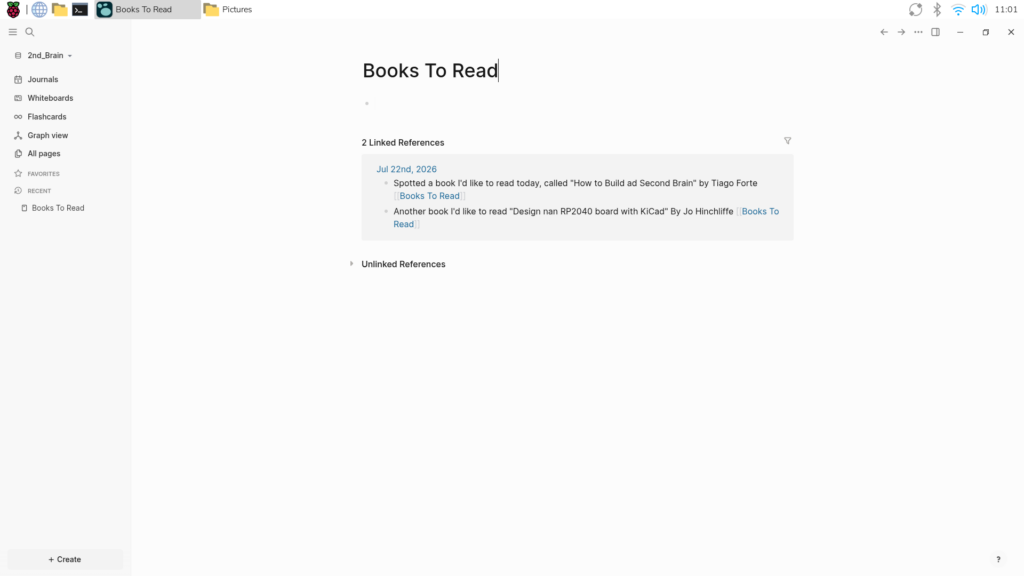
Figure 6: The ‘Books To Read’ tag page begins to collect all the inputs listed with that tag
We need to move on to other aspects of the system, but it’s worth noting that you can type ‘/Upload an asset’ (or rather start by writing ‘/U’, which will autocomplete) to add files of pretty much any type to an entry. You can then tag these in the usual way, and the asset will be copied to the assets folder in your designated directory. This means you don’t have to worry about copying and pasting items, or losing links to items, as they are all stored in the folder. Finally, note that you can embed links and videos, and even highlight and annotate PDFs, in Logseq, tagging the exact part of a PDF to return to later.
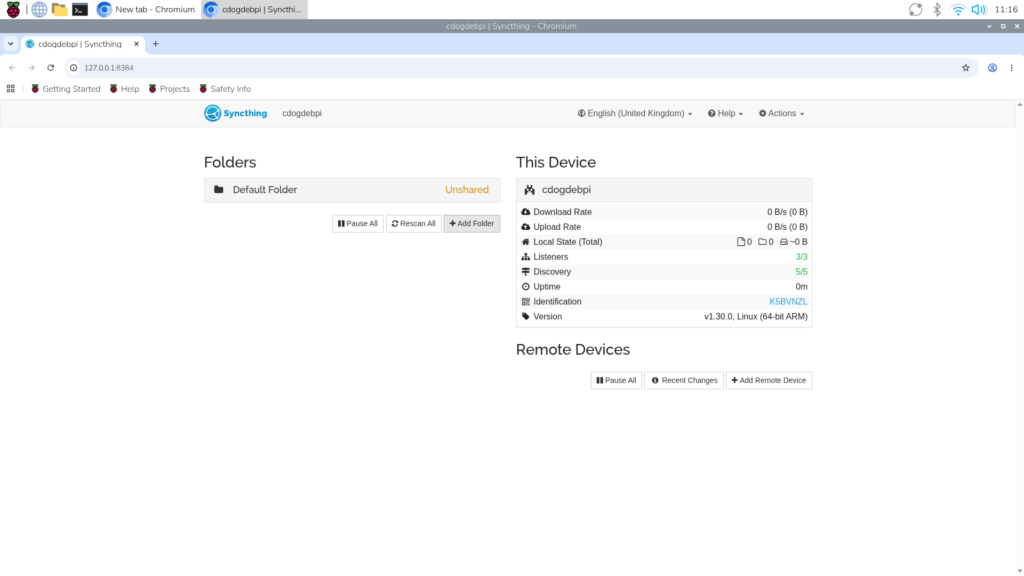
Figure 7: Syncthing Web UI is the admin console for Syncthing, allowing you to connect devices and share directories and files
So we have the basis of our second brain setup, but we’d like it to be accessible on more than one device. Our approach for this will be to install Logseq on another device, and then use Syncthing to synchronise folders so that our second brain folder is on both devices and up to date (Figure 7).
To install Syncthing on Raspberry Pi, it’s best to first run:
$ sudo apt update

$ sudo apt upgrade
…to make sure our system is up to date. Then we need to add the ‘apt-transport-https’ package to the apt service by running:
$ sudo apt install apt-transport-httpsWe then need to store the Syncthing GPG keys on Raspberry Pi in our keyrings directory. In a nutshell, this means that the Syncthing packages we install are legitimate and are sourced from the right place. To do this, run the following command:
$ curl -s https://syncthing.net/release-key.txt | gpg --dearmor | sudo tee /usr/share/keyrings/syncthing-archive-keyring.gpg >/dev/nullWe can now add the Syncthing repository with:
$ echo "deb [signed-by=/usr/share/keyrings/syncthing-archive-keyring.gpg] https://apt.syncthing.net/ syncthing stable" | sudo tee /etc/apt/sources.list.d/syncthing.listWe can then update the packages once again with:
$ sudo apt updateAnd then finally install Syncthing with:
$ sudo apt install syncthingOnce it’s installed, you will find two Syncthing items in the applications menu: one is a simple ‘Start Syncthing’ which sets the service running; the other is ‘Syncthing Web UI’. First, double-click the ‘Start Syncthing’ application, then double-click the ‘Syncthing Web UI’. This should now launch the default web browser and will land on a default Syncthing admin page for the device. From here, we can set up files and directories for synchronisation.
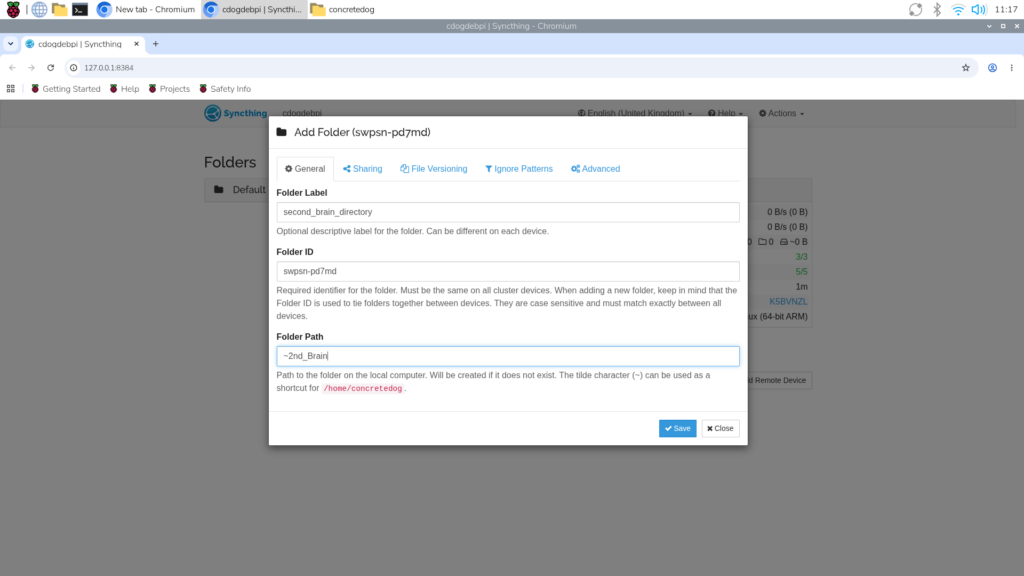
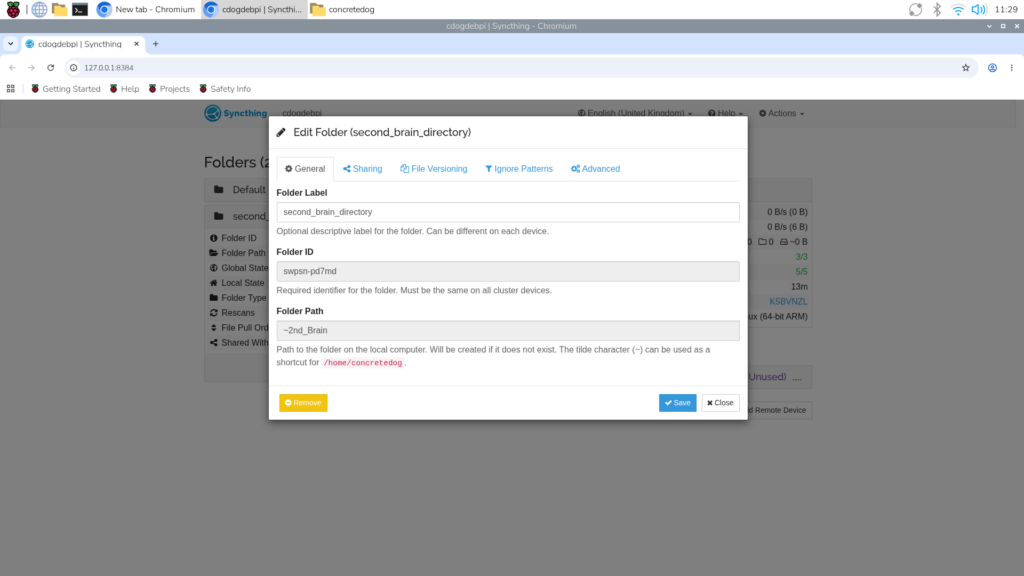
First, let’s click the ‘Add Folder’ button. In the ‘Add Folder’ dialog box (Figure 8), we can add a folder label — for example, ‘second_brain_directory’, as we are going to share the directory we made for our Logseq second brain files. Leave the Folder ID with the default generated identifier string, and then in the last input, Folder Path, set the exact folder path to match where the Logseq folder you made is. So for example, if you made your Logseq folder in the default user directory of a Raspberry Pi and you called it ‘2nd_Brain’, you can input the tilde (~) character (which means the same as /home/username) and write ~/2nd_Brain. Clicking Save sets this file to be shared.
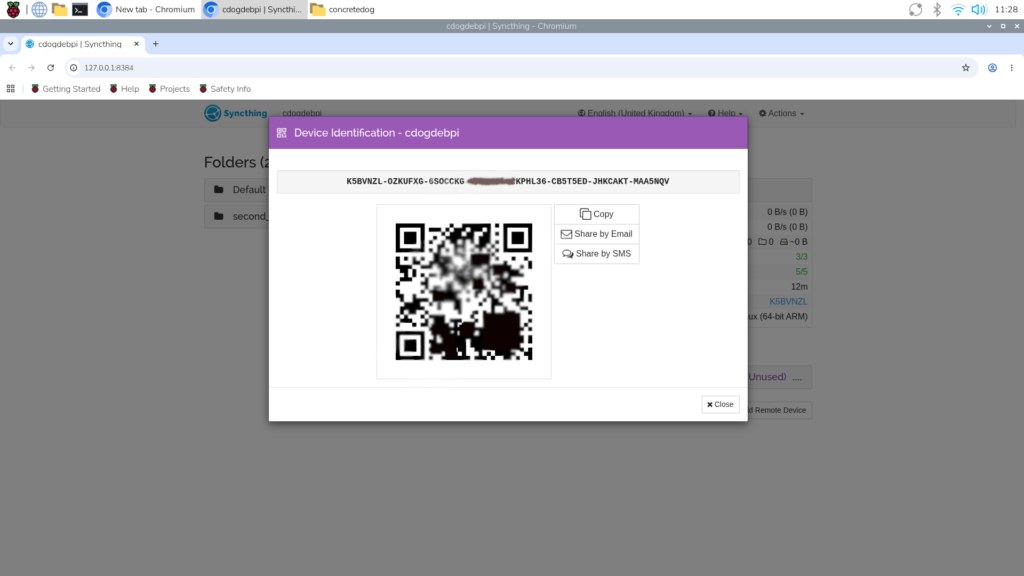
On another device with Logseq and Syncthing installed (we used our Uconsole), on the same Web UI page you can click on the short name identification in the ‘This Device’ area. Clicking this launches a dialog box with a QR code and a long-form ID string for the device (Figure 9). This is a 56-digit string with dashes. Back on the Raspberry Pi 500, you can click the ‘Add Remote Device’ button and type in the long device ID; note that you don’t need to add the dashes or spaces, just the long string. If you leave the Device Name section empty, it will populate with the random generated device name on the other device; or you can add a more descriptive name such as ‘Uconsole’ or ‘Pi Zero’ here.
Quick tip
Note that you don’t have to be on the same network for Syncthing to synchronise your files.
Finally, by clicking on the folder we created to share earlier on the Raspberry Pi 500, and then clicking the Edit button, we can move over to the Sharing tab in the dialog box, where we should be able to see the remote device we just added (Figure 10). If we tick the box to share with that device, we can then click Save. Give everything a couple of minutes to work through the networks and then check on the other device; you should see a notification that the other device wants to share a folder with you. Accept the folder and follow the instructions to set up a path to a directory to synchronise that folder to. All that then remains is to open Logseq on the second device and click ‘add graph’, navigating to the synchronised folder we just made. This means if we add or change anything in Logseq on our first device (Raspberry Pi 500) or our second device (Uconsole), then these changes appear on both devices, keeping our Logseq second brain system up to date. You can of course repeat this process, sharing and synchronising your 2nd_Brain Logseq folder onto as many devices as you want.
Careful now!
Note that synchronising folders is not a backup! If you accidentally delete part or all of your Logseq folder content, this will propagate through Syncthing and delete it everywhere! A solution to this is to, on one or more devices, set up a system that periodically backs up your folder to another folder.
To do this, we will create a small Bash script that will copy a target folder to a different folder that we won’t sync. We’ll then use the cron service to make this script run periodically so that we don’t have to think about it. You can do this on any of the Raspberry Pi devices, or indeed more than one; however, it would be most useful on a device which can be left always on. In our system, we have it set up on a Raspberry Pi Zero W which runs headless and is an ‘always on’ device in our workspace. However, we’ll set this up here on the Raspberry Pi 500, as it’s easy to do by typing commands into the terminal.
To begin, launch the Terminal application, and in the root directory of your Raspberry Pi device, launch the nano text editor to write a Bash script:
$ sudo nanoIn nano, type the following small Bash script, replacing LOGSEQ_Directory_Path with the path to your Logseq folder. If your folder is in the home directory, you don’t need any leading edge slashes; so, backing up our ‘2nd_brain’ folder in the home directory to ‘backup_2nd_brain’ is really straightforward to input.
#! /bin/sh

rsync -avh LOGSEQ_Directory_Path
Backup_Directory_Path
Save this file with a name like backup_script.sh.
We need to set this file as executable, so in the same working directory as the script, we need to run:
$ sudo chmod +x backup_script.shWe can now test the backup_script.sh script by, in the same directory, executing it with:
$./backup_script.shYou can then use the File Manager (or the Terminal) to check if the files have been copied to the newly created backup folder. Finally, we can automate this script using a cronjob. We can do this by editing a file called crontab. Type:
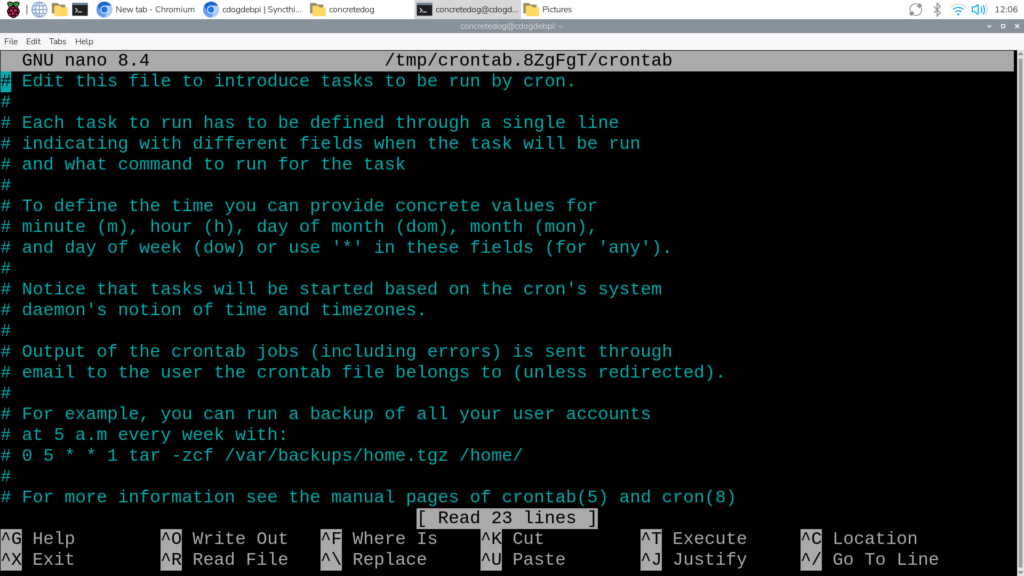
$ crontab -e…in the terminal. If this is the first time you have done this, it might ask which editor you would like to use; select nano from the list. In the now-open crontab file, there is a long section of comments that give a great overview of how the cron system works (Figure 11). At the end of the file, we can add a line that has the following structure: minutes, hour, day of month, month, day of week, followed by the command. You can leave slots empty using an asterisk (*) so you can construct values for different automated periods. So, for example:
46 10 * * 1 /home/concretedog/backup_script.sh…would execute the backup_script.sh script every Monday at 10.46am. Note that if you wanted to run the script once a day, you’d simply leave the day of week value empty, such as:
30 10 * * * /home/concretedog/backup_script.shOf course, you can extend and enhance the system; it would be great to back up the folders to an attached SSD, or you might like to explore how to add monitoring and logging to your cron system. Logseq and Syncthing are available for most desktop distributions, and they are also ported to smartphone operating systems, meaning you can carry your private, secure, and backed-up second brain with you always!
Find more Raspberry Pi projects in Raspberry Pi Official Magazine
This article appears in issue 169 of Raspberry Pi Official Magazine, which you can access online. You can also subscribe to the print version of our magazine. Not only do we deliver worldwide, but those who sign up to the six- or twelve-month print subscription will receive a FREE Raspberry Pi Pico 2 W!

You can find Raspberry Pi Official Magazine on Facebook, X, Threads, LinkedIn, and Mastodon. You can also contact the team via email: [email protected]



No comments
Jump to the comment form