Tinkernut’s do-it-yourself Pi Zero audio HAT
Why buy a Raspberry Pi Zero audio HAT when Tinkernut can show you how to make your own?
Raspberry Pi Zero audio
Unlike their grown-up siblings, the Pi Zero and Zero W lack an onboard audio jack, but that doesn’t stop you from using them to run an audio output. Various audio HATs exist on the market, from Adafruit, Pimoroni and Pi Supply to name a few, providing easy audio output for the Zero. But where would the fun be in a Tinkernut video that shows you how to attach a HAT?

“Take this audio HAT, press it onto the header pins and, errr, done? So … how was your day?”
DIY Audio: Tinkernut style
For the first video in his Hipster Spotify Radio using a Raspberry Pi Tinkernut Workbench series, Tinkernut – real name Daniel Davis – goes through the steps of researching, prototyping and finishing his own audio HAT for his newly acquired Raspberry Pi Zero W.
The build utilises the GPIO pins on the Zero W, specifically pins #18 and #13. FYI, this hidden gem of information comes from the Adafruit Pi Zero PWM Audio guide. Before he can use #18 and #13, header pins need to be soldered. If the thought of soldering pins to the Pi is somewhat daunting, check out the Pimoroni Hammer Header.
You’re welcome.
Once complete, with Raspbian installed on the micro SD, and SSH enabled for remote access, he’s ready to start prototyping.
Ingredients
Tinkernut uses two 270 ohm resistors, two 150 ohm resistors, two 10μf electrolytic capacitors, two 0.01 μf polyester film capacitors, an audio jack and some wire. You’ll also need a breadboard for prototyping. For the final build, you’ll need a single row female pin header and some prototyping board, if you want to join in at home.
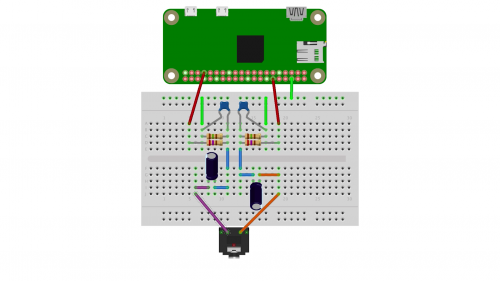
It should look like this…hopefully.
Once the prototype is working to run audio through to a cheap speaker (thanks to an edit of the config.txt file), the final board can be finished.
What’s next?
The audio board is just one step in the build.
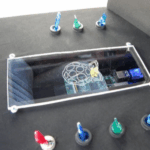
Spotify is such an awesome music service. Raspberry Pi Zero is such an awesome ultra-mini computing device. Obviously, combining the two is something I must do!!! The idea here is to make something that’s stylish, portable, can play Spotify, and hopefully also display visuals such as album art.
Subscribe to Tinkernut’s YouTube channel to keep up to date with the build, and check out some of his other Raspberry Pi builds, such as his cheap 360 video camera, security camera and digital vintage camera.
Have you made your own Raspberry Pi HAT? Show it off in the comments below!


4 comments
mahjongg
Don’t forget to redirect the PWM audio to the GPIO pins by adding dtoverlay=pwm-2chan,pin=18,func=2,pin2=13,func2=4
to /boot/config.txt
(the above dtoverlay= line expects the use of GPIO 18 and GPIO 13 for the GPIO’s used for PWM audio, but GPIO 19 is also a possibility )
Tyler Gibbs
thanks!!!
glenn
HOw many watts can this drive?
I assume it will be just small (less than 3W?) i suppose?
Just asking before i buy a small speaker.
Jeff
What if I only need mono-audio on my project, but am really tight on GPIO pins?
It looks like I could build one leg of the hardware, but is it possible to put the same pin in the config.txt for both left and right?
Comments are closed