The Ventura problem
Update: This problem was fixed in macOS Ventura 13.1
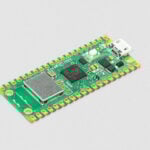
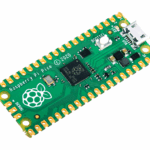
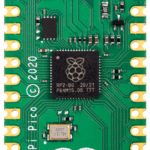
We’ve worked to make it as easy as possible for you to load your code onto a Raspberry Pi Pico or other RP2040-based boards. All you have to do is to press and hold the BOOTSEL button, plug the board into your computer, and it’ll mount as a mass storage volume. Then you can just drag and drop a UF2 file onto the board.
This works great. Right up until it doesn’t.

At the beginning of last week Apple released macOS Ventura, the next major version of their desktop operating system for Mac computers. We’d been monitoring a problem with Ventura since the early betas back in August with the hope that, on release, things would be working normally.
Unfortunately, this wasn’t the case. Right now, if you’re using a Pico with your Mac, we don’t recommend upgrading to Ventura (at least not yet).
What is wrong?
If you plug a Raspberry Pi Pico, or other RP2040-based board, into a Mac running Ventura, the RPI-RP2 “virtual” volume will be mounted as normal. Unfortunately, if you then try to drag-and-drop a UF2 file onto the volume, the process doesn’t complete, throwing a kPOSIXErrorENOATTR ("Attribute not found") error.

Why is this happening? Our current assumption is that Apple has implemented a change in the way that the macOS Finder deals with extended attributes.
The issue seems to be related to Finder trying to write, and then read back, extra metadata in addition to the UF2 file we’re trying to copy. Unfortunately, the USB volume (RPI-RP2) that the RP2040 exposes when in BOOTSEL mode is a “fake” volume. There is no mutable storage backing the volume. Instead, the UF2 file sectors are recognised and processed as they are written to the volume. So while additional writes to the volume will succeed, reading back the data will give the wrong contents.
Something has clearly changed in the move to macOS Ventura as everything “just worked” before, and continues to work on previous versions of macOS, and on other platforms such as MS Windows and Linux.
We’re not entirely sure what the exact change is; possibly Finder is now carrying out an additional re-read of the metadata after write, or it could be that there has been a change in the way errors are handed based on reading incorrect data. There may even have been some sort of change to the default caching behaviour whereby the data was always read back, but previously it was being read back from the disk cache — as it was small and just-written — and now macOS is either bypassing the cache, or the data itself isn’t being cached any more. It could be a number of things, or even a combination of several changes.
Isn’t that your problem?
In short, no. This is going to affect a lot of people, and not just here at Raspberry Pi.
Right now we know that things like deploying UF2 files (to RP2040-based boards) or Hex files (to the micro:bit or other DAPLink/ST-Link based boards) are affected.
However, using “fake” virtual volumes is also a common mechanism employed by other embedded devices which support firmware updates over USB. Most of these simply do not have the resources to back the state of the entire drive, which is the reason that the UF2 format exists. So there are any number of consumer devices that use a very similar mechanism for firmware updates, and are likely also affected.
So to be clear this is not a “UF2 problem” or a “Raspberry Pi” problem. The problem isn’t specific to UF2 files and the UF2 standard, and it’s not specific to Raspberry Pi devices. It will affect any device using a “fake” virtual volume, of which there are many. So this isn’t a Microsoft versus Apple problem, or a Raspberry Pi versus Apple problem, despite some conspiracy posts to the contrary. (Seriously, conspiracy theorists: where do you find the time?)
Are there any workarounds?
There are at least two workarounds to the problem. But essentially, they both do the same thing: take the macOS Finder out of the picture, and copy the UF2 to the virtual volume without involving those pesky extended attributes and additional resource forks.
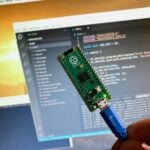
Use the command line
This is probably the easiest workaround for most people who are using Ventura.
Instead of using the Finder to drag and drop our UF2 file onto the RPI-RP2 volume, we can use the command line. If you pass the -X flag to the cp command you can successfully copy a UF2 onto your board, as passing this flag to the command instructs it to not copy extended attributes or resource forks, solving the problem.
Press and hold the BOOTSEL button, plug the board into your computer. Open a Terminal, and navigate to the directory where your UF2 file lives, then type:
$ cp -X blink.uf2 /Volumes/RPI-RP2/An error will be thrown in the Terminal window, and you’ll also see the normal “Disk Not Ejected Properly” error notification at the top right. You can ignore both of these warnings, because the UF2 file has been correctly copied to the virtual volume.

Your code should now be running on your Raspberry Pi Pico.
Update: According to a comment posted to the Github issue in the ARM Mbed DAPLink thread on this problem, using cp -X fails to work for firmware files >1MB in size as data is being written non-sequentially. Instead, you should use rsync which does work. This shouldn’t be a problem for UF2 files as the file format is designed to avoid problems like this, as each block stores its own address as well as the total number of blocks so the fact they’re being written non-sequentially shouldn’t matter.
Alternatively, if the errors bother you, you can use the rsync command,
$ rsync blink.uf2 /Volumes/RPI-RP2/which will also copy your UF2 to the board.
Finally, we offer something called picotool. This is a tool for inspecting RP2040 binaries and interacting with RP2040 devices; it’s open source and available from its Github repository, and amongst other things, it can be used to load binaries onto your Raspberry Pi Pico. If you already have the Pico SDK installed, you can download the picotool source and build it on your Mac as follows:
$ git clone -b master https://github.com/raspberrypi/picotool.git
$ brew install libusb-1.0-0-dev
$ cd picotool
$ mkdir build
$ cd build
$ export PICO_SDK_PATH=~/pico/pico-sdk
$ cmake ../
$ make
This will create a picotool command-line binary, putting it in the build/picotool directory. You can then copy a UF2 file onto your Raspberry Pi Pico by typing something like:
$ picotool load blink.uf2More information on picotool can be found in Appendix B of the “Getting started with Raspberry Pi Pico” book. It’s a very flexible tool, and can do a lot more than just load binaries onto the board.
Use the SWD port
The most robust method of copying a program onto your Raspberry Pi Pico is to use the SWD port.
Serial Wire Debug (SWD) is a standard interface on Cortex-M-based microcontrollers, which the machine you are using to develop your code (commonly called the host) can use to reset the board, load code into flash, and set the code running. Raspberry Pi Pico exposes the RP2040 SWD interface on three pins at the bottom edge of the board.
On a Raspberry Pi, you can connect the Pi’s GPIOs directly to the Pico’s SWD port, and load code from there.

On other machines — like a Mac — you will need an extra piece of hardware called a debug probe to bridge a connection on your host machine to the SWD pins on the Pico. One of the cheapest ways to do this is to use another Pico as the debug probe. How to do this is covered in Chapter 5 and Appendix A of the “Getting started with Raspberry Pi Pico” book.
When will this be fixed?
Honestly, we don’t know.
We’re talking with Apple, as are others we’ve talked to at companies like ours, as well as a number of folks associated with Arm; but only indirectly. We don’t have direct contact with the Finder team, who are remarkably hard to get in touch with.
We’re keeping track of developments over on Github as are others, including Arm Mbed DAPLink, Adafruit, and MicroPython. However, at the time of writing, the latest beta release Ventura candidate 13.1 (22C5033e) still exhibits the new behaviour.
So what can I do to help?
The way to report a bug to Apple, and offer feedback that this matters to you, is to use their Feedback Assistant. On your Mac, go ahead and open Apple’s Safari browser — it has to be Safari even if you normally use a different browser like Chrome, or Firefox — and type applefeedback:// into the address bar. This will open the Feedback Assistant desktop application.

Log in with your Apple ID, and go to “File > New Feedback” to create a new feedback issue. Use “macOS” as your topic, and you’ll then be presented with a form.

Please be polite, and outline the problem, and why it matters. Being abusive, or rude, isn’t going to help.
When you file your feedback you’ll be given a Feedback Number that you can refer to in future correspondence. So in the description section of your feedback, if you could mention our Feedback Number, which is FB11725030, as well as pointing both at this blog post for clarification along with our Github issue, that would be enormously appreciated. It will also help link your feedback to ours, and show that this issue is going to affect a lot of people.
Thanks for your help – we appreciate it.
Update: I’ve gone ahead and hacked together a quick macOS Shortcut. If you add it as a Quick Action — you’ll need to give it permission to use shell scripts— afterwards you can just right-click on your UF2 and select “Quick Actions > Copy to RPI-RP2” and your UF2 will be copied to your Pico.

If you want to go down this route, you won’t have to open the Terminal anymore to copy your UF2 to your Raspberry Pi Pico.
Update: The problem has now been fixed in macOS Ventura 13.1. You can update the OS on your Mac by opening the System Settings application, and clicking on “General” in the sidebar, and then “Software Update” in the main panel.

Your Mac will check for updates and prompt you to download and install the new version of the operating system. Your Mac will reboot during the update. Afterwards you will be able to drag-and-drop UF2 files on to your Raspberry Pi Pico, or other RP2040-based boards, as normal.


33 comments
Lafcadio
I’m glad I hadn’t got round to updating yet! Thank you for letting us know. I’m gong to file a bug report later today.
Raspberry Pi Staff Alasdair Allan — post author
Every little helps! Thank you!
Dave
My old girl won’t won’t go on the Ventura Highway.
So she may be old and slow but I could update my Pico if I need to. Every cloud …
I hope they sort this out soon for any one affected.
Raspberry Pi Staff Liz Upton
We’re crossing fingers. If you’re able to submit a bug report to Apple about this, we’d be very grateful!
Ben
If you don’t want to run Safari, you can open the feedback assistant from the finder (CMD-K or using the “Connect to server” item in the “Go” menu) or by typing “open applefeedback://” from Terminal.
Raspberry Pi Staff Alasdair Allan — post author
Good to know.
Raspberry Pi Staff Liz Upton
I *like* days when the comments section teaches me something. Thanks Ben!
Ron Alexander
I am cool with all this BUT have a question. I have created a few sketches on the PICO and PICOW using Arduino IDE but have not encountered a UF2 file yet. Am I missing something?
Raspberry Pi Staff Alasdair Allan — post author
The Arduino IDE hides all of this behind its normal interface. However, it’s not using the Finder to do its uploads so I think (although I must admit to not having tested it yet) you shouldn’t have a problem.
Jon Hendry
What happens if you mount the Pico in a Linux or Windows VM running on a Ventura Mac?
Raspberry Pi Staff Alasdair Allan — post author
Should work fine. The VMs have a direct interface into the USB stack and shouldn’t have a problem.
Alessandro Ranellucci
Another workaround is to use the Arduino upload (with the IDE or the command line tool arduino-cli) which it is not affected by this issue as it’s based on picotool.
Raspberry Pi Staff Alasdair Allan — post author
Is that the community or the official port? Hadn’t realised that the picotool source code had be used there. Interesting!
Ed
Thanks for bringing attention to this matter. I had *just* updated but fortunately the fix is simple enough for now: just use cp -X. One thing: in the build instructions for picotool you use “brew”. That is a third party package manager which needs to be installed first, IF you choose to use that one. It doesn’t have to be brew. Alternatively, you can use MacPorts and the command would be “sudo port install libusb-devel”.
Raspberry Pi Staff Alasdair Allan — post author
Yup. Except we use Homebrew extensively in our “Getting Started” instructions, and other documentation. So folks working with the C SDK, who are most likely to go down the picotool route, will already likely have it installed.
Michael Zimmermann
I’ve never really liked that anyone’s software uses fake-volumes to mi-use a storage device as a data transport. But of course I understand that it was done for usability and to prevent requiring additional software.
That being said, I hope that this gets worked out quickly.
Pushing for an alternative standard long-term that uses USB bulk transfers instead of fake drives might be desirable but I don’t really see that happening given the small target audience.
Raspberry Pi Staff Alasdair Allan — post author
I must admit that just yanking the volume out from under the operating system is a bit cruel to the operating system. I wish the UF2 standard had a bit more of a gentle disengage. Unfortunately, there isn’t a way AFAIK for a USB volume to cleanly tell the OS “Hey, I’m going away now”?
Dave Comer
I found that by using Windows 10 under Parallels Desktop 18.1.0 I am able to copy the uf2 and have it execute fine on the pico2040. Clearly, this is not the optimum way, but it works for me. Presumably, because finder is not involved (you have to select the Windows 10 VM for the USB connection, of course.) With that said, I prefer using the SWD. Just thought I’d chime in with yet another work aroung.
Kelly Fitzpatrick
Apple M1 Pro with Ventura 13.0.1 – NONE of the workarounds described above (cp -X, rsync, ditto) work for me with Pico W. Same Pico W connects fine on a Windows 11 machine. Any suggestions?
Chris Andrew
Hi Kelly, I have had a similar experience as well as being unable to detect the board in Arduino IDE. The only success I’ve had thus far was copying the Pico W blink file downloaded from the official Pico guide PDF using the above cp -X method, after many failed attempts using the very same method.
Raspberry Pi Staff Alasdair Allan — post author
I have 13.0.1 installed on my Mac, both cp -X and rsync work for me with this version. Sorry, must be something else happening for you.
Uden
using the file-manager Forklift to copy the UF2 files to the pico seems to work. I just copied the MicroPython UF2 file rp2-pico-20221128-unstable-v1.19.1-721-gd5181034f.uf2 (615 kB).
Jesse Brower
Are there any updates to this that can be shared?
Raspberry Pi Staff Alasdair Allan — post author
Sorry, nothing beyond the fact we’re in touch with Apple and they’re looking at the problem.
Chris Andrew
@Alasdair Allan, thank you for the helpful article.
Robert C
Hoping this gets resolved soon. Thankfully the shortcut that was provided works just fine for me on my M2 MacBook with 13.0.1
Sean Clark
I am finding that this problem is happening with the BBC Micro:bit as well as the Pico. Could you two gang up and get Apple to prioritise a fix!?
Raspberry Pi Staff Liz Upton
As it happens, we have done! Keep watching this space: we’ll let you know as son as we have anything.
Thomas Dam
Just updated my Mac to Ventura 13.1, drag and drop to Pi Pico works!
Artsem
updated my Mac to Ventura 13.1, cp and rsync don’t work still :(
Gerd Holzhauer
I am sorry but i run Ventura 13.2.1 (22D68) and I still cannot copy the file rp2-pico-20230225-unstable-v1.19.1-896-g2e4dda3c2.uf2 to RPI-RP2 by drag and drop
Stanley Hall
Using Ventura 13.2 doesn’t seem to work. I’ve tried cp -X and rsync. I only get the warning that the volume was removed incorrectly.
I’m updating to 13.3 and will try again.
Raspberry Pi Staff Liz Upton
That’s weird – I’m using 13.2 and it’s fine. Can you let us know what happens when you upgrade? (I haven’t had time to yet!)
Comments are closed