Recreate 3D Monster Maze’s 8-bit labyrinth | Wireframe issue 18
You too can recreate the techniques behind a pioneering 3D maze game in Python. Mark Vanstone explains how.
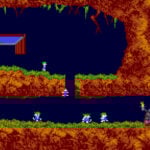
3D Monster Maze, released in 1982 by J.K. Greye software, written by Malcolm Evans.
3D Monster Maze
While 3D games have become more and more realistic, some may forget that 3D games on home computers started in the mists of time on machines like the Sinclair ZX81. One such pioneering game took pride of place in my collection of tapes, took many minutes to load, and required the 16K RAM pack expansion. That game was 3D Monster Maze — perhaps the most popular game released for the ZX81.
The game was released in 1982 by J.K. Greye Software, and written by Malcolm Evans. Although the graphics were incredibly low resolution by today’s standards, it became an instant hit. The idea of the game was to navigate around a randomly generated maze in search of the exit.
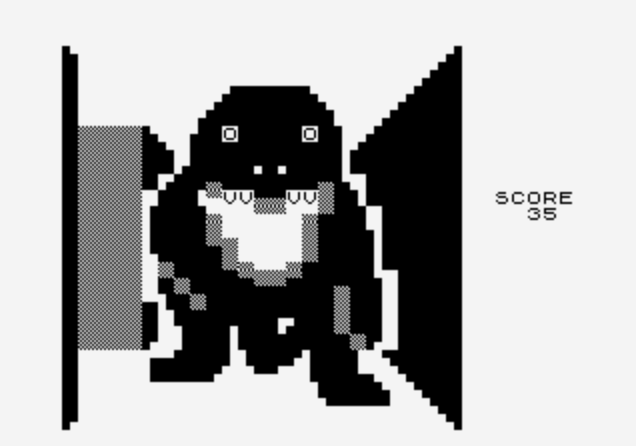
The problem was that a Tyrannosaurus rex also inhabited the maze, and would chase you down and have you for dinner if you didn’t escape quickly enough. The maze itself was made of straight corridors on a 16×18 grid, which the player would move around from one block to the next. The shape of the blocks were displayed by using the low-resolution pixels included in the ZX81’s character set, with 2×2 pixels per character on the screen.
The original ZX81 game drew its maze from chunky 2×2 pixel blocks.
Draw imaginary lines
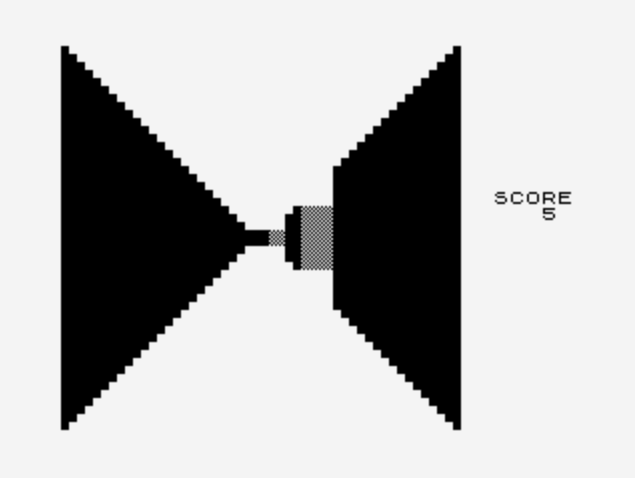
There’s an interesting trick to recreating the original game’s 3D corridor display which, although quite limited, works well for a simplistic rendering of a maze. To do this, we need to draw imaginary lines diagonally from corner to corner in a square viewport: these are our vanishing point perspective guides. Then each corridor block in our view is half the width and half the height of the block nearer to us.
If we draw this out with lines showing the block positions, we get a view that looks like we’re looking down a long corridor with branches leading off left and right. In our Pygame Zero version of the maze, we’re going to use this wireframe as the basis for drawing our block elements. We’ll create graphics for blocks that are near the player, one block away, two, three, and four blocks away. We’ll need to view the blocks from the left-hand side, the right-hand side, and the centre.

The maze display is made by drawing diagonal lines to a central vanishing point.
Once we’ve created our block graphics, we’ll need to make some data to represent the layout of the maze. In this example, the maze is built from a 10×10 list of zeros and ones. We’ll set a starting position for the player and the direction they’re facing (0–3), then we’re all set to render a view of the maze from our player’s perspective.
The display is created from furthest away to nearest, so we look four blocks away from the player (in the direction they’re looking) and draw a block if there’s one indicated by the maze data to the left; we do the same on the right, and finally in the middle. Then we move towards the player by a block and repeat the process (with larger graphics) until we get to the block the player is on.
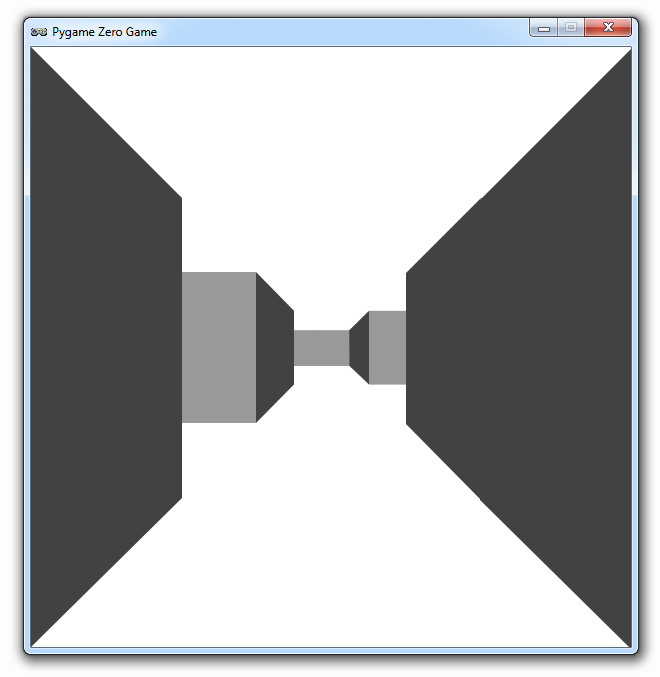
Each visible block is drawn from the back forward to make the player’s view of the corridors.
That’s all there is to it. To move backwards and forwards, just change the position in the grid the player’s standing on and redraw the display. To turn, change the direction the player’s looking and redraw. This technique’s obviously a little limited, and will only work with corridors viewed at 90-degree angles, but it launched a whole genre of games on home computers. It really was a big deal for many twelve-year-olds — as I was at the time — and laid the path for the vibrant, fast-moving 3D games we enjoy today.
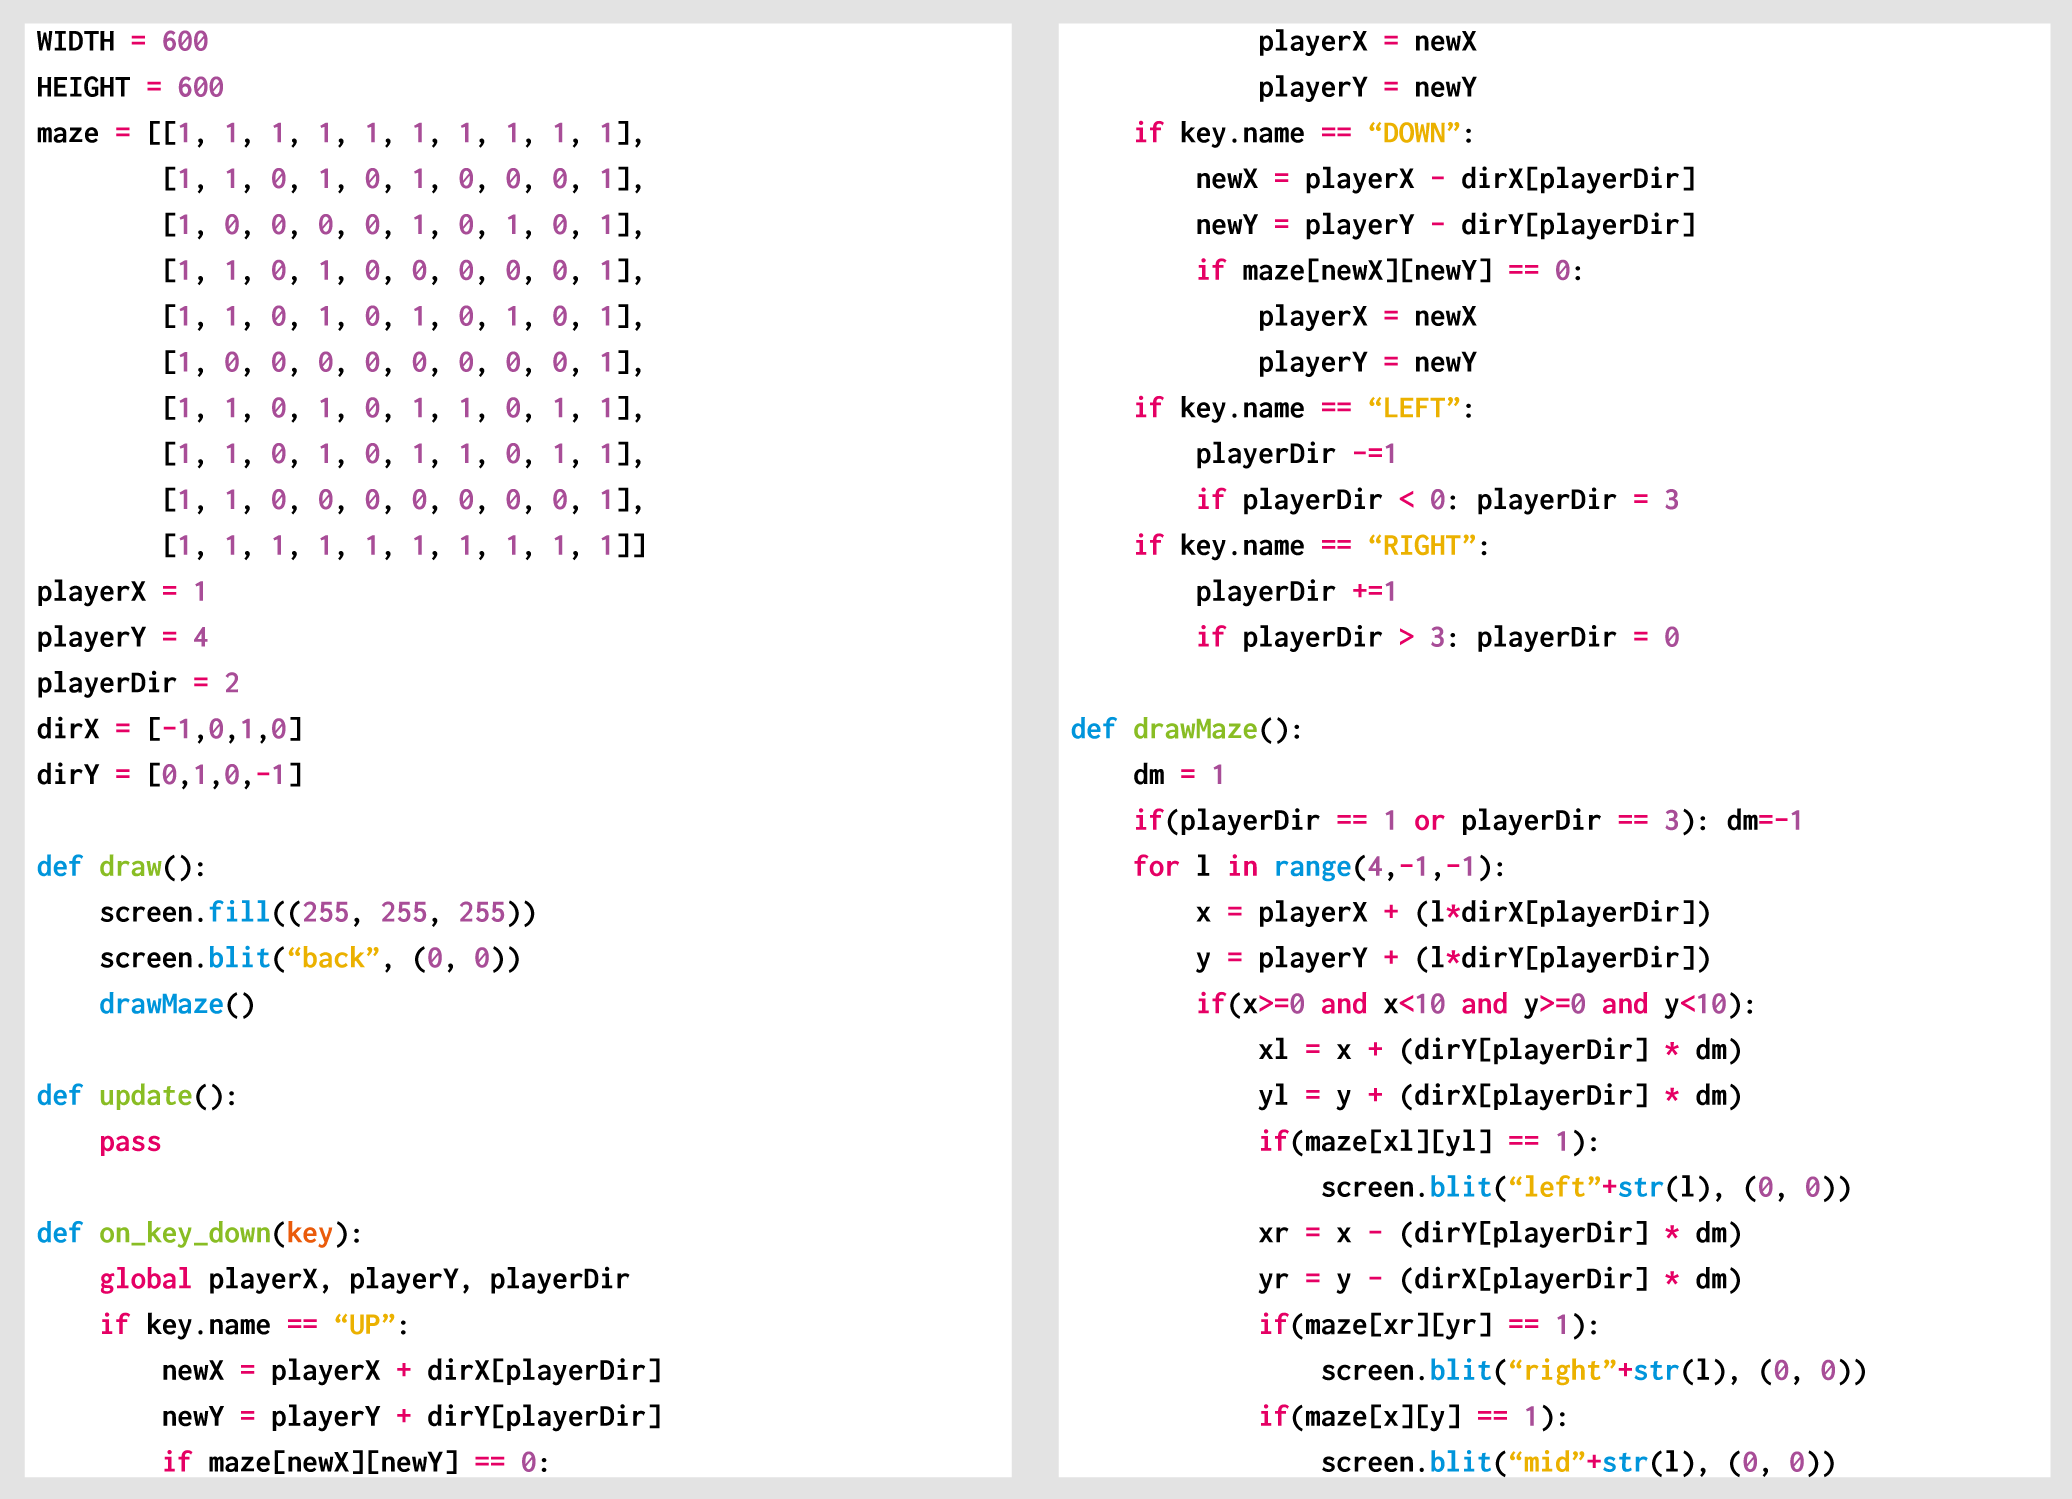
Here’s Mark’s code, which recreates 3D Monster Maze’s network of corridors in Python. To get it running on your system, you’ll need to install Pygame Zero. And to download the full code, visit our Github repository here.
Get your copy of Wireframe issue 18
You can read more features like this one in Wireframe issue 18, available now at Tesco, WHSmith, and all good independent UK newsagents.
Or you can buy Wireframe directly from Raspberry Pi Press — delivery is available worldwide. And if you’d like a handy digital version of the magazine, you can also download issue 18 for free in PDF format.

Make sure to follow Wireframe on Twitter and Facebook for updates and exclusive offers and giveaways. Subscribe on the Wireframe website to save up to 49% compared to newsstand pricing!


8 comments
lodger
Nice posting, but I hoped to get some information about randomly generated mazes. Guess that’s a little too sophisticated for starters. But it would be nice if there was an article about that …
Tobias Huebner
Go have a look at issue 18 of wireframe magazine. There’s an article called “Create mazes with two easy algorithms” on p. 32-35.
Chris Herbert
Not exactly comprehensive tutorial is it. Just pasting a bunch of code isn’t a tutorial.
lodger
I thought that myself as well. But then I went on trying to understand the code snippets and if you know C it’s a nice and clean example of how to do this right.
Bruce
I too was a ZX81 owner aged 12. Ended up working for Digital Research as a programmer in the 90’s, and wrote a DOS version of 3DMM using the exact same logic you described, but in assembler. Thanks for the article – brought back some long lost memories.
John Read
I wrote a version of 3D maze exactly like this for an Apple II in my sixth form in 1981 and adapted it in 1982 for BBC Micro with a randomly generated maze, all done in Basic. Still have a copy of my BBC micro version.
L Medlin
Would you ever release your BBC Micro version? It’s be interesting to see if it runs on my Master 128.
Gryff Derrick
really needs commented code, or at least a more in depth tutorial than just “we draw lines to the center” and a paste of code
Comments are closed