Raspberry Pi thermal camera
It has been a cold winter for Tom Shaffner, and since he is working from home and leaving the heating on all day, he decided it was finally time to see where his house’s insulation could be improved.
An affordable solution
His first thought was to get a thermal IR (infrared) camera, but he found the price hasn’t yet come down as much as he’d hoped. They range from several thousand dollars down to a few hundred, with a $50 option just to rent one from a hardware store for 24 hours.
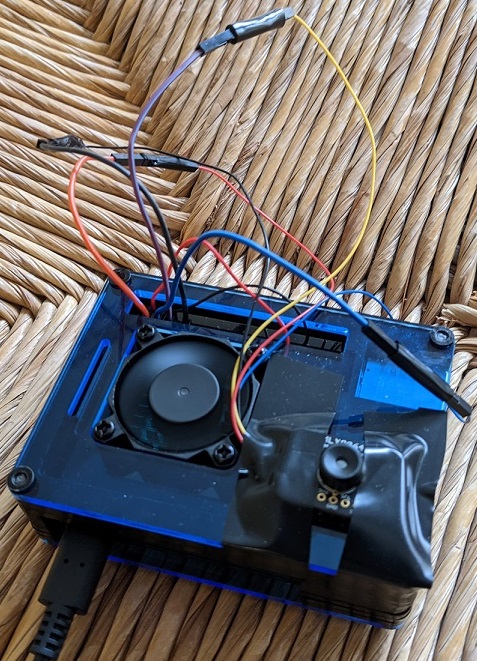
When he saw the $50 option, he realised he could just buy the $60 (£54) MLX90640 Thermal Camera from Pimoroni and attach it to a Raspberry Pi. Tom used a Raspberry Pi 4 for this project. Problem affordably solved.
A joint open source effort
Once Tom’s hardware arrived, he took advantage of the opportunity to combine elements of several other projects that had caught his eye into a single, consolidated Python library that can be downloaded via pip and run both locally and as a web server. Tom thanks Валерий Курышев, Joshua Hrisko, and Adrian Rosebrock for their work, on which this solution was partly based.
Tom has also published everything on GitHub for further open source development by any enterprising individuals who are interested in taking this even further.
Quality images
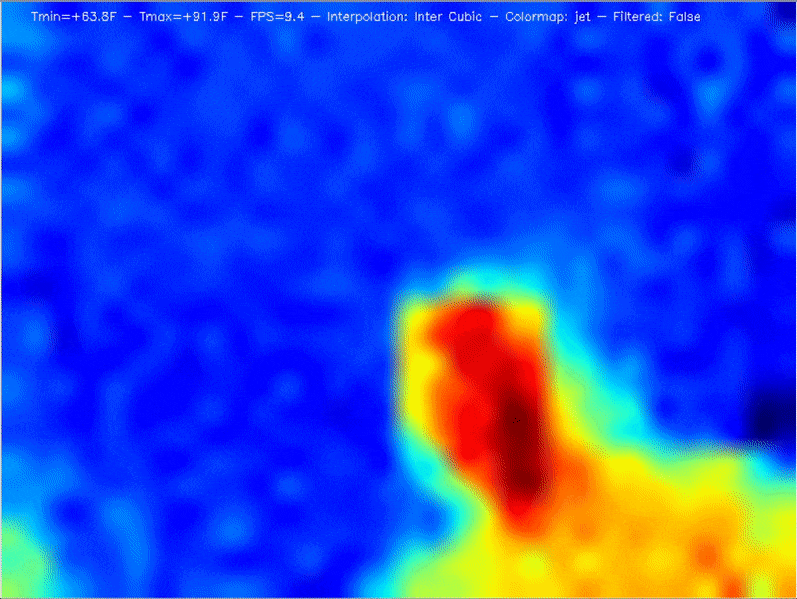
The big question, though, was whether the image quality would be good enough to be of real use. A few years back, the best cheap thermal IR camera had only an 8×8 resolution – not great. The magic of the MLX90640 Thermal Camera is that for the same price the resolution jumps to 24×32, giving each frame 768 different temperature readings.
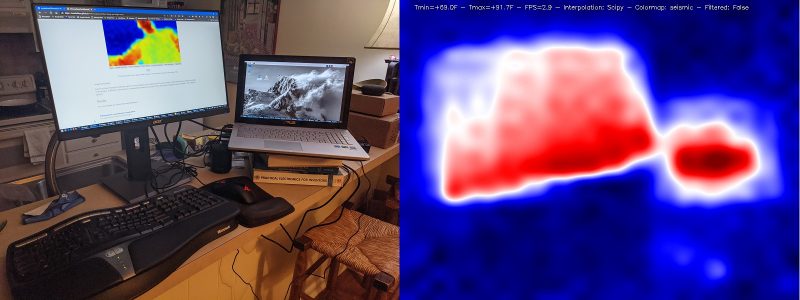
Add a bit of interpolation and image enlargement and the end result gets the job done nicely. Stream the video over your local wireless network, and you can hold the camera in one hand and your phone in the other to use as a screen.
Bonus security feature
Bonus: If you leave the web server running when you’re finished thermal imaging, you’ve got yourself an affordable infrared security camera.
Documentation on the setup, installation, and results are all available on Tom’s GitHub, along with more pictures of what you can expect.
And you can connect with Tom on LinkedIn if you’d like to learn more about this “technically savvy mathematical modeller”.


23 comments
Richard collins
Cool!
(pun indented)
Esbeeb
All sold out at present.
Craig
And stock not expected until Autumn!
Dennis
Indeed cool!
@Richard collins: Your pun looks flush left to me!
Mark
Another option is from Adafruit
https://www.adafruit.com/product/3538
and they are in stock at least as of this comment
Esbeeb
That part only has an 8×8 grid of sensors. That’s far lower resolution.
Richard Creedy
made me go look at pimoroni website and the cameras all gone :-(
Dave
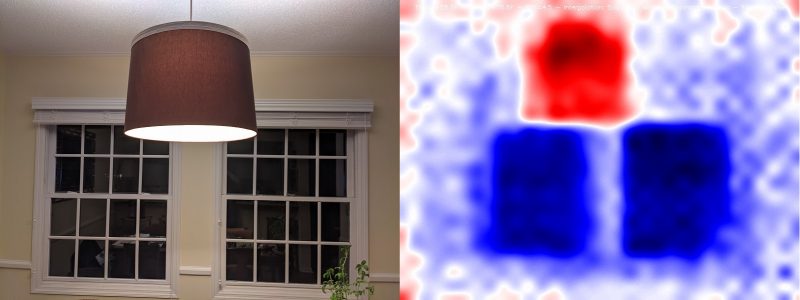
Actually, it’s better to use this kind of thing, looking at the house from the outside, to see where all your heat is escaping. You would then see cracks around doors, thresholds, window and roof seals & flashing, wall cracks, etc. that you wouldn’t see on it from indoors.
laurent
Unfortunately it’s been a while all those mlx90640 boards are sold out.
moises
Great project, It can solve many problem!! congrats
Mac
But of course, it’s out of stock. Bad timing I guess? Try publishing again in a while. Looks like FLIR is the only option and it’ll burn a hole in you wallet.
crumble
Seek is there ass well.
Its not that fast. Especially with the original software to reduce the noise. But you can get them in a useable resolution of 320×200. There are some free libraries, But they are really bad.
FLIR cheats and combines on some products the low resoluion thermal image with a normal/(IR?). Would be a nice next step to tape the noir beside this camera.
Pierrick
That’s a nice project and I have been looking for this mlx90640 for months now. Not willing to spend hundreds.. I will wait for stocks ?. Thanks for sharing your work
Simon
Flir One Pro for reference has a thermal resolution of 160 x 120 pixels
Jeff
I have been watching the market for a thermal camera such as the one FLIR offers. The reviews regarding the overlay of a regular image onto the heat mapped image are not good at all. It would seem an easy thing to resize one to fit the other. As with all technology, it changes so fast. For the price they ask I expect it to be able to take a standard color image and ghost it over the heat map. The issues were that it was difficult to tell where they were looking with the thermal image. Once these sensors become available to people like us. They are gonna get a wake up call. Like Garmin and their GPS business. Who makes the sensor for FLIR? Anyone know?
Bushra
Alhamdulillah……… ?……….. Mashallah……….??
Bernardo
I did a small project with the same camera. It is fun! See the example link below. Not as instructive as this article but a fun way to test your camera.
https://youtu.be/zHQmrH7CZwA
Harish Mehta
As the image resolution is improved, we can also improve it further by replacing the Camera when it becomes cheap in future. But, the work is really nice. I mean, It will be great to see the thermal images of a gas stove or an OTG. However, the images will also be very interesting if I bring it near to Refrigerator. But, it may not show as great results when brought into a contact with a Liquid Nitrogen. Anyway, it’s really a good work.
Giles Read
Successful experiments were done in 2017 with a Pi (3B) and a much higher resolution thermal camera (384×288). Details are here: https://www.flickr.com/groups/therm-app-users/discuss/72157678674384080/
You can also find hundreds of thermal images created with the same type of camera (but not necessarily on a Pi) here: https://www.flickr.com/groups/therm-app-users/pool/
Finally, if you’re wanting to talk about the technical side of thermal imaging with like-minded hobbyists, mosey on over to the excellent EEVblog forum Thermal Imaging: https://www.eevblog.com/forum/thermal-imaging/
There you will find a friendly, knowledgeable bunch of people with diverse experience of thermal imaging, Raspberry Pi and many more topics.
David
Neat. Just tried on a headless Pi Zero with Raspberry Pi OS Lite connected over USB. I tried the ‘OpenCV Version – Web Server’. Seems to work, but in addition to what is suggested in the guide I needed libilmbase23, libopenexr-dev, libgtk-3-0 and to update NumPy (pip3 install -U numpy). Just to note, no errors in running after this but the resulting stream is mostly an odd checkerboard of moving colour with an occasional ‘correct’ frame appearing. (No doubt there are other things I need to add/change.)
Night
I also am getting the checkerboard pattern. And am unable to stop it?
Desructiv
Nice!
Bernhard
Oh how i like such wired camera solutions. Please more of them :-)
Best regards
Bernhard
Comments are closed