Raspberry Pi Pico guitar games controller
HackSpace magazine wanted to make a Guitar Hero-like controller to go with Wireframe magazine’s Guitar Hero-like game. It didn’t all go exactly as they hoped, but they stuck with it and got something working anyway. This is from issue 55 of HackSpace, where you’ll also find some other projects that went more according to plan.
We tried to 3D-print a guitar, but misunderstood the stresses on the neck and oriented the neck in the wrong direction on the print bed. This was made worse by us printing in a cold room that may have affected the layer adhesion strength. It may not have worked even if we had done everything right, since there are a lot of forces on the neck of a guitar and it has to hold up to them very well in order to work.
The end result was that the neck snapped in many places. This tutorial, however, isn’t about making musical instruments, or even 3D printing. It’s about what we did after we ended up with a non-functional, guitar-shaped object made of the pieces glued back together.

Our colleagues over at Wireframe magazine – a mag about making and playing games – have written a tutorial on how to make a Guitar Hero-like game. If you’ve not played Guitar Hero, the basic premise of the game is that you have to play a song on the controller. One button selects the note, and another strums. Strum at the right time while holding the right note and you score points. In the original game, this is done with a guitar-shaped controller, but in Wireframe’s re-implementation, it’s done with keys on the keyboard. This game is in Wireframe issue 62. This will also show you how the game works and how to extend it.
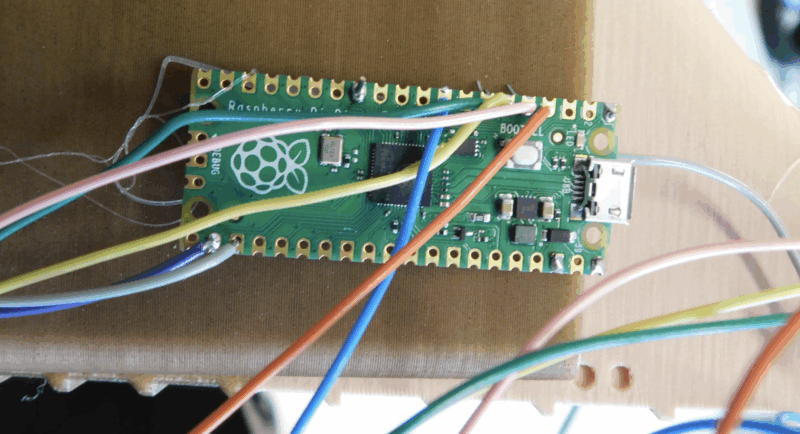
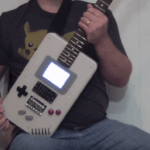
Of course, we couldn’t let this stand. A guitar-playing game needs a guitar-shaped controller. We had a guitar (well, about three quarters of a guitar to be honest), a Raspberry Pi Pico, and enough gubbins to build a replica controller for replica Guitar Hero.

In this tutorial, we’ll build our own controller. If you don’t have a broken 3D-printed guitar, don’t worry: this is just what holds everything together. You could use almost anything. The simplest would be a wooden plank, but you could be creative. An old tennis racket would give classic air-guitar vibes, or you could cut a guitar shape out of sheet material (such as plywood or MDF) with a jig-saw. If your really want to go the whole hog, you could also 3D-print your own guitar – the design files are here, but we wouldn’t recommend using the same alignment that we used.
Since our game takes input from the keyboard, we just have to set Pico up as a keyboard, then we can get our program to send keystrokes to the computer and the game will interpret them as though they’d come from any normal keyboard. It’s actually very easy for some microcontrollers to behave like keyboards, and you can do this in a range of languages, but we find CircuitPython to be just about the quickest and easiest option for this. Since Wireframe’s game is also written in Python, this means that both the game and controller are in a single language, which helps keep things simple.

We’ll look at the code shortly, but we can use the adafruit_hid module’s keyboard object which exposes press() and release() methods that let you press and release buttons. Let’s first look at the hardware.
We’ll treat the two inputs (note and strum) a little differently. For the notes, we’ll use touchpads, and for the strum we’ll use a microswitch. This arrangement fitted our guitar well, but you could use all buttons for the notes if you prefer.
A touchpad is just an exposed conductor. Wire, tinfoil, screws, and sheet steel all work, but we used a wiremesh designed for protecting cables because we had some to hand. A bead of solder along each cut edge stopped it fraying, and also
protects fingers from the stray strands.

Raspberry Pi Pico doesn’t have in-built capabilities for touch sensing, but that doesn’t matter, we can still use the TouchIO CircuitPython module, as long as we connect the touchpad to ground via a 1MΩ resistor. Other than that, the touchpad just needs to be connected to any IO pin.
When working with touch-sensitive circuits, you need to be a little mindful of the whole system. Although we said that a touchpad is an exposed connector, you’ll still get some reading if you touch the wire, and you can get some cross-talk between pads. We’ve addressed some of this in the code, but it’s better to minimise it in the circuit as well, so keep the wires as short as possible and don’t route them where they’ll come into contact with your hands or body.
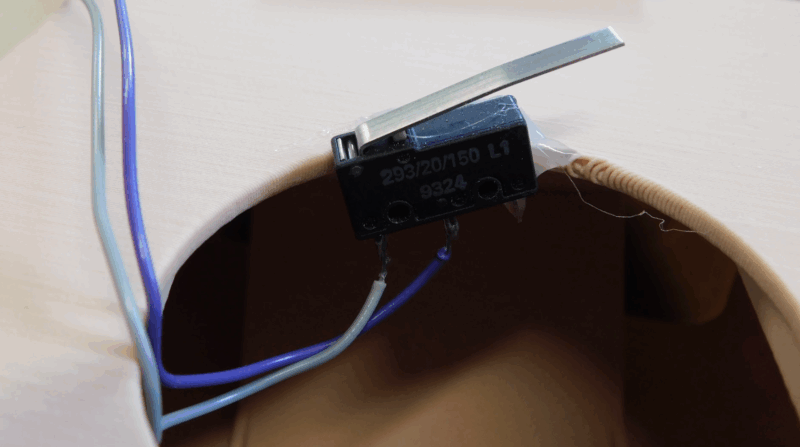
The microswitch will have three connectors: one common, one normally open, and one normally closed. We need two of these – the normally open and the common. These may be marked on your microswitch – or you can find them with a multimeter, set it to its continuity setting (where it beeps when the two probes are electrically connected), then find the pair of terminals that don’t beep when the switch isn’t pressed, but do when it is.
You need to attach one of these connections to ground and the other to any unused IO pin.
That’s all there is to the circuit; you just need to physically attach everything to the part of the controller you want. There are probably some clever ways of doing this, but we just hot-glued it all in place.
Let’s now take a look at the code (this should be saved as code.py on your device):
import time
import board
import touchio
from digitalio import DigitalInOut, Direction, Pull
import usb_hid
from adafruit_hid.keyboard import Keyboard
from adafruit_hid.keyboard_layout_us import KeyboardLayoutUS
from adafruit_hid.keycode import Keycode

touch_pad_z = board.GP2
touch_z = touchio.TouchIn(touch_pad_z)

touch_pad_x = board.GP3
touch_x = touchio.TouchIn(touch_pad_x)

touch_pad_c = board.GP4
touch_c = touchio.TouchIn(touch_pad_c)

touch_pad_v = board.GP5
touch_v = touchio.TouchIn(touch_pad_v)

touch_pad_b = board.GP6
touch_b = touchio.TouchIn(touch_pad_b)

touchpads = [touch_z, touch_x, touch_c, touch_v, touch_b]
keycodes = [Keycode.Z, Keycode.X, Keycode.C, Keycode.V, Keycode.B]

thresh_jump = 2500
for pad in touchpads:
    current = pad.raw_value
    pad.threshold = current+thresh_jump

switch = DigitalInOut(board.GP17)
switch.direction = Direction.INPUT
switch.pull = Pull.UP

keyboard = Keyboard(usb_hid.devices)
keyboard_layout = KeyboardLayoutUS(keyboard)

touch_thresh = 3500
currently_pressed = False
currently_pressed_index = 0

while True:

    pressed = False
    max_value = 0
    max_index = 0
    last_key = ""
    for i in range(5):
        value = touchpads[i].raw_value
        if value > touch_thresh:
            pressed = True
        if value > max_value:
            max_value = value
            max_index = i
    if (pressed):
        print(max_index)
        if (not currently_pressed) or currently_pressed_index != max_index:
            keyboard.release(keycodes[currently_pressed_index])
            keyboard.press(keycodes[max_index])
            currently_pressed = True
            currently_pressed_index = max_index

    if (not pressed) and currently_pressed:
        keyboard.release(keycodes[currently_pressed_index])
        currently_pressed = False

    time.sleep(0.05)
    if not switch.value:
        keyboard.press(Keycode.SPACE)
    else:
        keyboard.release(Keycode.SPACE)
Normally, with TouchIO, you can just use the value property (which will be true if the pad is currently touched and false if not) to see if the pad is currently touched, but this was triggering a lot of false positives for us. Instead, we set a fixed threshold and tested to see if any of the pads exceeded this threshold – if they did, then it checks to see which of the pads had the highest raw_value (which is basically an indication of the capacitance of the pad, which will increase if you touch it), and it treats the highest one as touched. Using this, we were able to accurately detect which pad was touched, but the downside is that it can only detect a single note press at a time. This isn’t a problem in the game Wireframe created, but could potentially limit future songs. You may find that you have to tune the threshold value for your build. Increase it if you’re getting false presses, and decrease it if it’s not registering presses at all.
In order to run this, you’ll first need to download CircuitPython and flash it to your device – you can find it at circuitpython.org. You’ll also need the libraries bundle, and copy across the adafruit_hid module to the lib folder on your Pico. Finally, you’ll need to save this code to your device as code.py (you can download it here).
With that all in place, you should be able to fire up your controller and rock out to a Guitar Hero-like game with your own controller, both coded in Python.


No comments
Comments are closed