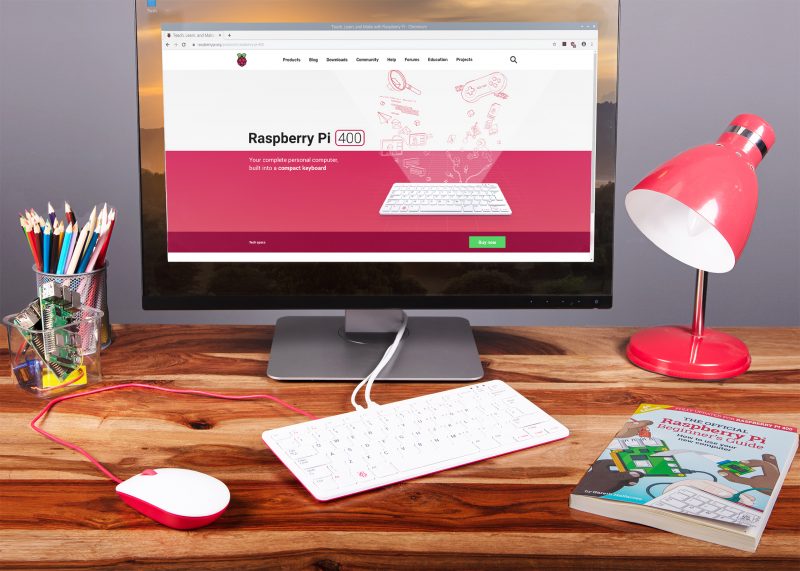
Raspberry Pi 400 for working and learning at home
Did you get Raspberry Pi 400 as a home learning or working device? We hope you’ve been getting on well with our affordable all-in-one computing solution.
If you’re a new user, here are some tips for you to get the most out of your brand-new Raspberry Pi 400.
First things first!
Make sure your Raspberry Pi runs the newest version of the Raspberry Pi OS. Here is how (and here is a video preview of what the process looks like):
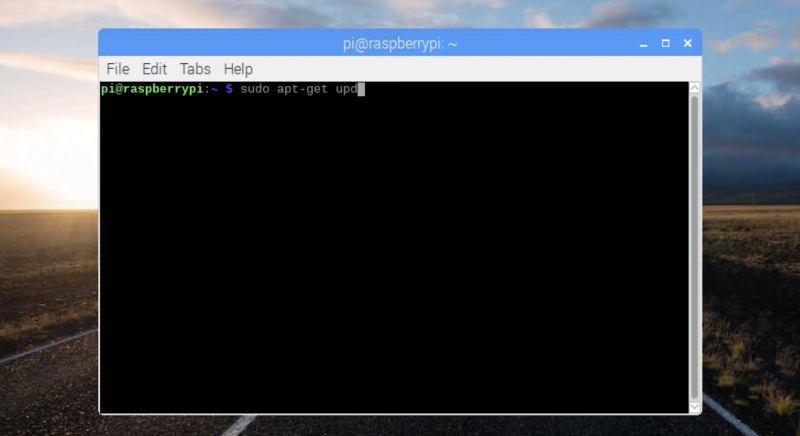
Open a terminal window by clicking on the Terminal icon in the top menu bar. Then type this command in the terminal window:
sudo apt update
Press Enter on the keyboard. Once the update is downloaded, type into the window:
sudo apt full-upgrade
Press Enter again. It is safe to just accept the default answer to any questions you are asked during the procedure by typing y and pressing Enter.
Now reboot your Raspberry Pi.
Videoconferencing, collaboration, files
With the newest version of Raspberry Pi OS installed, you can use the following applications in the Chromium browser:
- Zoom (make sure you’ve set Zoom’s microphone and speaker to ‘System’)
- Microsoft Teams and Office
- Google’s online apps including Meet, Drive, Docs, Sheets, Slides, Forms etc.
- Google Classroom
- Skype
Just log in with your username and password and start working or learning!
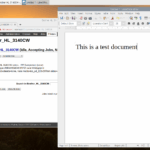
Raspberry Pi OS also has LibreOffice installed for working with text files, spreadsheets, and the like.
Printing on your Raspberry Pi
Go into the Preferences section in the main menu, and open Print Settings. This shows the system-config-printer dialog window, where you can do the usual things you’re familiar with from other operating systems: add new printers, remove old ones, set a printer as the default, and access the print queue for each printer.
Like most things in Linux-based operating systems such as Raspberry Pi OS, whether you can make your printer model work depends on user contributions; not every printer is supported yet. We’ve found that most networked printers work fine, while USB printers are a bit hit-and-miss. The best thing to do is to try it and see, and ask for help on our forums if your particular printer doesn’t seem to work.
More tips for using Raspberry Pi as a home computer
Our very own Alasdair Allen wrote a comprehensive guide that covers more topics of setting up a Raspberry Pi for home working, from getting your audio and video ready to setting up a Citrix workspace. Thanks Alasdair!
Free resources for learning at home
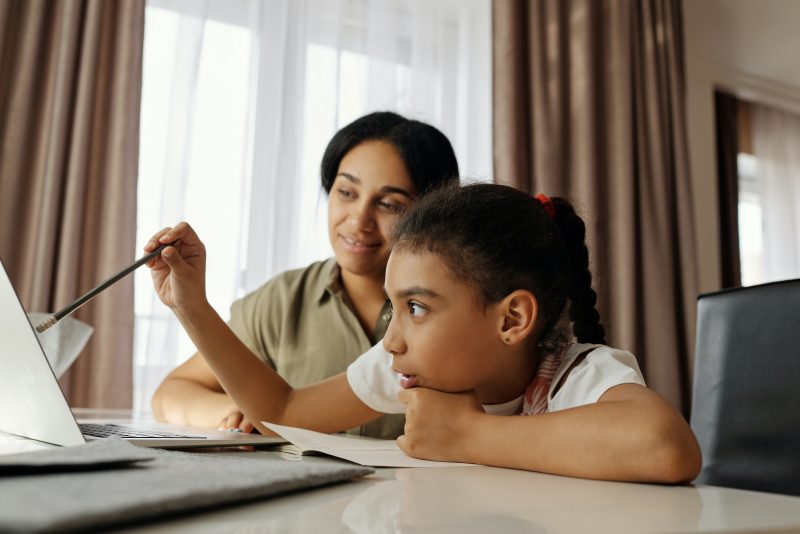
We’ve got a host of completely free resources for young people, parents, and teachers to continue computing school lessons at home and learn about digital making. Discover them all here!
What do you need?
Let us know in the comments if there are any niggles you’re experiencing, or if you have a top tip to help others who are just getting to grips with using Raspberry Pi as a home learning or working device.


38 comments
Arijit Sadhu
Would be useful to have instructions how to install a webcam. It is one of the most asked questions I get when I help people set up their raspberry pi.
James
Step 1: Plug USB webcam into USB port on Raspberry Pi.
Done!
steve
Doesn’t work with either of my USB webcams.
steve
I needed
sudo apt install fswebcam
reboot
first to get my webcams to work.
Michal Smrž
How are these conference called are handled, if chromium has disabled gpu acceleration?
And web.skype on raspberry does not support video calling, last time I have tested (some months ago)
Colin Tinker
I have used Google Meet and Jitsi Meet with no issues but have not tried Zoom or Skype.
Procyon
A few more tips for your Raspberry Pi 400:
Overclock:
I have been overclocking my Pi 400 to 2.38GHz ever since I got it in November 2020. It has been stable as a rock, no lock-ups or crashes. Even overclocked to 2.38GHz, the idle temperature hovers around 41C and around 52C-55C when watching 1080p Youtube clips. Here’s the [all] section of my /boot/config.txt file:
[all]
initial_turbo=60
hdmi_group=1
hdmi_mode=97
hdmi_enable_4kp60=1
enable_uart=1
arm_64bit=1
over_voltage=15
arm_freq=2380
gpu_freq=750
gpu_mem=256
Boot from SSD:
Add an SSD to your Pi 400 so you can boot from it. To give you an idea of the relative boot improvement times, booting from a microSD card takes about 11.5 to 12 seconds (depending on the card’s speed). Booting from a SATA M.2 SSD takes about 8.75 seconds (as measured by the “systemd-analyze” command). You will also experience an overall improvement in application load times (e.g. in LibreOffice or Chromium with multiple tabs previously left open). If you are shopping for a new SSD for your Pi 400, you might want to skip NVMe SSDs, as they have higher peak power usage compared to SATA M.2 or SATA 2.5″ SSDs. The reason is that the Pi 400’s USB 3.0 port might be able to supply enough juice to boot off an NVMe SSD and run seemingly well, until you stress the SSD (e.g. benchmarking, large database, large file copies) the NVMe SSD will disconnect itself due to insufficient power. (You can mitigate this with a powered USB 3.0 hub, but that introduces yet another device between the SSD and the Pi 400). In short, stick with SATA M.2 SSDs. The SSD enclosure you pair the SSD with is important. I recommend using enclosures with ASMedia ASM1153E controllers. These USB-SATA bridge chips support UASP (USB Attached SCSI Protocol) mode for better performance and the TRIM command, important to maintain write performance on an SSD by unmapping unused blocks occupied by deleted data. To give you an idea of the performane to expect, my Samsung 860 EVO SATA M.2 SSD paired with a Ugreen SSD enclosure (with ASMedia ASM1153E controller) gives 393MB/s sequential read and 339MB/s sequentaial write speeds (as tested using the fio command).
Add a USB Sound Card:
The Pi 400 lacks an audio jack for analog audio out or microphone in, so adding a USB sound card solves that. I use an inexpensive one that has a single combined analog-audio out and microphone input jack (like in laptops but with better audio quality). You might also consider adding an inexpensive 4-port USB 2.0 hub, so you can connect your mouse, USB sound card, printer and webcam to the Pi 400’s single USB 2.0 port.
Jim
@Procyon
Apparently There are 4 UGREEN SSD enclosure models available, which of these is the correct choice:
(1) M-key Model(Deep Gray): Only support PCIE-based M-key/B&M-Key SSD(NVME protocol), with 50cm type-c to type-c cable , type c gen.2 standard, max 10Gbps transfer rate
(2) M-key Model(Deep Gray): Only support PCIE-based M-key/B&M-Key SSD(NVME protocol), with 50cm type-c to type-c cable , type-c to USB 3.0 cable type c gen.2 standard, max 10Gbps transfer rate
(3) B-key Model-1(Deep Gray): Only support SATA-based B-key /B&M-Key SSD(NGFF protocol), with 50cm type-c to USB 3.0 cable , type c gen.2 standard, max 6Gbps transfer rate. Will be in stock on May 10th.
(4) B-key Model-2(Silver): Only support SATA-based B-key /B&M-Key SSD(NGFF protocol), with 50cm micro USB 3.0 to USB 3.0 cable , max 5Gbps transfer rate.
Procyon
TL:DR: The Ugreen SSD enclosure you want to get is Option (4) the “Silver B-key model”.
Options (1) and (2) are both NVMe SSD enclosures (their internal slots are “M” keyed to prevent inadvertent insertion of SATA M.2 SSDs). The one that works best (i.e. most stable under load, good performance, supports UASP and TRIM) with my Pi 400 are options (3) and (4) from your list above. These are SSD enclosures with B-keyed slots (the notches in the slot are in a different position than M-keyed slots) and are designed for SATA M.2 SSDs.
I use both Option (3) and (4) models with my Pi 400. I unplug and switch SSD enclosures depending on whether I am using Raspberry Pi OS or Ubuntu 20.10, as I detest multi-booting.
Option (3) uses an ASMedia ASM235 bridge chip, while Option (4) uses an ASMedia ASM1153e chip.
As far as performance goes, I find Option (3) and (4) deliver roughly the same read/write performance, with the cheaper 5Gbps model (the one with micro-USB 3.0 connector aka the “Silver B-Key model”) a smidgen faster than the 6Gbps model (the one with the USB-C connector, aka the “Dark Grey B-key model”). I measured performance using fio 3.12, using identical 500GB Samsung EVO 860 SATA M.2 SSDs. (Note: Your mileage may vary depending on which M.2 SSD you stick into these enclosures.) Based on my experience, I found NVMe SSDs to self-disconnect from the Pi 400 when put under heavy load (e.g. when copying gigabyes of data or running a large database search). This, I suspect is because the NVMe SSD I used (a 1TB Samsung 970 EVO Plus) needed more power at peak load than what the Pi 400’s USB 3.0 socket was able to supply. I have had no such self-disconnect issues with the Samsung 860 EVO SATA M.2 SSDs.
Also, the higher performance of an NVMe SSD is wasted as they are bottlenecked by the Pi 400’s 5Gbps USB 3.0 port. This 5Gbps speed rating translates into 400+ MB/s actual throughput (5000Gbps / 8 = 625MB/s – 25% (i.e. 20% for 8b10b encoding overhead and approximately 5% for SATA->USB protocol-translation overhead) and you end up with something like only 468MB/sec actual usable speed from one USB 3.0 port. (Not to mention whatever other USB peripherals may be consuming bandwidth (like the keyboard, mouse, USB sound card, printer, webcam etc.) at the same time. On a Pi 400, the four USB ports (1 hidden and used by the keyboard) share a common connection via a single lane, PCIe x1 link (4000Gbps) to the SoC. Anyway, this is probably way more information than you asked for. Good luck.
Warren
Do NOT get the NVMe. They are faster, so for normal use you’d want to go with NVMe, but you won’t get the faster speed through the USB3 port on the Pi 4, so it would be a waste of money. They also require more power to run, which the Pi may or may not be able to provide.
W. H. Heydt
Last year it was mentioned that cameras for videoconferencing with Pis were being tested. Is there a list of webcams that work well with the Pi400?
(I have my grandson set up with a Pi4B-4 using a PiCamera v2 and that works in Google Meet, but that wouldn’t work for a Pi400.)
Eric Olson
I too would like to know what web cameras are recommended. My understanding is that some cameras have lag because the format they deliver has to be converted for use with Zoom while others work smoothly.
Gordon Hollingworth
I would suggest a camera that supports MJPG output, we use the A4Tech 1080P webcam: https://www.a4tech.com/product.aspx?id=36
To install it, just plug it in… When you start your particular browser-based videoconference application, go to the settings to select the camera, although it should be the default.
W. H. Heydt
Hmmmm… I was under the impression that some inexpensive webcams were also going to be looked at. Didn’t any of them pan out?
On Newegg looks like the least expensive A4Tech 1080P goes for about $63, which is the same price as a Logitech C615.
W. H. Heydt
Update: I observe that PiHut has the A4Tech webcam for $43.
Caridad
I need an 8GB Pi400.
James Carroll
8GB Pi 4 boards are available. Just add a keyboard. Seriously, I have a Pi 400 and it’s awesome except for the teeny tiny keyboard that is perfect for children but much too small for my big hands. My plan now is to rip the board and heatsink out and build my own Pi 400.
Caridad
Thank you for your reply James, of course you are correct, and I have considered that option. However, I like the simple form factor. It is neat, functional, portable, cool and quiet.
The Pi400 is marketed as a desktop computer. As such, I would like to see 8GB of ram and a numbered keyboard for spreadsheet input. Perhaps that would leave room for an internal SSD or the headphone and microphone jacks that many want. Heat-sinking the USB controller wouldn’t hurt.
It would cost more and I would pay the price. Perhaps other computers may compete in price but I don’t see as nice a package and that wouldn’t be supporting the Raspberry Pi Foundation and its goals. I don’t need a high powered gaming machine or a bloated OS. There could be low and higher end models. I think it would sell. It would certainly be practical.
W. H. Heydt
“Need” or “want”?
Caridad
W. H. Heydt, If your reply is to me, both, mostly need. 8GB with a numeric keyboard and I am a happy camper.
Rewe
I second that. I haven’t purchased the Pi 400 yet, because it has 4GB only. I do not think this is enough for a desktop nowadays, especially that I would like to do some compilation on this machine. I hope the 8GB version will come eventually.
Amazeryogo
I had a question, so I have a Raspberry Pi 400 and I want a microphone to attend my meeting but there is no headphone jack, was the removal of the headphone jack intentional because of “courage” (like Apple)?
Eben Upton
The headphone jack on a Raspberry Pi 4 is just that: a headphone jack. The assumption is that, like you, most people who want a headphones will also want a microphone. And for them the solution (whether on a Raspberry Pi 4 or 400) is a USB audio peripheral.
W. H. Heydt
I have two forms of USB to headphone and mic adapters. One has two separate jacks for headsets that have two plugs. The other (the one my grandson is using) has a single 4-pole TRRS jack. Just hunt around for the type you need.
One could also set things up with speakers, either ones with a USB connection or through a USB to 3.5mm adapter and a mic on it’s own adapter or a USB webcam with a built-in mic.
Mikael Bonnier
There are at least two standards for 4-pole 3.5mm jacks for headsets: early Android and later Android. Maybe later Android 4-pole is called TRRS. I have headsets and phones of both types, but more of the latter. A related question is if the headset is destroyed if you plug it in to the wrong 4-pole audio jack or a Raspberry Pi 4-pole jack with composite video out. I once destroyed the mic of an old headset by plugging its 3-pole connector into the 3-pole audio out.
Downsizer
Amazeryogo, you’re lucky they didn’t remove the keyboard too, like the MacBook Wheel!
https://youtu.be/9BnLbv6QYcA
;)
2021 version:
“I’ll buy almost anything if it’s [R 197 G 26 B 74] and made by Raspberry Pi”
Phil Atkin
Anyone got video of Zoom running on a Pi to give a feel for performance?
Mark Collins
I will have to get one of these for myself love the form factor! however, ‘work’ is a loose term as I need to dial in remotely to work PCs and tills and would be difficult n this! However, I miss the days of my Atari 800XL/ Acorn A3000 – this is multiple times more powerful!!! I am typing this on a Ryzen 2700X powered PC makes me feel guilty!
Chris
Hi, I was hoping that I could use an monitor with a pi 400 as it would solve a load of homeschooling issues. There is the following article: https://www.raspberrypi.org/blog/connect-your-raspberry-pi-4-to-an-ipad-pro/ but other than not having an iPad Pro with usb-c to do this with (I realise there is a wireless option) this looks to be opening a remote-desktop style window in the iPad, with controls bing via the iPad. I haven’t found any guide where you can connect to an iPad from a pi (pi400 in this case) whilst keeping the iPad dumb monitor. I wanted to use the keyboard & mouse on the pi 400, not the iPad as a touch screen. Hoping that I’ve missed something or Maybe this isn’t possible?
Nick
I have started working from home mostly and this new Raspberry Pi 400 looks cool. I’ll have to get one
Andy
Ha anyone been able to install a VPN client like OpenVPN? I found a lot of tutorials on the web but they’re very complicated, and they all talk about a VPN server anyway. I just need a simple client to connect to my office PC. I have successfully installed them on PCs and Macs but can’t seem to manage to on the Pi! :(
Fabian
Is is possible to output the screen via xrdp to a different computer but still you the Pi 400s normal keyboard and a mouse that is attached? So that only the picture is transfered to a different device.
Would be cool to have the Pi 400 as a second device on my desk and looking at the screen via a xrdp-session on my laptop.
Best regards from Germany
Fabian
George
Hi , I am unable to use zoom. It just shows “connecting” but nothing is happening. Could you please help me with this. thank you.
Shonah Melton
Hi George. Did they ever help you to resolve your issue regarding zoom. I don’t see any replies here and it makes me concerned. I’m new to this and seriously thinking of buying a raspberrypi but it doesn’t look like there is any feedback on comments left. What do you think of your raspberrypi?
Liz Upton
Hi Shonah
You’re replying to a very old post, and people don’t tend to come back to check to see if people are responding to them in threads like this. Zoom works absolutely fine on the Raspberry Pi – we can’t say what was wrong with George’s setup, because he didn’t leave any details about it. But hundreds of thousands of people are using Zoom on the Raspberry Pi with absolutely no issues.
You can use Zoom in the browser, and it’s very easy.
https://www.raspberrypi.org/blog/working-from-home-with-your-raspberry-pi/ – a brief mention of Zoom here; we don’t usually call it out in particular simply because it’s such a normal thing to do with a Raspberry Pi!
Ivan Bliminse
I would like to know when there will be better gpu acceleration for the Raspberry Pi 4. It is important for my work to use Zoom, Microsoft Teams, and fast Internet browser. It would be brilliant if there were a gpu HAT or Raspberry Pi 5 with an APU.
cspan
This might be an edge case but in terms of using the Pi and/or RPi Desktop OS for work, one issue is incompatibilities that may be the result of falling behind in LibreOffice releases due to development ceasing for the 32-bit platform. Libreoffice is a great office suite and I have long appreciated (and relied upon) the ability to convert to and from Microsoft Office formats. It’s not perfect, but it’s usually very good. But one area that seems to fall consistently behind is password-protection on MS Office files. I don’t know if they change their encryption algorithm often or if LibreOffice is just perpetually behind whatever their changes are. But I am running into compatibility issues with increasing frequency, and I can’t help but wonder if some of the problem is that I’m stuck on older versions of LibreOffice on RPiOS and RPD for x86.
AnneMieke
I try to install blockly, where can I find a step by step instruction to install it.
Comments are closed