How to make stickers and stencils with a vinyl cutter | Custom PC #225
In the latest issue of Custom PC magazine, Antony Leather shows you how to use a vinyl cutting machine to create eye-catching case artwork and painting stencils.
Wrapping your case or hardware in vinyl, which we explored last month, is very different to creating patterns and text that can be applied to surfaces. The latter is usually a much more intricate process, and it can be very difficult and time-consuming to create vinyl cut-outs by hand with a scalpel. This is where a cutting machine comes in.
These machines can cut out vinyl for you with perfect precision, leaving you with the task of just transferring the vinyl to your PC. You can even use masking vinyl to create accurate masking patterns for spray painting, which would take hours to cut out by hand and likely have inferior results.
What you’ll need:


Vinyl cutouts (seven steps)

1 / Create design
You need a bold image with which to work, so you can use a cutting machine’s software to trace the edges and cut it out of a vinyl sheet. This can be an image, design or text you’ve created yourself, or an image you’ve downloaded.

2 / Stay within borders
Import the image into the cutter’s software and drag it into the trace area. The design needs to sit within the print area borders, but cutting machines can easily deal with long lengths of material, so make sure you use the correct borders and stay within them in the software.

3 / Set trace area
Configure the software to trace around the edges. All vinyl cutting software is different, but you usually need to tweak the settings to adjust the cutting lines, so the machine will only cut along the edges. Check the instructions.

4 / Set cutting depth
Your cutting machine will tell you the correct depths to set the cutting blade for different materials. This is usually set manually on the blade section itself. This helps to cut only the material you’ll be transferring, and not any backing material – using the correct depth is key.

5 / Print and remove cut-outs
The cutting process usually takes just a few minutes, and then you can start the process of using a pick to remove any unwanted inner sections of your design. You need to only leave behind the pattern you want to transfer.

6 / Lift and apply to case
Lift your pattern off the vinyl backing paper and stick it on your PC. This might need some persuasion to lift it off the vinyl backing paper. Occasionally you may need to use a scalpel to encourage it to lift off. Remove the transfer paper at an angle to help ensure the vinyl is left behind.
Painting stencils (three steps)

1 / Use masking sheet
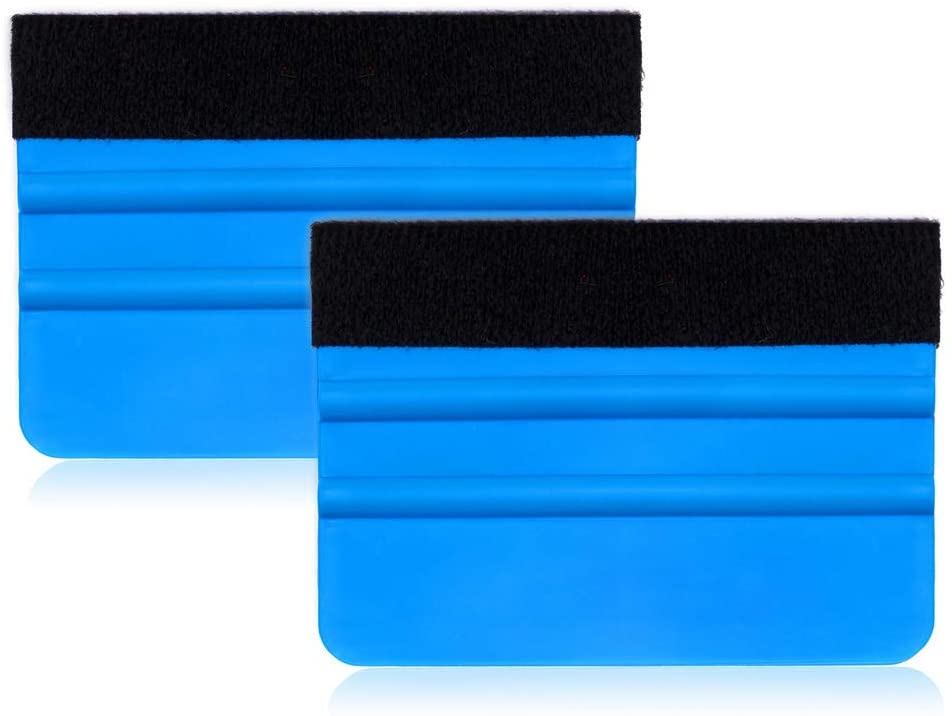
A cutter can also cut masking vinyl, which you can use instead of masking tape for spray painting, enabling you to create precise masks. You can use the same process to cut it out as the coloured vinyl, or create a large mask. Use a squeegee or credit card to press the mask onto your case.

2 / Spray over the mask
Use your spray paints to add paint to the exposed areas. You only need one or two coats, but it’s important to remove the masking before the paint fully dries, ideally within five minutes.

3 / Remove masking sheet
Peel off the masking sheet slowly. If there is any overspray or paint creep, this can be remove with isopropyl alcohol. If you need to start again, acrylic spray paint remover can be used, or you can simply spray over the panel using its base colour, which is white in this case.
Custom PC #225
You can read more features like this one in Custom PC #225, available directly from Raspberry Pi Press — we deliver worldwide. Each issue features a custom-made reader’s drive like this one.

And if you’d like a handy digital version of the magazine, you can also download issue 225 for free in PDF format.

No comments
Comments are closed