HATs and bonnets to give your Raspberry Pi 400 a cyberdeck feel
I’ve decided we haven’t seen enough of Raspberry Pi 400 on the blog lately, and I also remember how much you all love to discuss your survival plans for the aftertimes whenever I feature a cyberdeck. To satiate those dual desires, I thought I’d introduce those of you who haven’t already met to Adafruit’s CYBERDECK HAT and CYBERDECK Bonnet, both created with Raspberry Pi 400 in mind.
Special features
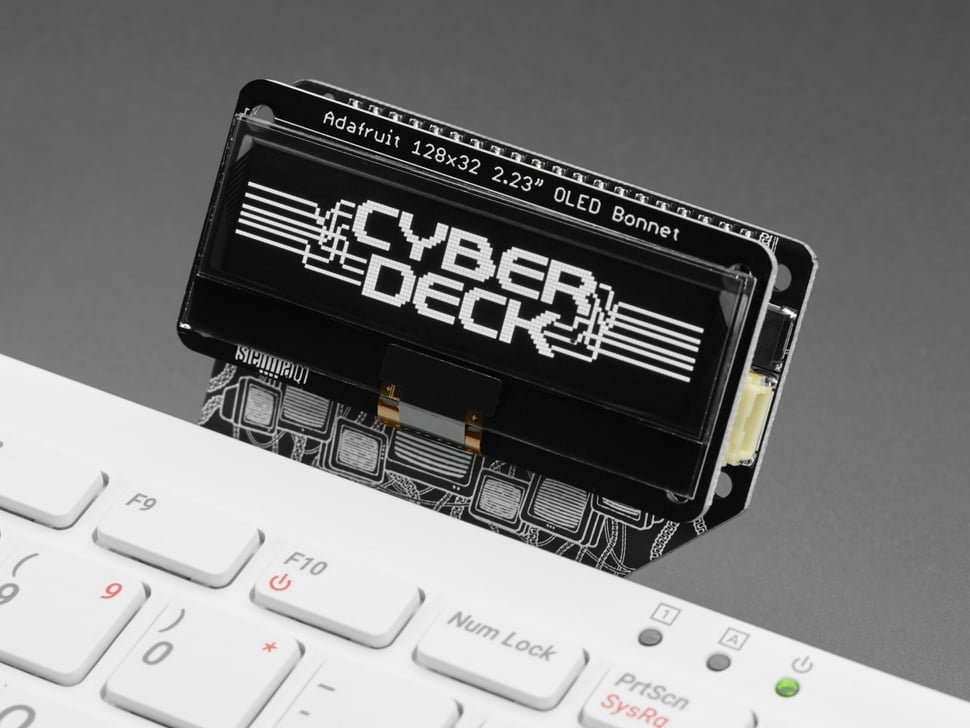
The HAT and Bonnet feature a few STEMMA connectors so you can easily plug in some NeoPixels or speakers, depending on what you’re cooking. They work with many more things than just a screen, but using them with a screen and your Raspberry Pi 400 is when they have that cyberdeck look, and why they were so named. My favourite feature is the custom-made angled headers so the HAT and Bonnet will sit slightly tipped back at a comfortably readable angle while you’re working. We do so appreciate when our friends at Adafruit care about our spinal health.
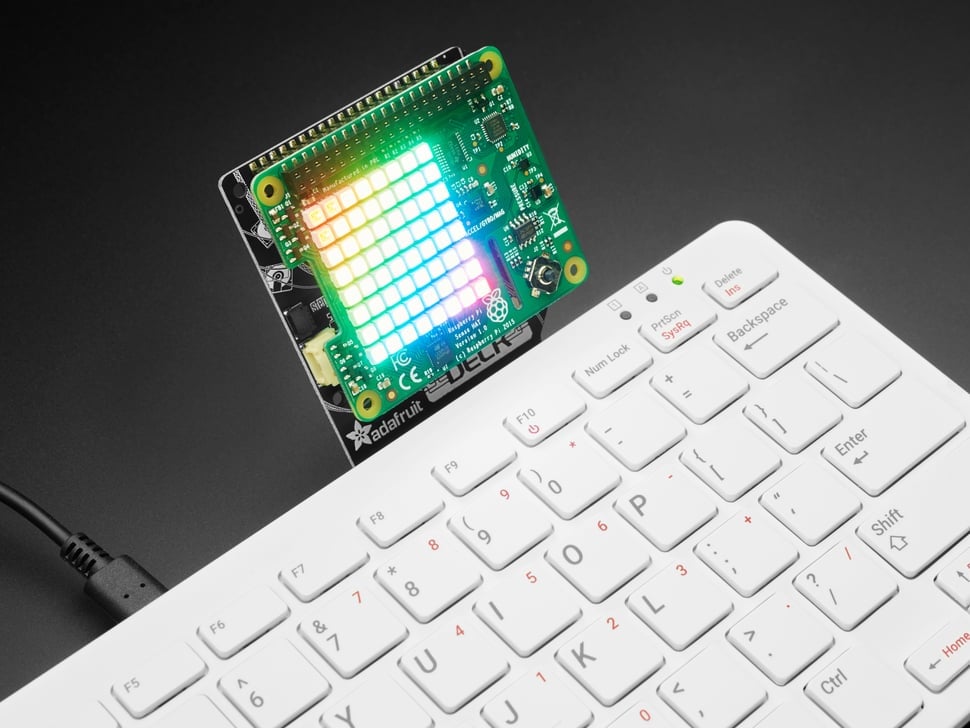
These are cheerfully affordable add-ons that you can just plug straight into your Raspberry Pi 400 and play with. Adafruit also lists their recommended displays on each of the product pages for the HAT and the Bonnet so you don’t need to go searching for something that will fit. Just pick one based on your preferences and click it straight onto your 400’s headgear. If you want to use either of them to control servos, sensors, or LEDs, you can just plug a regular monitor straight into the 400 and get started right away.
Cyberdeck hall of fame
Now we come to the portion of today’s proceedings in which we just drool over nice-looking cyberdecks:
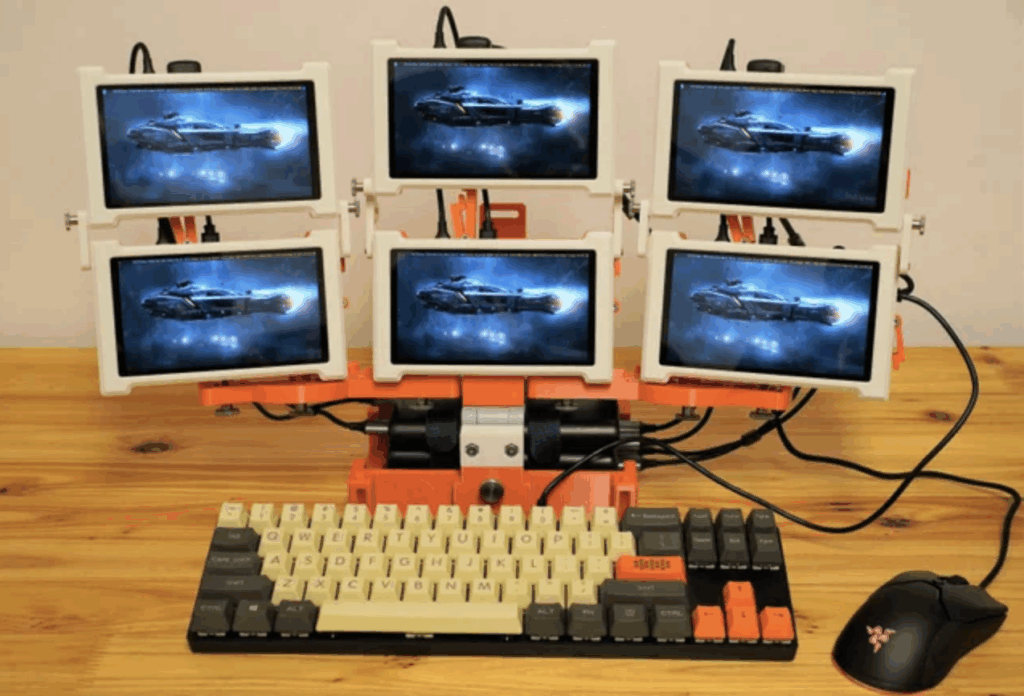
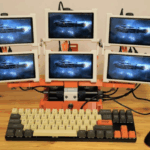
Mega six-screen cyberdeck
Maker Sören Gebbert really leaned in to the “more is more” idiom when building this big orange cyberdeck using three Raspberry Pis. Why use just one screen to manipulate enemy cyberware and take down your cyberpunk foes, when you can have six?
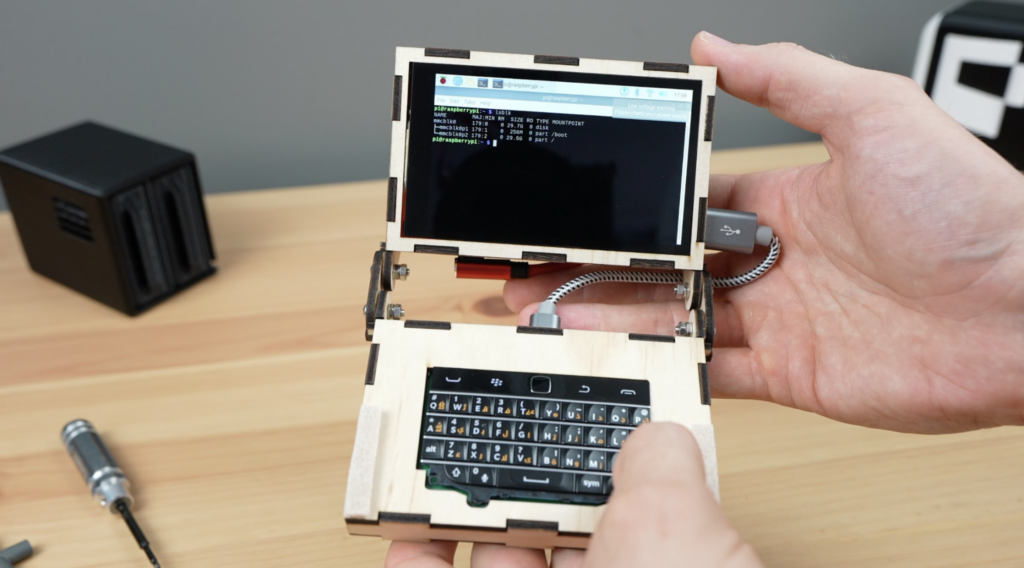
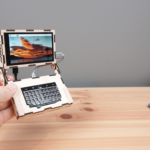
Clamshell BlackBerry cyberdeck
Keeping things as compact as possible drove the design of this hinged clamshell-style computer. Maker Michael Klements chose a clamshell version of a BlackBerry and paired it with Raspberry Pi 4 for maximum computing power, aiming for “a functional desktop computer with a GUI”.
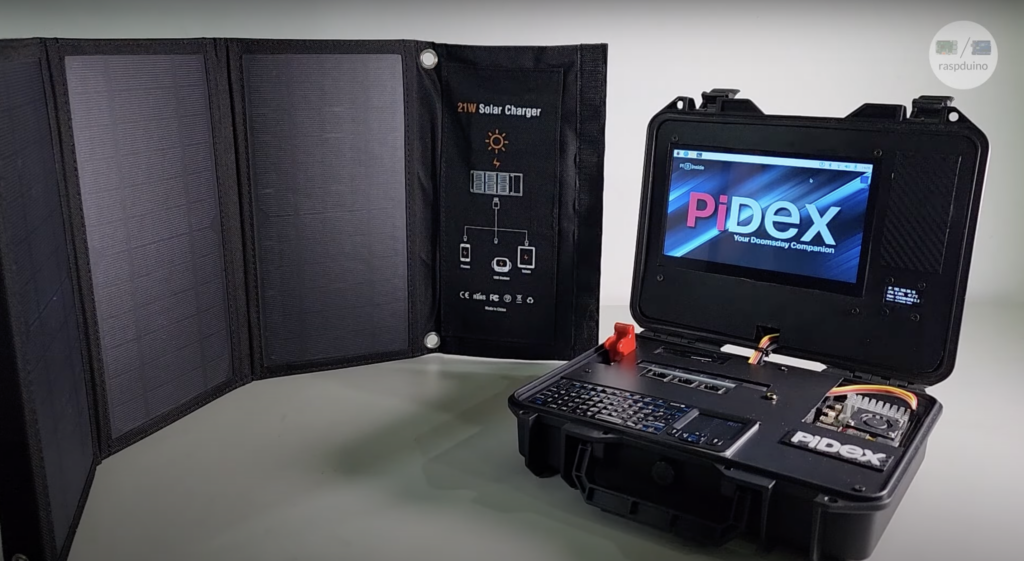
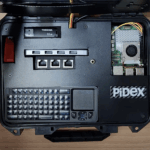
PiDex
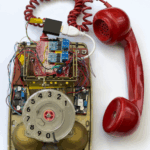
Last but not least we have PiDex. Billed as “your Raspberry Pi 5-powered doomsday companion”, this is the project which prompted a lot of you to take a deep dive into what preparations for the end times might look like and offer helpful tips on how to properly stock a survival bunker. All wholesome fun. Scroll to the comments section at the bottom of this blog to join in.
9 comments
fred
When we getting a 8GB Pi 500? :) With a NVMe slot. Not got a RPi5 yet, holding out for a Pi 500. Then I can sneak it on my work desk without the boss noticing. ;)
Raspberry Pi Staff Liz Upton
It’ll be a while; these things have historically trailed the “main” product by a year or so. And you can definitely sneak a Pi 5 onto your desk without the boss noticing. Don’t ask me how I know.
Anders
Maybe unintentionally candid there, coming from the Raspberry Pi official source. Rather than “we don’t talk about future products” we have instead a loose time estimate and quasi-confirmation of something in the pipeline. Love it!
Raspberry Pi Staff Liz Upton
Everything I do, I do with SCADS of intention. ;)
S Rose
As delightful as a Pi 400 is, the keyboard isn’t replaceable and when it fails, the device loses most value. And will passive cooling be enough for the Pi 5 processor? I don’t think it’s a completely compelling product idea.
gus3
The new, low-end Apple Macintosh with OS: $999.
The new, low-end Raspberry Pi: $5 (Zero), or $25 (Model 3 A+), or $60 (Model 5, newest, with 4G). Choose from many OS options, free or proprietary.
Anders
With a bit of fettling, the Pi 400 keyboard can be replaced with a Raspberry Pi USB keyboard top half. Or a keyboard plugged into its USB ports. Or, a Pi 400 is cheaper than some keyboards.
Passive cooling works well on a Pi 5 processor, I am using one like this. I don’t deliberately run things that are designed to stress the CPU, I just use it as a computer and it works just fine.
unCoopervised
As much as I’d love a Pi 500, I too fear that the thermals may be an issue. I’m sure they could fit a tiny fan in the keyboard but the silence of the 400 is nice!
WAYNE
I have some interesting questions about this — do the hat and bonnet automatically display the same regular image as an hdmi video out, or does it have to be specially configured or coded in a more complicated manner? Is it possible to fairly simple attach a screen AND speakers in this method? If so, how? I’m assuming the screen is just plug and play. Any reason to choose a capacitive vs resistive touchscreen display? Not sure which is better or easier to use on a tiny screen. Thanks!
Comments are closed