Build a simple quiz game in Python
According to the TIOBE Index, Python is the world’s most popular programming language, and it’s easy to see why. The programs are clutter-free and easy to read, with far fewer brackets to untangle than in some other languages. Issue 163 of Raspberry Pi Official Magazine featured beginner-friendly Python projects for those just getting started with Raspberry Pi.
Believing the best way to learn programming is by doing it, author Sean McManus penned this tutorial showing you how to build a simple quiz, talking you through the code at an entry-level pace. Pass this article on to someone who is keen but unsure where to start on their coding journey.
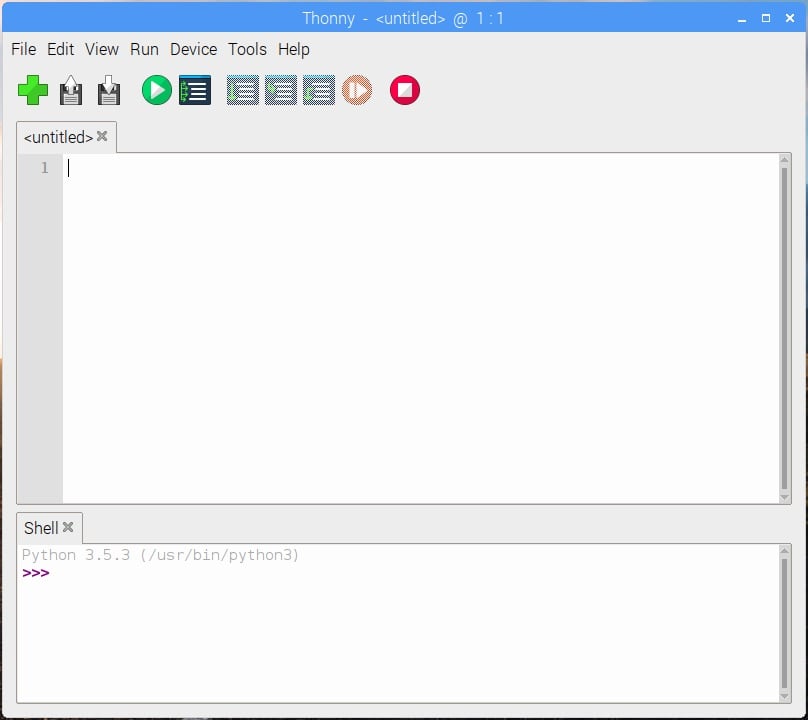
01. Open Thonny
Raspberry Pi OS comes with Thonny, which you can use to write and run Python programs. Find it under ‘Programming’ in the Raspberry Pi desktop menu.
02. Enter your first program
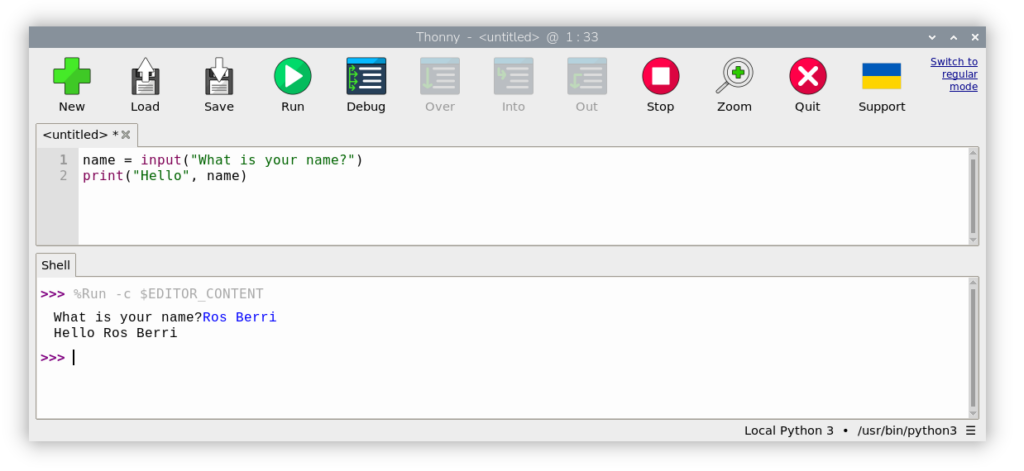
Thonny has two panels. At the bottom is the ‘Shell’. If you enter instructions here, they will be carried out immediately. We’ll focus on the top panel, where you type programs; these are stored sets of instructions that you can save, reuse, and easily edit. Enter the following short program — can you predict what it will do?
name = input("What is your name?")

print("Hello", name)
In Thonny, you’ll see that "What is your name?" and "Hello" are green, which means they’re chunks of text known as ‘strings’. Strings have quotation marks around them.
03. Run your program
Click the green ‘Run’ button to start the program. If it doesn’t work, double-check your code, particularly the punctuation.
The first line uses Python’s input() function, which tells the user what it wants and then waits for them to type it in. The user’s input goes into a variable called name. A variable is like a box for storing information. A program can change (or vary) the information in a variable.
On the second line, the print() function outputs information in the Shell. Inside the brackets, we put the information we want to display: the string "Hello" and the variable that contains the user’s name. We separate them with a comma. Can you modify the program to say “[name] is awesome”?
04. Add a quiz question
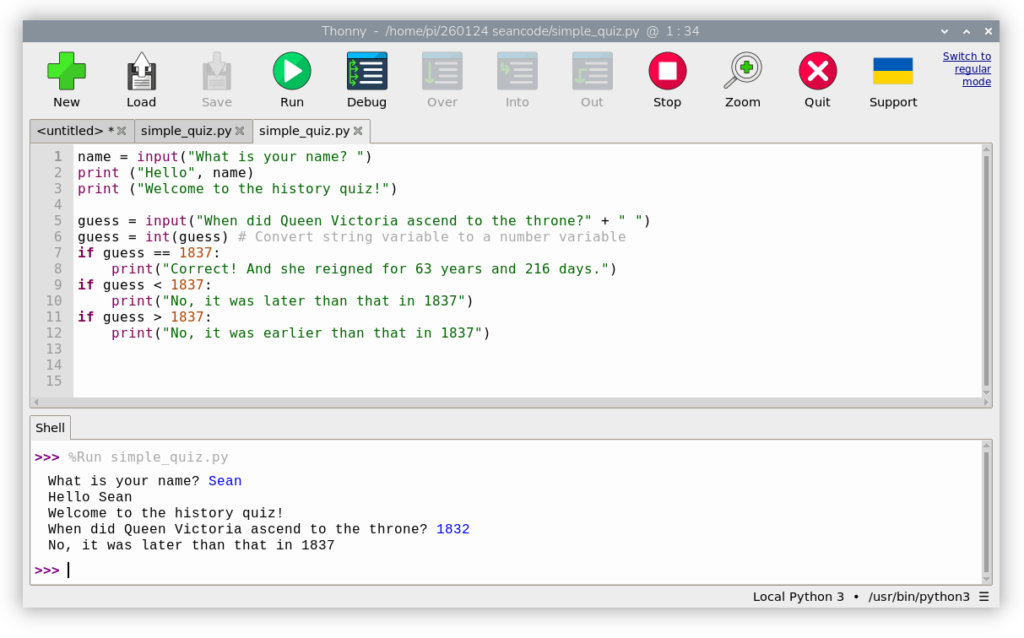
Let’s extend this program into a guess-the-year quiz, as shown in simple_quiz.py.
The game begins at line 5. We ask the quiz question and put the player’s answer into a variable called guess. The input() function creates string variables, so line 6 converts guess into an integer (whole number) so that we can do number comparisons. The # symbol marks a comment, added to help people understand the code. The computer ignores comments.
Lines 7 and 8 are a team. Line 7 checks whether the number in the guess variable is equal to 1837, the correct answer. Python uses two equals signs to check for things that are the same. (In lines 1, 5, and 6, you saw one equals sign, which is used to mean “make this variable equal to” something.) The instruction in line 8 is only carried out if the player’s guess is 1837.
You can tell that line 8 belongs with line 7 because it’s indented by four spaces. Python uses indentation to show which instructions belong together without needing additional punctuation, such as brackets. If you get your indentation wrong, your program won’t run. If you remember the colon at the end of line 7 when typing in the program, Thonny will automatically indent the next line. When you don’t need indentation any more, tap the ‘DELETE’ key.
Similarly, lines 9 and 10 check whether the player’s guess is less than 1837 and answer accordingly. Lines 11 and 12 cover guesses higher (or later) than 1837.
Test whether your program works correctly by typing in early, late, and correct dates. Congratulations! You’ve built your first Python game!
download the full code
05. Understanding lists
You could add more questions by copying lines 5 to 12, pasting them at the end of your program, and modifying the code for each question. But there’s a better way.
Lists are one of the data structures you can use to store information in Python, allowing you to write shorter, clearer, and more sophisticated programs. Click Thonny’s ‘New’ button to open a new tab and enter the tea_menu.py listing.
In this program, line 3 creates a list called tea_menu. It contains four strings. Each list item is separated by a comma, and the whole list is enclosed within square brackets.
Lines 4 and 5 make a for loop. A loop is a portion of code that repeats. Line 4 sets it up so that each time the loop starts, the program takes the next item from the tea_menu list and puts it into a variable called flavour. Line 5 is indented to show it belongs to the loop — it outputs the tea flavour. Try adding more flavours to the list.
We can also access a list item using its position in the list, called its index. The numbers start at zero, so lines 7 and 8 show how to get the first two flavours. The len() function reveals how long a list is, as shown in line 9.
There’s lots more to learn about lists, but that’s all we need to know today.
Curious about \n in the strings we’re printing? It adds a blank line to tidy up the output.
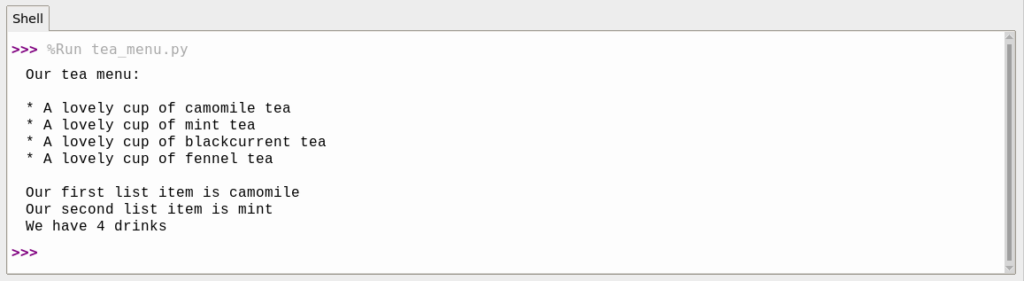
This menu is generated from a list of tea flavours; download the full code
06. Creating a list-based quiz
Let’s combine everything you’ve seen with a couple of new ideas. We’ll make a quiz game with multiple questions: the player guesses until they are right, and then the program moves on to the next question. See longer_quiz.py.
The first new idea: lists can contain other lists. This program creates a list called question_and_answer_list (lines 3 to 7). Each item in it is a list that contains a single question (a string) and its answer (a number).
Line 9 sets up a loop that goes through the big question and answer list. It extracts the next question and answer pair and puts them into variables called question and answer.
The second new idea is that you can have loops inside loops, called nested loops. This program introduces the while loop starting at line 12 and ending at line 21. This type of loop repeats a chunk of code while something is true. In this case, we repeat as long as the player’s guess is not equal to (!=) the answer. We indent the lines below by another four spaces to show which lines belong to this loop.
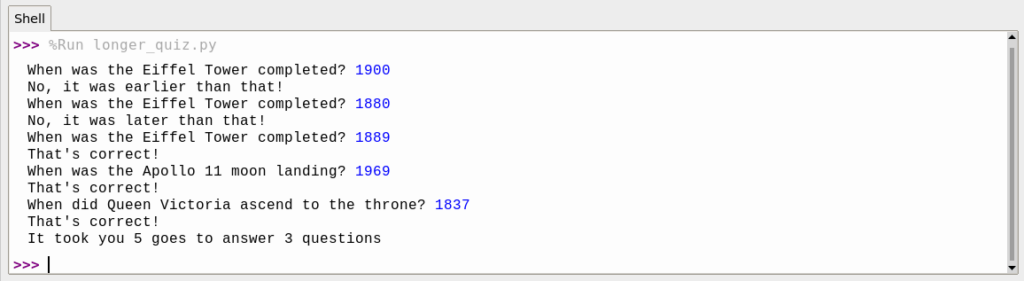
So, we have an outer loop that cycles through the questions, and an inner loop that takes the player’s guess, tells them if they were early, late, or correct, and repeats until they get it right. At that point, the program jumps back to line 9 to pick up the next question and answer pair.
Line 1 makes a variable to remember how many guesses the player makes. It’s increased in line 15. At the end, we give the player their score. In line 13, a space was added to the end of the question to tidy up the display; otherwise, the player’s answer would butt up against the question.
Customising programs is good practice when you’re learning Python. Try adding your own questions and messages to the quiz.
Find more Raspberry Pi projects in Raspberry Pi Official Magazine
This article appeared in issue 163 of Raspberry Pi Official Magazine, which you can access online. You can also subscribe to the print version of our magazine. Not only do we deliver worldwide, but those who sign up to the six- or twelve-month print subscription will receive a FREE Raspberry Pi Pico 2 W!
You can find Raspberry Pi Official Magazine on Facebook, X, Threads, LinkedIn, and Mastodon. You can also contact the team via email: [email protected]


1 comment
Jump to the comment form
David G.
I’ll keep this book marked?