Build a Raspberry Pi laser scanner
You really don’t need anything too fancy to build this Raspberry Pi laser scanner, and that’s why we think it’s pretty wonderful.
Building a Raspberry Pi laser scanner
The ingredients you’ll need to build the laser scanner are:
- Raspberry Pi
- Raspberry Pi Camera Module v2
- Stepper motor and driver
- Line laser
- Various LEDs, resistors, and wires
- Button
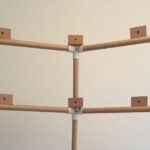
To complete the build, access to a 3D printer and laser cutter would come in handy. If you don’t have access to such tools, we trust you to think of an alternative housing for the scanner. You’re a maker, you’re imaginative — it’s what you do.
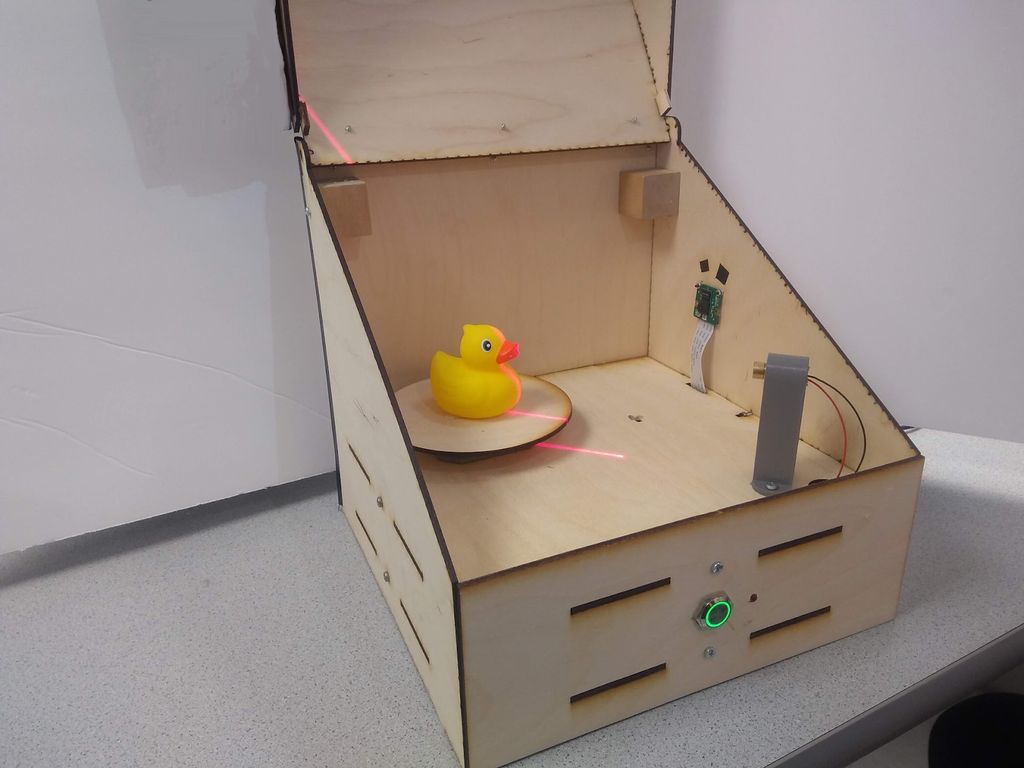
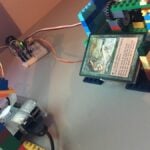
How does the laser scanner work?
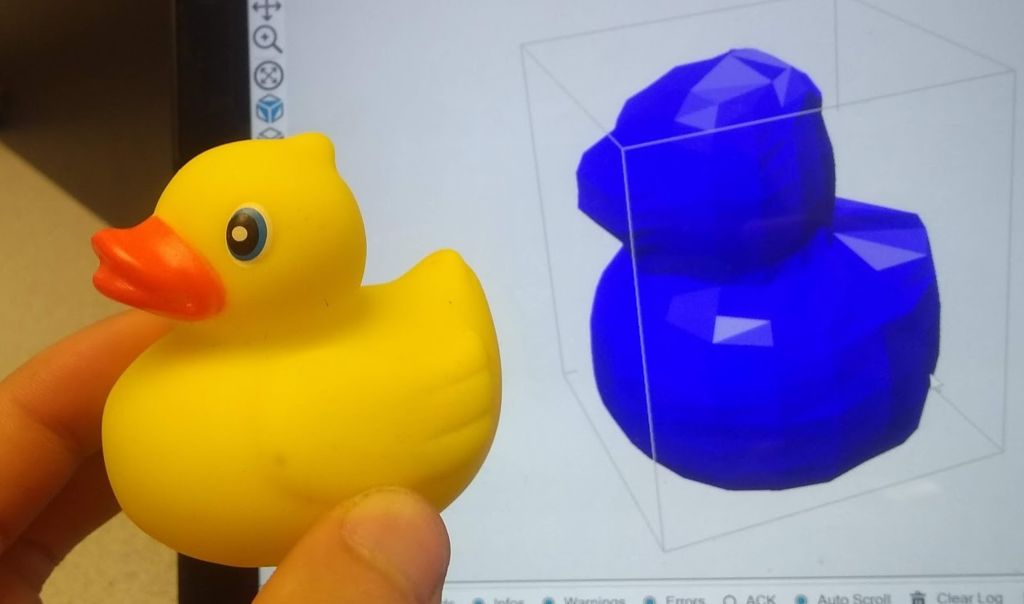
The line laser projects a line an object, highlighting a slice of it. The Raspberry Pi Camera Module captures this slice, recording the shape of the laser line on the object’s surface. Then the stepper motor rotates the object. When the object has completed a full rotation and the camera has taken an image of every slice, the Raspberry Pi processes all the images to create one virtual 3D object.
Instructables user mfx2 has written a wonderful tutorial for the project, which also includes all files needed to build and program your own version.

9 comments
Ruler of cats
The resolution isn’t so good, is it?
CooliPi
With so few passes, don’t expect high resolution. Also the width of the laser line correlate with precision. Translucent objects “shine” when lit by a laser, so it also adds some uncertainty, limiting resolution. But given many iterations, the final resolution could be good. To speed it up, some continuous image capture would be needed, eliminating the long phase of camera’s brightness adjustment.
Hal9001
Hahaha,yeah you could also pay 40k+ for an rtc. Looks brilliant for an introduction and a marvellous way to get surveyors of the future interested.
Fred Waters
Looks like all that is lacking is higher resolution. Wonder how it would do if you hooked up a good quality camera to be controlled by the RPi?
David Hothersall
You haven’t read the tutorial have you?
The resolution can be increased but at the cost of time.
Cryptonoid
Good job guys. Good execution. Simple, cost effective and very elegant. Dont worry about the details that can be adjusted by simply swapping out the laser, and increasing the numbers of pictures taken. Haters gonna hate.
Kevin Bowers
OK, just gotta do it. Just because of the green angel-eye power button–I happen to have an extra one just like it!
Luke Wilson
Well done, what a great idea! It is always inspiring to see people doing these pi projects. Very inventive, you make the difficult look easy.
Arjen
Nice idea. I busy to build it too. But isn’t better too use only half image?
I think you get then better object?
Comments are closed