Rocketry with Raspberry Pi
Move over SpaceX — you’ve got some competition. We’ve recently been inspired to get into this whole rocketry business, so we made Raspberry Pi Rocket One, took it to a big field, and tried to make it fly.

The thrill of launching a model rocket can be an unforgettable experience. After weeks or even months of planning, designing, building, and testing, seeing your rocket soar into the sky brings a sense of accomplishment that few hobbies can match. Pair that with some Raspberry Pi hardware and you can open up a whole new world of fun. The sky’s the limit, or rather, it isn’t.
How to make a model rocket
If you’re new to building model rockets then the easiest way to get started is to buy one of the many available kits. These come in various shapes and sizes, ranging from simple designs for beginners to complex kits for advanced builders. The kits usually come with most of the materials you’ll need, but you’ll also need some additional items such as glue, sandpaper, and paint in order to assemble your rocket. You’ll have to cut and sand the fins and add other components like a nose cone and engine mount. Step-by-step instructions are included, so it’s pretty straightforward.
I needed a rocket that could take a payload, and opted for a kit made by Estes called Green Eggs. It’s designed to carry an actual chicken egg on board: the idea is that you can launch an egg and return it safely to earth without cracking it! Using paint and stencils I suitably customised my rocket:

How model rockets work
Model rocket engines are the heart of the rocket. They provide the necessary thrust to lift the rocket off the launch pad and into the sky. The engines consist of a cylindrical cardboard casing full of solid fuel propellant, which is lit using an igniter. The igniter consists of a small piece of flammable material between two wires. At the press of a button, electrical current flows through the igniter, causing it to catch fire and burn briefly. It’s essentially an electronic match:
The igniter is placed into a cavity in the base of the solid fuel of the rocket engine, and held in place by a plastic plug:

Choosing the right engine
Model rocket engines come in different sizes and power levels. These are typically labeled with letter and number codes which represent the engine’s characteristics, starting with its power — the total impulse (in Newton-seconds) that it produces. Each letter represents up to twice the total impulse of the preceding letter, so a B engine will take a rocket higher than an A engine. It’s important to choose the right engine size and power for your rocket, according to its weight and design, to ensure a safe and successful launch. The following video is a static fire test of a C12-5 engine:
The first number in the code after the letter represents the average thrust, or how fast the engine will power the rocket to go. The higher the number, the greater the speed.
The final number in the code tells you the delay, in seconds, between the end of the engine’s thrust phase and the ignition of the ejection charge. Ejection allows your parachute to deploy so your rocket can float safely back to earth for retrieval. Take a look at the static fire test video again and you can see that once the main thrust phase of the engine has depleted, after a delay of five seconds the smaller ejection charge propellant ignites. This fires in the opposite direction, into the rocket itself. The ejection charge separates the rocket into two pieces connected by an elastic strip, freeing the parachute stored inside the body of the rocket.
I used an Estes D12-5 engine for my rocket. This is a single-stage engine with a 24mm diameter, designed for rockets with a maximum lift weight of less than 270g. Perfect for the Estes Green Eggs.
Payload


As soon as I stumbled across the Rockit RP2040-based model rocket flight controller on Tindie, I had to have one. Rockit (Rocket Operation Computing Kit) is a compact and inexpensive flight computer designed by Dan Invents from Finland for small model rockets. Among its many features, this board has an altimeter, accelerometer, and temperature sensor, all of which record data to a microSD card for post-flight analysis. Dan did a fantastic job with this board, and even included a 5V boost converter with 2A current output in order to control servos for more advanced rocketry. Alternatively, it can be used to power a Raspberry Pi and camera: now we’re talking!
Assembling the electronics and housing
I set about designing and 3D printing a suitable payload housing for the Rockit board, battery, Raspberry Pi Zero, and our wide angle 12MP camera module 3:


I added a small switch between the battery and everything else so it could all be powered on easily. Then I drilled a small hole in the housing for the camera, and simply slid the whole thing into place:

The Rockit board comes pre-flashed with Dan’s bespoke firmware. The board has a number of operational modes, and a tiny rotary switch lets the user choose between them. The basic mode simply arms automatically you power up the board, with a reassuring beeping sound to let you know everything is ready to go. The sensors pick up on the motion of the launch and get to work recording data to the microSD card, so it’s incredibly easy to set up.
As for the Pi Zero, I wrote a small script that records video in 30-second clips when you power up the board. Computers aren’t keen on being turned off simply by disconnecting power, and this way the only file I might corrupt when that happens is the final 30-second clip after the rocket has returned safely to earth.
All that was left to do was the final assembly. That consisted of packing the parachute and attaching the nose cone and payload section:

Launch day
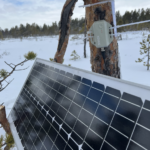
The phrase “what goes up must come down” highlights the small inherent risks involved in model rocketry. Therefore, to ensure a safe and enjoyable experience, we highly recommend joining an organised club that follows all the rules and regulations. That way, you can have peace of mind and focus on enjoying the thrill of the experience. I teamed up with the East Anglian Rocketry Society, which is local to us here at Pi Towers in Cambridge, UK:

The photo shows Ian Lewis, the treasurer of the EARS, who guided me through my first launch experience. There isn’t much he doesn’t know about rockets. The club allows visitors, so even if you’re not ready to fly quite yet you can enjoy a day out watching others launch. It really is quite a spectacle. As a one-time guest, you can use the club’s facilities and launch your first rocket for a minimal fee — a great way to try out model rocketry without becoming a member.
Countdown
With everything set and ready to go, the countdown echoes around you through a loudspeaker system. “And in five, four, three, two, one… lift-off!”
It was a perfect launch! The parachute deployed and the rocket floated gently back to earth. Get in!
Flight data
We retrieved the rocket from the field next to the launch site, then set about interrogating our data. The Rockit board automatically writes a CSV file to the microSD card, so by popping it into my laptop and opening up my default spreadsheet viewer, I could quickly see that we had flight data:

The spreadsheet is pretty self-explanatory, showing time in milliseconds against the data that each of the on-board sensors recorded.
The data is all fascinating, but the first thing I wanted to know, of course, was how high we had flown:

The altimeter recorded our highest point (or apogee, as we rocket scientists call it) 8.8 seconds after launch at 154.3 metres, which is 506 feet. I’ve made all the data available here if you want to take a look in more detail.
“What about the Raspberry Pi camera footage?” I hear you ask. Well, that’s where things went a little wrong for me. I returned home feeling all smug about my first launch and powered up the board only to find that I had video right up until the point of launch, and then nothing!
I’m not quite sure why the camera stopped recording. Raspberry Pis are pretty good at coping with rocket launches (just check out Astro Pi for proof). I need to do some further work, and then I’ll try again. As we all know, though, it’s rare that a rocket launch goes perfectly smoothly. At least we didn’t undergo a rapid unscheduled disassembly before stage separation.


10 comments
Christoff Smith
Seems like a great activity for our local GCSE engineering STEM club. But the company mentioned in the article appears to be in the US? How did you get a rocket delivered to the UK?
Raspberry Pi Staff Ashley Whittaker
We heard about this from the staff at EARS: https://www.ukroc.com/
Might be cool for your students to take part in.
Also, Toby said there are loads of UK resellers for that particular rocket. He went with: https://wheelspinmodels.co.uk/i/329819/ but they’re now out of stock.
Bsimmo
There are various UK sites for model rockets I can check where our few came from.
We used Pi’s to record video and altimeter/GNSS/6dofF etc back with B and then A+.
Later we used SenseHATs on the A+ and they worked well too. Great for LED feedback when setting up.
Then the Zeros came out and never got to use them.
For video we found the jerk on launch could cause a slight power cable dislodge, so resets the Pi and you get video up to that point.
If not that then a camera cable doing similar. And that the sd card if resting against something doesn’t get knocked.
If not that as other date is collected.
We put pi in parachuted containers to collect video and data as the drifted back to land.
Also look at the CanSat ESA.
And if the rockets parachute fails or goes into a spin, the Pi are quite robust…… 😂
Raspberry Pi Staff Ashley Whittaker
We have withstood a solar flare in space so were pretty confident we’d survive in these little rockets!
Jeff Geerling
That ending, though… you know a part 2 is obligatory now, complete with flight video!
Raspberry Pi Staff Ashley Whittaker
Top tip: never agree to accompany Toby to a “fun work event”. You will be tasked with wading through a field to find his rockets.
AndrewS
What’s not fun about that?
Conrad
This is cool! was involved with model rocketry way back in highschool. will definitely look into the Rockit :)
EWAN PARRY
I did a STEM activity with sugar rockets. I couldn’t source ESTES engines where I lived so made them myself. Would love to have had the Pi module to collect data.
Mark
STL/STEP files for this project? And the script you used for the Zero?
Thanks.
Comments are closed