Recreate the Victorian Fairy Lantern stage trick with Pico LiPo
In the latest issue of HackSpace magazine, Andrew Lewis shows us how to recreate a classic stage illusion in small-scale using a Pimoroni Pico LiPo and an SPI screen.
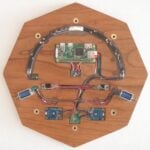
The Pepper’s ghost illusion wowed the theatre-going public in the 1860s, spawning a slew of ghost-themed plays. With this project, you can create your own version of this popular illusion to capture a fairy inside a lantern, using the power of an RP2040 board, LCD screen, a suitable GIF image, and transparent acrylic.

The Pepper’s ghost illusion is actually much older than you might expect, and was first described in the 1500s. Although it’s not a true hologram, the eerie effect that it creates often gets called as such, and is occasionally seen as an advertising gimmick at trade shows and conferences. The illusion uses an artfully positioned pane of glass or plastic to reflect a concealed object or screen in such a way that the image appears to be floating, semi-transparent, in mid-air. The technique is also the basis of how an autocue works: since the illusion is only visible from a certain position, it’s possible for a public speaker to look directly at the text of an announcement without the text being visible to those people behind the transparent screen.
It’ll work if you believe in it
To make your own version of the Pepper’s ghost illusion, you’ll mount an acrylic sheet at 45 degrees to a concealed screen inside a lantern. You’ll want the lantern to have glass sides, so that the semi-transparent effect of the illusion is apparent to the viewer. If you try to project the illusion against a plain background, the power of the effect is lost and you might as well just put the screen up there instead.

Before you fit the hardware into the lantern, you’ll need to solder the pieces together, choose a GIF image you like, size it to match the size of your screen, and then convert it into a format that the Pico LiPo can process fast enough to display as an animation. After choosing a GIF, the easiest way to resize and manipulate it is with an online service like ezgif.com.
Crop or resize your GIF to 240×240, and choose an appropriate compression level. Save the GIF to your computer. You can also apply different playback and effects for your animation, like reverse or ping-pong.

All at C++
Converting the GIF into a useful format for the Pico LiPo is easy, thanks to the work of Larry Bank. Larry has produced some extremely useful code that lets us shortcut a lot of the issues around playing back a GIF and connecting to the screen. So, download the image_to_c application from hsmag.cc/ImageToC, and the code from hsmag.cc/SPILCDCode. The image_to_c application lets you automatically reformat the GIF file in a way that’s more easily handled by the bb_spi_lcd code, which takes the reformatted GIF and displays it on an SPI LCD screen. Assuming that you’re using Windows, there’s a precompiled image_to_c32.exe in the dist folder of the image_to_c repository. If you read through the notes for the image_to_c app, you’ll see that the application outputs the modified GIF to stdout. That means that if you have a file named fairy.gif on Windows and you want to create a properly formatted header file for C++, you’ll use the command image_to_c32.exe fairy.gif >> fairy.h.

You’ll need to make a few changes to the example provided with bb_spi_lcd so that it will load the correct GIF and connect with the 1.3” screen properly. Open up the spi_lcd_demo.c file in your favourite editor, and begin by adding #include “fairy.h“ (assuming that your processed GIF is called fairy.h) to the list of includes at the top of the code. Next, change the value of #define DISPLAY_WIDTH and #define DISPLAY_HEIGHT 240, to match the resolution of the screen.
Jump down near the bottom of the code and find the setup() function. You need to change the call to the spilcdInit function so that it uses the correct LCD driver settings. The correct driver is LCD_ST7789_240, so the full line should read: spilcdInit(&lcd, LCD_ST7789_240, FLAGS_NONE, CLOCK_SPEED, LCD_CS, LCD_DC, LCD_RESET, LCD_BACKLIGHT, LCD_MISO, LCD_MOSI, LCD_SCK);

Finally, find the main() and look for the if statement that encapsulates a GIF_openRAM() call. Change the call to read GIF_openRAM(&gif, (uint8_t *)fairy, sizeof(fairy), GIFDraw). The name ’fairy’ here refers to the name of the const defined in the fairy.h file you generated from the GIF file, and is normally the same as the original GIF file name.
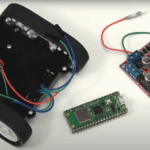
Save the changes, and you’re almost ready to compile and upload the file to the Pico. You’ll need to copy the pico_sdk_import.cmake file from your pico-sdk/external folder into the folder where you’ve downloaded the bb_spi_lcd repository. This file helps the compiler to locate the Pico SDK on your system. If it isn’t the bb_spi_lcd folder, then you’ll probably get an error when you try to compile. As is traditional, create a folder called build and navigate into it. Do cmake .. to create your build files, and then use make to build the project. After a few screens of hopefully green text have passed by, you should have a file named spi_lcd_demo.uf2 in your build folder. Attach your Pico LiPo to your computer via USB, and put it into bootloader mode by turning it on with the BOOT button pushed down. Copy the UF2 file to the Pico LiPo (which should appear on your system as a drive named RPI-RP2). Restart the Pico LiPo and you should see your GIF playing on the screen.

Now that the hardware is done, you can set about fitting it all inside your lantern. The exact instructions for this will vary depending on the size and shape of the lantern that you’re using, but there are a few tips that might make the process a little bit easier. Firstly, pay attention to the location of the USB socket and the power button on the Pico LiPo. You’ll need access to the USB port to charge the batteries, and the power button to turn the board on and off. You should also be aware of the lights on the board and make sure that they don’t interfere with the illusion.
If the base of the lantern is too inaccessible, you could try fitting everything into the top of the lantern instead. As long as the screen is concealed from sight, the illusion should work fine. Keeping your cables short and soldering wires directly to the boards rather than using DuPont connectors can help to keep the footprint of the electronics small.
Chances are high that this project will get handled quite a lot, so more hot glue is probably better than less. If you’re not interested in capturing a fairy, you could use the same effect to play a holo-message from the Rebel Alliance, revive a Hogwarts ghost, or visualise the great and glorious Oz in portable format.


4 comments
Raspberry Pi Staff Liz
Ha – I loved this when I saw it in the mag. Pepper’s Ghost remains a really effective illusion; I had a great conversation with a lady who works in Imagineering at Disney just pre-pandemic about how much they use the effect in the parks. Amazingly powerful for a trick that’s more than 150 years old!
Raspberry Pi Staff Ashley Whittaker
Disney parks you say…… 🤔
Eric Albert
The Hackspace mag article mentions a pre-compiled UF2 file for the fairy shown in the project. But where is that file??? I’d like to use that first to test out some lantern options and designs.
Richard Aspden
Echoing Eric’s comment I couldn’t fine the pre-compiled UF2. I tried making my own – the image shows for a split second on the screen then disappears. I tried another GIF and it doesn’t show at all. Has anyone got this working?
Comments are closed