Cloud-init on Raspberry Pi OS
As some of you may have already noticed, the latest Raspberry Pi OS release based on Debian Trixie now includes cloud-init. This marks the beginning of a transition away from our legacy first-boot customisation system based on the firstrun.sh script.
Cloud-init is a cross-platform, distribution-agnostic tool used to automatically configure systems on first boot. (Definition adapted from the official cloud-init documentation.) With it, you can provision your Raspberry Pi images with users, network settings, SSH keys, storage configurations, and much more — all without manually logging in after flashing the image.
How can I use it?
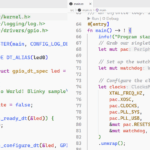
If you’ve downloaded the latest image (released on 24 November 2025), you’ll find that three new files have appeared on the boot partition. This is the FAT32 partition that your computer automatically mounts when you insert a freshly flashed Raspberry Pi OS microSD card. It already contains familiar files like config.txt, but now you’ll also see:
meta-datanetwork-configuser-data
For most users, meta-data can be left untouched — it simply enables cloud-init to process the other configuration files correctly. Advanced users may use it for more complex provisioning workflows, but it’s safe to ignore in typical setups.
Cloud-init uses YAML for its configuration files. If you’re new to YAML, it’s worth taking a quick look at the official documentation, as indentation and formatting matter. For now, we’ll focus on the two most relevant files: user-data and network-config.
General configuration (user-data)
The user-data file is the central place for your configuration. With the exception of networking, almost everything cloud-init sets up on first boot is controlled from here.
You can use it to create a default user, define your locale, install additional packages, configure SSH access, and much more — all of which is covered in the official cloud-init documentation.
Unlike many other distributions, Raspberry Pi OS includes a few Raspberry Pi–specific extensions for cloud-init configuration. These allow you to enable hardware interfaces such as I2C, SPI, serial, and 1-Wire, and even activate USB gadget mode (rpi-usb-gadget) automatically.
Here’s an example configuration that sets up a user and demonstrates all the currently supported Raspberry Pi–specific options:
#cloud-config

# Set the hostname for this device. This will also update /etc/hosts if manage_etc_hosts is enabled.
hostname: mypi2025
manage_etc_hosts: true

# Set the system timezone
timezone: Europe/London

# Create a default user account and apply permissions
users:
  - name: pi
    groups: users,adm,dialout,audio,netdev,video,plugdev,cdrom,games,input,gpio,spi,i2c,render,sudo
    shell: /bin/bash
    lock_passwd: false  # Set to true to disable password login entirely
    plain_text_password: mysecretpassword123  # Alternatively, use 'passwd:' with a hashed password for better security
    ssh_authorized_keys:
      - ssh-ed25519 mykeystuff  # Replace with your actual SSH public key
    sudo: ALL=(ALL) NOPASSWD:ALL  # Allow passwordless sudo for this user

# Raspberry Pi–specific options (provided by the cc_raspberry_pi module)
rpi:
    spi: true               # Enable SPI interface
    i2c: true               # Enable I2C interface
    serial: true            # Enable serial console and UART interface
    onewire: true           # Enable 1-Wire interface
    enable_usb_gadget: true # Enable USB gadget mode

# Additional Raspberry Pi OS option (not available on generic cloud-init images)
enable_ssh: true  # Enables the SSH server on first boot

# Optional: Disable SSH password authentication if using SSH keys only (recommended for security)
# ssh_pwauth: false
For more details, you can refer to the cc_raspberry_pi module in the official cloud-init documentation.
Note:
The#cloud-configheader at the top of the file is mandatory — cloud-init will not process the file correctly without it.
Networking configuration (network-config)
The network-config file defines how your Raspberry Pi should set up its network interfaces on first boot. As the name suggests, this is where you configure Wi-Fi or Ethernet settings before ever powering on the device.
Here’s a simple example that connects your Raspberry Pi to a Wi-Fi network:
network:
  version: 2
  wifis:
    # Make sure the target is NetworkManager which is the default on Raspberry Pi OS
    renderer: NetworkManager
    # The connection name
    wlan0:
      dhcp4: true
      # !VERY IMPORTANT! Change this to the ISO/IEC 3166 country code for the country you want to use this microSD card in.
      regulatory-domain: "GB"
      access-points:
        "My Net-Work":
          password: "mysupersecretpassword"
      # Don’t wait at boot for this connection to connect successfully
      optional: true
When you power on your Raspberry Pi with this microSD card inserted, cloud-init will process this configuration and attempt to connect to the specified network automatically — allowing you to SSH in or continue working without needing to attach a screen or a keyboard.
You can configure far more than just basic Wi-Fi credentials: multiple networks, priority fallback, static IP assignments, VLANs, and more are supported. For a full reference, see the official cloud-init networking documentation.
With the introduction of cloud-init, Raspberry Pi OS also includes Netplan, a unified abstraction layer for network configuration used by several modern Linux distributions.
More about Netplan
Netplan is now the primary source of truth for networking on Raspberry Pi OS. It uses its own YAML-based configuration format and can render network settings for both systemd-networkd and NetworkManager, depending on which renderer you choose. The major advantage of this approach is portability — a Netplan configuration can be reused across any Linux distribution that supports it, regardless of whether it uses NetworkManager or networkd underneath.
To use Netplan directly, place your configuration files in /etc/netplan/ — this is also where cloud-init stores your generated network configuration from network-config without modification. From there, you can generate the active configuration using:
sudo netplan generateThis writes the appropriate configuration files for the selected backend (NetworkManager on Raspberry Pi OS). To activate the configuration, run:
sudo netplan applyYou can still use nmcli as usual to inspect or manage connections. Since many existing tools and scripts rely on nmcli or the NetworkManager D-Bus API, there needs to be a communication layer between Netplan and NetworkManager. Canonical provides three patches that enable this two-way interoperability, allowing NetworkManager to signal configuration changes back to Netplan.
For Raspberry Pi OS, we’ve gone a step further and introduced additional patches to improve this workflow:
- NetworkManager will only interact with connections that use the
netplan-prefix. If you want a new connection to be persisted by Netplan, give it that prefix when creating it, and it will be stored in Netplan’s configuration. - When generating profiles, NetworkManager loads all Netplan-defined connections and writes its interpreted runtime configuration back in a format Netplan can understand.
- During this process, all
.yamland.ymlfiles under/etc/netplan/are cleared to avoid conflicting definitions across multiple layers. - This does not affect manually created connections stored in
/etc/NetworkManager/system-connections/. - Any profiles generated at runtime by Netplan will appear under
/run/NetworkManager/system-connections/and will also use thenetplan-prefix.
This approach ensures consistency between both systems and prevents configuration drift when editing or reloading profiles via NetworkManager tools.
Wrapping up
With cloud-init and Netplan now integrated into Raspberry Pi OS, first-boot provisioning becomes far more powerful, repeatable, and portable across different setups. Whether you’re configuring a single device or preparing dozens of Raspberry Pis for a classroom, a lab, or an IoT deployment, these new tools make it easy to define everything up front — users, networking, interfaces, and more — before the system even powers on.
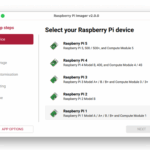
With the release of Raspberry Pi Imager 2.0, cloud-init configuration for Raspberry Pi OS is now generated by default. This makes it easy to further customise your setup after writing the image — simply edit the generated user-data or network-config files on the boot partition. Imager 2.0 also understands the Raspberry Pi–specific rpi: options, so features like SPI or I2C can be enabled directly in the customisation UI.
The legacy method still works, but cloud-init and Netplan open the door to a much more flexible and modern workflow. We’ll continue expanding support for Raspberry Pi–specific cloud-init modules and streamlined provisioning features in future releases.
If you create interesting user-data or network-config templates, or have feedback about the new system, we’d love to hear from you in the forums.
Header image resources: Background designed by Freepik. Icons by ziadarts, Dimas Anom, and Gregor Cresnar via Flaticon.


25 comments
Jump to the comment form
Milliways
It would have been nice if this was documented BEFORE releasing it on an unsuspecting public. Unfortunately this seems to be the new norm; release stuff then sometimes document it.
I just did a fresh install (to test the new imager) and managed to work this out but my normal process failed.
Raspberry Pi Staff Ashley Whittaker
https://cloudinit.readthedocs.io/en/latest/explanation/introduction.html
James W Williams
I looked at the full documentation and I don’t see how to specify the uid and gid of an account. This is necessary in environments with NFS where the uid:gid have to be consistent across all hosts (for NFS v3, at least). I hope this feature is present and I just missed it.
Jesse Korhonen
Hi,
You can find full schema how to add users in https://cloudinit.readthedocs.io/en/latest/reference/modules.html#mod-cc-users-groups
So you can specify uid attribute with integer.
uid: (integer/string) The user’s ID. Default value [system default].
Changed in version 22.3.The use of “string“ type is deprecated. Use an “integer“ instead.
For groups I don’t think that there is clear way to do this and that fearure is not even in roadmap: https://github.com/canonical/cloud-init/issues/2314
Best regards,
Jesse Korhonen
Mark Adler
Does this explain why the 1.9.6 flasher is not setting anything up anymore, and leaving me with a raw OS? I tried the 2.0.0 flasher, but it doesn’t work, taking half an hour to get to 7% written, and then proceeding no further.
Tom Dewey
Correct. Per the post:
This marks the beginning of a transition away from our legacy first-boot customisation system based on the firstrun.sh script.
cloud-init offers the advantage that even if you decide against using Raspberry Pi Imager, writing a configuration file to customise is much simpler than the firstrun.sh style system.
Pre-2.0.0 Raspberry Pi Imager may be able to perform limited customisation if you point it as a custom repository file – but they lack the extensions to cloud-init covered in this post.
Alistair Buxton
Yes. I wasted several hours today trying to figure out why customization just stopped working for no reason. Because of course Imager doesn’t tell you it has downloaded a new version. That would be too simple.
Alistair Buxton
This article states that “The legacy method still works” yet over on the rpi-imager github, the developers state that:
“[Raspberry Pi OS Trixie released after 24 Nov 2025] has now switched to “init_format”: “cloudinit-rpi” to make use of all the new features in Imager 2.0. This has the unfortunate side-effect that Imager 1.9.x now isn’t able to customise Raspberry Pi OS Trixie, because the older versions of Imager don’t know how to deal with cloudinit-rpi.”
So which is it?
Jeff Geerling
So glad to see cloud-init finally used for all the configuration at first boot. This finally unifies my various device setup scripts, it’s nice to have that standard layer across many distros.
It’s a little awkward with timing, since this is both an image change and a change to the way Imager works, seems like a transition period would be useful, but as it solves my own problems I’m not complaining!
Rich Robinson
May be just too much of a learning curve for new and inexperienced users. It needs the q&a style approach somewhere to give a simple set-up. Not exactly KISS, even though for fleet setups it would be better. Too scary at first look.
jordana
great support for usb gadget mode that is a valuable feature when wifi is only available with captive portal
Milliways
The post states “the latest Raspberry Pi OS release based on Debian Trixie now includes cloud-init”. This links to https://www.raspberrypi.com/news/trixie-the-new-version-of-raspberry-pi-os/ 2nd Oct 2025 BUT that does NOT use cloud-init; which was not in the release until 24 Nov. Those who installed the initial release got the traditional first-boot customisation
Milliways
This NOW says “the latest image (released on 20 October 2025)” but there is no such image in https://downloads.raspberrypi.org/raspios_arm64/images/ and no release notes!
bensimmo
Just needs a RaspberryPi Cloud-init Configuration Program/App to make this easier for people.
Giving us all the Pi options and helps explain them, all in a nice Desktop way (rather than text and hope), even integrate it into Pi Imager so we can just save/import the file and skip the other config options.
AndrewS
“Just needs a RaspberryPi Cloud-init Configuration Program/App to make this easier for people.”
That’s what Imager 2.0 is :-)
https://www.raspberrypi.com/news/a-new-raspberry-pi-imager/
bensimmo
I can load a file in that I believe.
but to actually create the file itself with all the options, not just give some of the ‘new user’ settings.
And we cannot get to the setting without having a drive to install on anyway!
There are no i2c, 1-wire, advanced WiFi, static IP’s, make an AP, serial, … some of the features you have in your raspberrypi documents.
But it does overall make life easier for repeated installs :-)
A good move.
Esbeeb
I don’t like yaml. Footguns will possibly occur in netplan yaml confs, with IPv6 addresses. People won’t know they have to put doublequotes around IPv6 addresses, by default.
I like logging into a Pi over VNC then graphically using NetworkManager graphically in the “tray” (or whatever it’s called). Graphical configuration reveals all the conf options 100x better than the dark torture chamber which is netplan’s yaml, *as soon as you want to anything nonstandard*, like say create bridge devices, or adjust wireguard tunnels (which I do a lot).
Thierry de Coulon
Cloud-init ruined my install by trowing an error at reboot. I don’t need this and it’s an annoyance, so now I remove it first thing after install.
tommylovell
Yes, I noticed. Great idea, but I concur with Milliways, a “non-obscure” heads-up on this would have been nice. Broke all my procedures. I use Imager; copy output back to disk; ‘dd’ to Pi disk; move disk to Pi; boot Pi; finally Ansible to fully customize Pi. Many more things broken than usual. My fault for not paying constant attention to my Pi’s.
DDSCentral
Just noticed when setting up a Pi 4 afresh.
This Netplan/cloud-init stuff certainly has it’s uses but I personally hate it and it’s one of the reasons I use regular Debian over Ubuntu.
Plain old ifupdown is just fine for me and it just works.
Also I have a working network configuration that I do not wish to rewrite to Ubuntu-ish.
“apt purge netplain.io cloud-init”
But to each his own I guess.
JR
Does not work with Trixie Lite 32 bit.
Monika Singh
Does this cloud-init require a Wi-Fi or LAN connection before booting to connect?
davkau
Update for anyone still struggling with this: If you’re using
the Trixie-based Raspberry Pi OS Lite (64-bit), make sure to use Imager v2.0.6 (or newer). The older versions like 1.8.5 won’t apply your custom configuration (hostname, SSH, WiFi).
It’s not entirely clear to me why it fails silently with the old imager—possibly related to Trixie’s switch to cloud-init for first-boot customization, which only Imager 2.x seems to understand. Either way: upgrading the Imager fixed it. Tested and working on Pi 4.
thomas
If you introduce such changes the system should afterwards react transparently on the attempt to use esisting tools or recipees like, e.g., using ‘hostname -b’ or raspi-config to change the hostname. I set up my system using the raspberry pi image and tried to change my hostname today and had to learn that the changes were all undone after a reboot. Only searching the internet gave some hints on how to fix this and what is behind this. For me, the system is broken the way it behaves now. For newbees this is a showstopper.
FM_81
A question about “network-config”: Let’s assume, you want to connect to a WiFi on first boot, but you do NOT want to give the wlan-password in PLAIN TEXT an use a hash instead? (Just like it was possible in earlier days in ‘wpa-supplicant.conf’. May be, it’s written somewhere in documentation, but if, then it is hidden to good for me …) Thank you!