Build your own weather station with our new guide!
One of the most common enquiries I receive at Pi Towers is “How can I get my hands on a Raspberry Pi Oracle Weather Station?” Now the answer is: “Why not build your own version using our guide?”
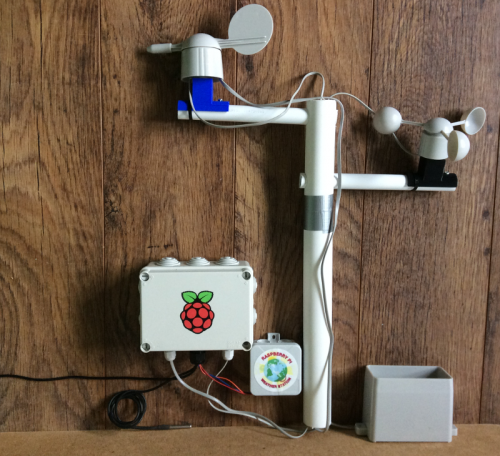
Tadaaaa! The BYO weather station fully assembled.
Our Oracle Weather Station
In 2016 we sent out nearly 1000 Raspberry Pi Oracle Weather Station kits to schools from around the world who had applied to be part of our weather station programme. In the original kit was a special HAT that allows the Pi to collect weather data with a set of sensors.

The original Raspberry Pi Oracle Weather Station HAT
We designed the HAT to enable students to create their own weather stations and mount them at their schools. As part of the programme, we also provide an ever-growing range of supporting resources. We’ve seen Oracle Weather Stations in great locations with a huge differences in climate, and they’ve even recorded the effects of a solar eclipse.
Our new BYO weather station guide
We only had a single batch of HATs made, and unfortunately we’ve given nearly* all the Weather Station kits away. Not only are the kits really popular, we also receive lots of questions about how to add extra sensors or how to take more precise measurements of a particular weather phenomenon. So today, to satisfy your demand for a hackable weather station, we’re launching our Build your own weather station guide!

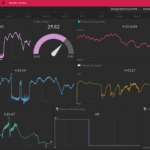
Fun with meteorological experiments!
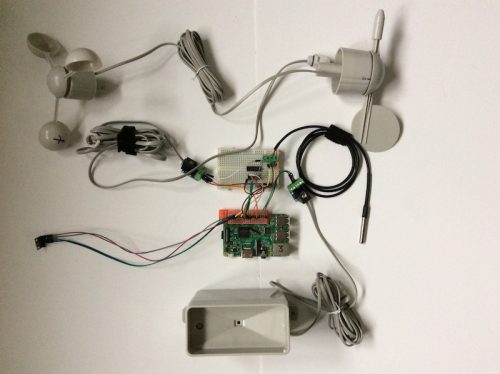
Our guide suggests the use of many of the sensors from the Oracle Weather Station kit, so can build a station that’s as close as possible to the original. As you know, the Raspberry Pi is incredibly versatile, and we’ve made it easy to hack the design in case you want to use different sensors.
Many other tutorials for Pi-powered weather stations don’t explain how the various sensors work or how to store your data. Ours goes into more detail. It shows you how to put together a breadboard prototype, it describes how to write Python code to take readings in different ways, and it guides you through recording these readings in a database.
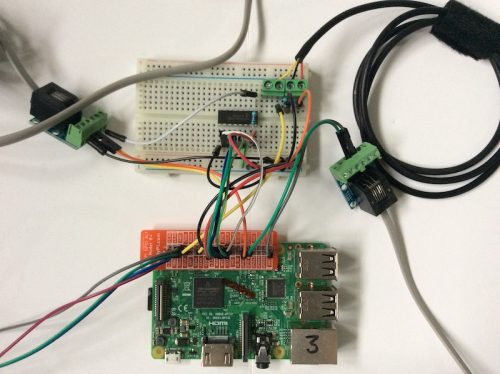
There’s also a section on how to make your station weatherproof. And in case you want to move past the breadboard stage, we also help you with that. The guide shows you how to solder together all the components, similar to the original Oracle Weather Station HAT.
Who should try this build
We think this is a great project to tackle at home, at a STEM club, Scout group, or CoderDojo, and we’re sure that many of you will be chomping at the bit to get started. Before you do, please note that we’ve designed the build to be as straight-forward as possible, but it’s still fairly advanced both in terms of electronics and programming. You should read through the whole guide before purchasing any components.
The sensors and components we’re suggesting balance cost, accuracy, and easy of use. Depending on what you want to use your station for, you may wish to use different components. Similarly, the final soldered design in the guide may not be the most elegant, but we think it is achievable for someone with modest soldering experience and basic equipment.
You can build a functioning weather station without soldering with our guide, but the build will be more durable if you do solder it. If you’ve never tried soldering before, that’s OK: we have a Getting started with soldering resource plus video tutorial that will walk you through how it works step by step.
For those of you who are more experienced makers, there are plenty of different ways to put the final build together. We always like to hear about alternative builds, so please post your designs in the Weather Station forum.
Our plans for the guide
Our next step is publishing supplementary guides for adding extra functionality to your weather station. We’d love to hear which enhancements you would most like to see! Our current ideas under development include adding a webcam, making a tweeting weather station, adding a light/UV meter, and incorporating a lightning sensor. Let us know which of these is your favourite, or suggest your own amazing ideas in the comments!
*We do have a very small number of kits reserved for interesting projects or locations: a particularly cool experiment, a novel idea for how the Oracle Weather Station could be used, or places with specific weather phenomena. If have such a project in mind, please send a brief outline to [email protected], and we’ll consider how we might be able to help you.


14 comments
Steve
This is fantastic news — the guide looks terrific! Getting the weather station kit out as a full-fledged, generally available product has been at the top of my wish list since the original appeared, but what you’ve done here is a very acceptable alternative (although I would still like to see an updated version of the weather station HAT put out there). Kudos to everyone involved with this project!
Fabio
Hello,
I would like to share the working I am doing with the Raspberry’s Weather station. It is about how to extend the station so we can install more sensors or replace the current ones.
I had a problem with the soil temperature which is connected to the station by a short wire and I would like to install the station on the top of my school. Increase the length was not an option due to interference/resistence. Also, I would like to measure UV, river level, etc.
I extended the station by turning it into an access point (using an USB-Wireless adapter) and by developing wireless modules based on the microcontroller ESP8266. I wrote a short article and I could write it in a more appropriated format if this work is useful to the community.
https://fabiorochaufsc.github.io/Pesquisa/Estacao/article.pdf
Richard Sierakowski
A brilliant evolution of this project which will further enhance the skill and knowledge of those people who will participate in the construction of a more flexible and versatile version.
Richard
Dougie Lawson
This is a very good thing.
You’ve replaced a couple of the parts compared to the official weather station, but it’s not hard to hack the old code for the new station. I see you’ve abandoned the air quality sensor and taken an upgrade from BMP180 to BME280 for temp and pressure.
I’ll have a look at hacking your new code for the original station (since Clive sent me one as a reward for answering the questions in the Weather Station part of the forum).
Miles Archer
On the software side, you might use weewx, an open source weather station platform that runs quite well on a raspberry pi. It’s written in python so it makes it really easy to customize. I have mine running on an older 2B connected to a commercial weather station via USB and to a custom wireless thermometer via Wifi.
http://weewx.com/
Craig
This looks similar to https://pypi.org/project/pywws that has been running on my Pi B v1 (or v2 I can’t remember now) since 2013! Although the graphs do look a little ‘cleaner’ in weeWX.
http://weather.pithreeonefour.co.uk/
J P (@JP_AustinTx)
Plus 1 for the weewx software. Great start and has all the tough code built in. Including upload to Weather Underground and others. `
ErrolTheTerrible
Great! I have a one of the Sparkfun Weather sensor kits lying around doing nothing. Reading the Guide now.
BTW, the links to the 3D printed parts are acting funny. The link has only a very thin active area at the top of the text. I almost though there was no links…
Brian Williams
What is the rationale for not publishing the circuit diagram for the original weather station hat? It’s not for sale to the public, so where is the harm?
It seems to be rather against the spirit of open source, don’t you think?
Theeuwes Pronk
It would be nice if you could make it run with weewx
I can make a Hat for the weather station
Ian Boag
One of the options with weewx is to put the readings into a file and tell weewx to get it from there. So if you have some code that will read the sensors, you can do the read, put the readings into a suitably formatted file and tell weewx to read it at whatever interval works for you.
Ed
I have read the tutorial, and managed to follow it through. My software runs and records for about 5 days then randomly stops recording. I wonder if for some reason the script is timing out? I wonder what the benefit of having the script constantly running is, rather than using Cron to record the results in the database automatically at intervals? Obviously the wind script will need to be constantly running to gather gust data, but I would have thought one script would be less taxing than two? I am just waiting for the waterproof boxes to arrive before I mount my equipment in the garden.
It would be nice to see a tutorial about how to display the data on a website, but I realise you guys aren’t web designers but I’m sure someone in the community will be able to help.
Marlin
How much would it cost to build a weather station with most of the features like the acurite brand has? After reading few blog posts on https://www.weatherstationlab.com/, i’m considering to build my own weather station. Is that a good idea?
Gerald
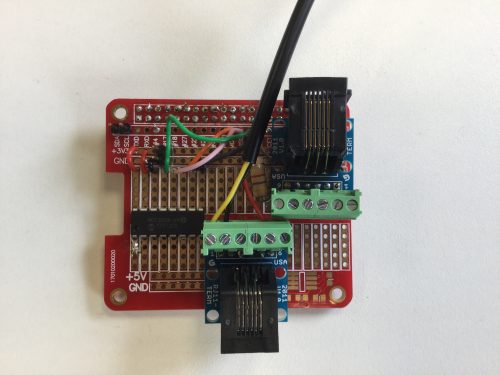
There is a bug in the wiring diagram for the HAT in the “Assembling everything for the outdoors” section. GPIO6 is pictured being wired to the same pin as GND and should be on the next pin. The summary complete wiring diagram shown at the beginning has GPIO6 wired correctly, but all of the following pictures are incorrect.
Comments are closed