Big internet-connected button | HackSpace #77
One whack to send the magazine to press. You can pick up the latest issue of HackSpace magazine tomorrow!
Each month at HackSpace mag towers, we create a magazine. We source content, edit it, massage it into the right format, add images, and check through everything with a fine-toothed comb. Once this is all done, we send it to the printers to translate our digital files onto paper.
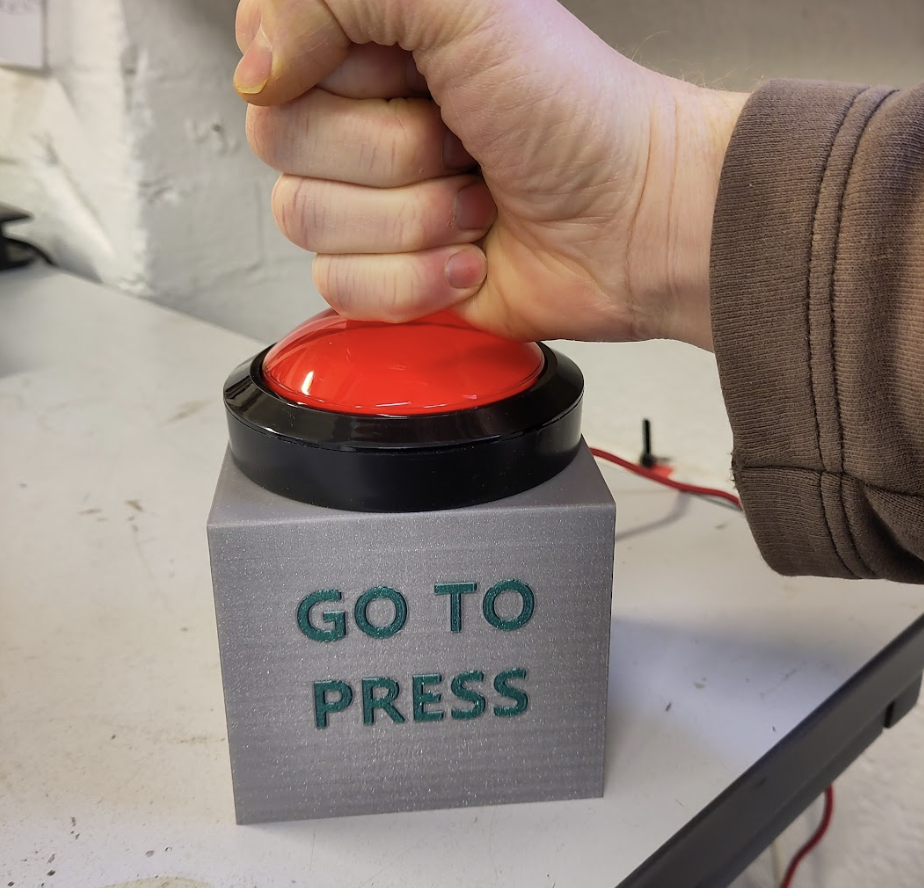
It’s this final step that feels a little, well, underwhelming. You might imagine that sending a magazine to press involves hitting a big important-looking button. At least, that’s what this writer thought when he first joined the world of publishing many years ago. However, reality is less impressive, and we actually just send a message to someone to say that we’re happy with it.
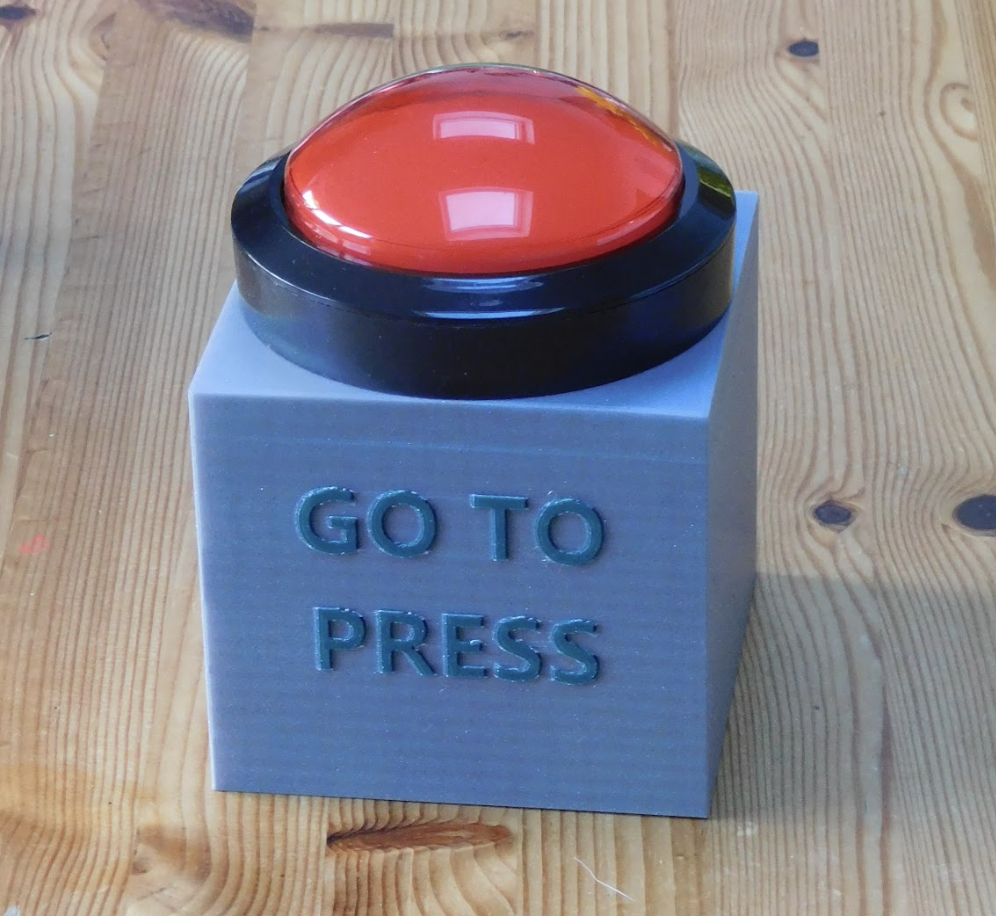
When reality is underwhelming, we can choose to accept that, or we can choose to enliven it. This issue, we choose the latter and we’ve created our own big, important-looking button. OK, technically we haven’t created our own button, we bought it (the aptly named Massive Arcade Button 100 mm from Adafruit). We did, however, make a mount for it, attach it to a Raspberry Pi Pico W, and program it to send the appropriate message when we hit it.
Now, rather than type out our approval message, we just hammer the big red button once the issue’s ready to send.
Obviously, it’s unlikely that you happen to need a button to send a magazine, but we’ll look at how to make a big red button that does – well, anything you like really.
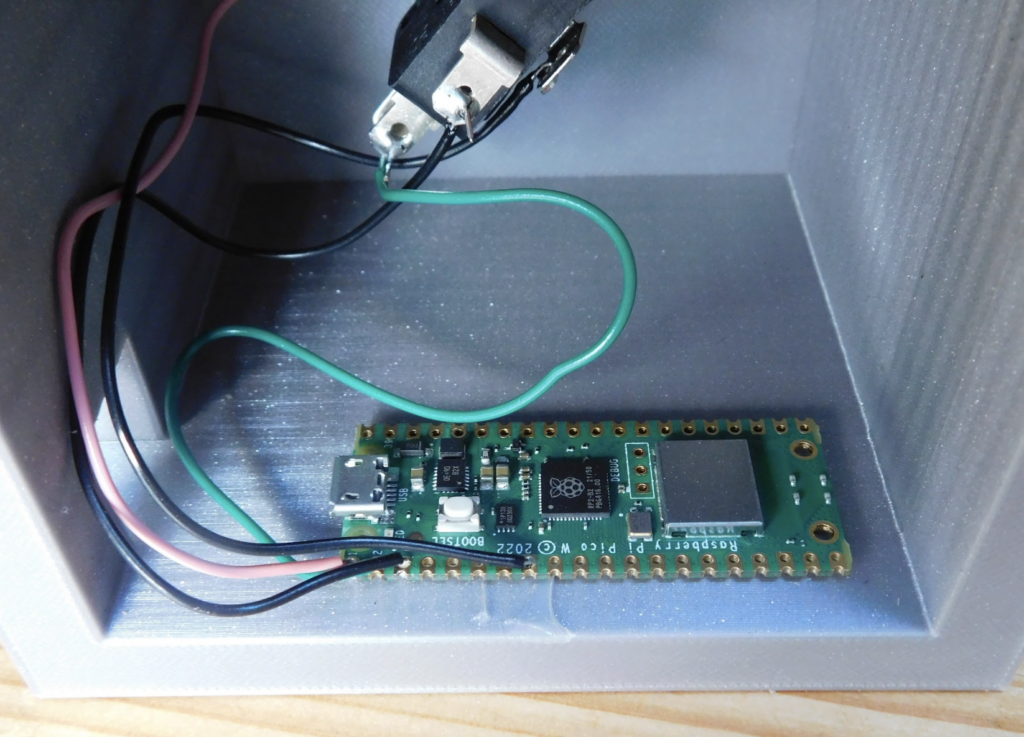
First, you’ll need the 3D-printable file for the box. You can grab this here. It’s designed to work with a multi-colour printer, but you can print it in a single colour. It’s a pretty simple design – just a cube with the unnecessary bits removed, leaving a hole in the top for a button, and a hole in the back for power. There’s no mounting for the Raspberry Pi Pico W inside – we prefer to use a bit of hot glue but, if you’re averse to that sort of thing, you could add a few holes.
The text was added in PrusaSlicer, and can be edited in that software as well.
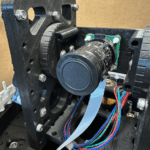
The electronics for the switch are in a removable assembly in the bottom of the button. Twist it a few degrees and it should pop off. There’s an LED in the button, so we wire that up to a GPIO pin (at present, we just leave it on, so we could wire it up to 3.3 V or VBUS, but we thought we’d keep the option for adding light effects in the future). The LED has a built-in resistor, so we can just connect it up directly to pin 0 and ground. The LED pins are on either side of the switch (see Figure 1). You can use either one as ground and power, and then just turn the LED around to match.
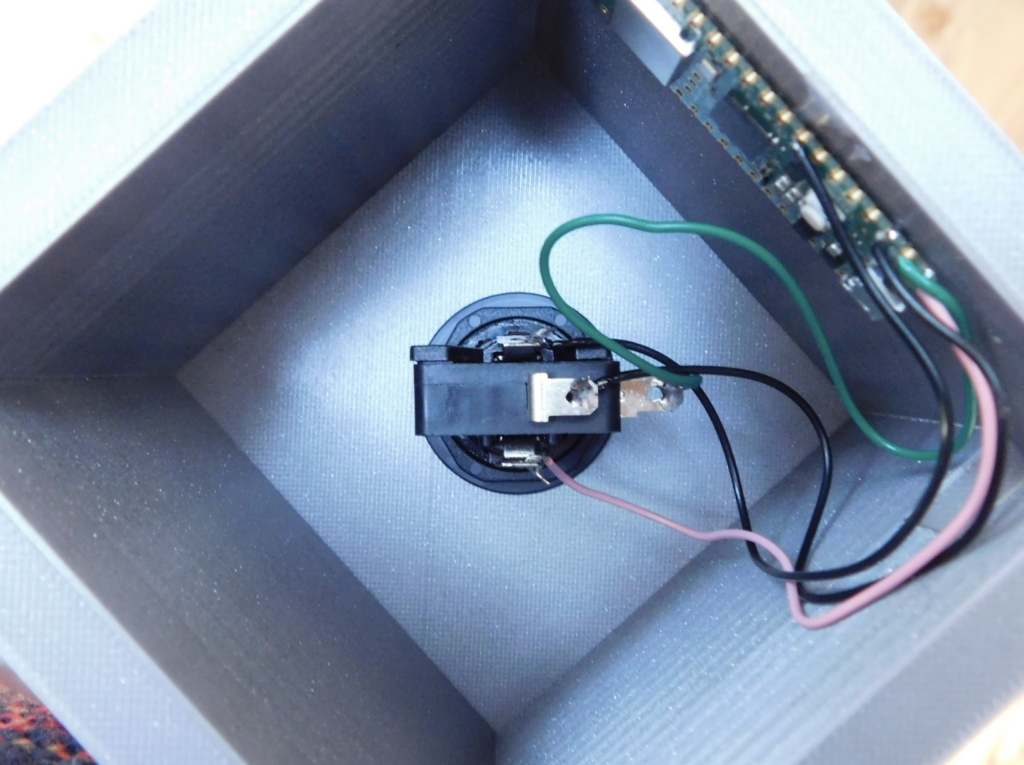
There are three pins for the switch: Common, Normally Open, and Normally Closed. We wired up Normally Open and Common directly between GPIO 1 and ground. The Common pin is on the bottom of the unit, while the Normally Open is the bottom of the two pins on the end. We can then add a pull-up resistor in software, and the button will read 1 when it’s not pressed and 0 when it is.
That’s the extent of the hardware for this build, let’s now take a look at the software.
We’ve used MicroPython, so you’ll need to install that to the Pico W.
We need to send our message via Slack, and this has an application programming interface (API) that lets us interact with it from our script. If you want to work with a different service, you need to find out the suitable details of its API.
Dialling in
Interacting with the Slack API is a little fiddly because you have to get the security details right. Fortunately, someone far smarter than us has already done the hard work and written it up on the Raspberry Pi blog. There are full details here. We won’t rehash all of this here. The most important part, for our purposes, is setting up the security details on the Slack website (depending on your configuration, you may need to get your workspace admin to approve the bot).
Once you’ve set all this up, and noted down the security details, you need to get the code from GitHub.
The key files we need are in the MicroPython directory. We need all of these except main.py, for which we’ll use our own code (below). These need to be copied onto the Pico W, and you can do this using the Thonny MicroPython editor. Go to View > Files, then you can navigate to the place you downloaded them. Select them, and upload them to the / directory on Pico.
Simple script
Let’s now look at our own code (below).
The one bit that you have to change here is the channel_id. In Slack, you can send a message to a person, a group of people, or a channel, but all three options use a channel ID. To find out the channel ID of a channel, click on the channel, then the little drop-down arrow next to the channel name, and scroll to the bottom of the box that pops up, and you should see the ID.
For a message to one person, go to that person’s profile, click on the three dots, and you should get the option to copy the member ID. This can be used in place of a channel ID.
For a group of people, you have to already have a chat with the group going. Click on the conversation, and then there’s a drop-down arrow next to the title (which is the names of the people in the chat). Click on this, then go to the About tab and you should see the channel ID at the bottom.
The code is pretty basic. First, it turns on the LED, and connects to the network. Once it’s connected, it starts to loop, waiting for the button to be pressed. When it is, the code sends the Slack message.
We need to be a little careful that, with each press of the button, we only send the message once. When a button is pressed, two contacts come together and, as they do, they can connect and disconnect multiple times before settling together. This is known as bouncing.
We have a little loop that runs to make sure that the button has been fully unpressed before it can
fire again.
The full code for this is:
import network

import time

import config

from slack_bot import SlackBot

channel_id = "put your channel here"

message = "Let's send it"

led = machine.Pin(0, machine.Pin.OUT)

led.on() # let's just have it light up

button = machine.Pin(1, machine.Pin.IN, machine.Pin.PULL_UP)

# initialize the Wi-Fi interface

wlan = network.WLAN(network.STA_IF)

# activate and connect to the Wi-Fi network:

wlan.active(True)

wlan.connect(config.WIFI_SSID, config.WIFI_PASSWORD)

while not wlan.isconnected():

    time.sleep(0.5)

print(f"Connected to Wi-Fi SSID: {config.WIFI_SSID}")

print("Now waiting for the button")

while True:

    if not button.value():

        #The button has been pressed

        slack_bot = SlackBot(config.SLACK_APP_TOKEN, config.SLACK_BOT_TOKEN)

        print("posting message")

        slack_bot.post_message(message, channel_id)

        print("posted message")

        #wait for button to be unpressed

        counter = 0

        while True:

            if button.value():

                counter += 1

            if not button.value():

                counter -= 1

            if counter > 10:

                break

            time.sleep(0.01)
Load the code onto Pico W (along with all the libraries from the original project).
Make sure that you have the configuration file set up, and you should be able to send messages with the press of a button. Whether it is to send something to manufacture, share a joke, or anything else you might need, whack the button to send the message.
HackSpace magazine issue 77 out NOW!
Each month, HackSpace magazine brings you the best projects, tips, tricks and tutorials from the makersphere. You can get HackSpace from the Raspberry Pi Press online store or your local newsagents.


5 comments
solar3000
That was easy.
Raspberry Pi Staff Liz Upton
I’m thinking about a button-operated disco ball for quiet moments in the Pi Towers Maker Lab.
solar3000
Awesome!
Staples, that was easy.
Glyndon
Next level: Add an ‘undo’ feature, to handle those cases where the office cat presses the button at an inopportune time.
Raspberry Pi Staff Ashley Whittaker
If the cat wants to go to press, we go to press.
Comments are closed