Beginner-friendly robotics projects
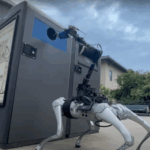
We saw this father-and-son post on Reddit about PiDog, a robot they built together for the son to take in to show-and-tell at school. The reason we loved it so much was because robotics can seem like such a daunting area to get into for new makers, but this father-son duo insist that building PiDog was a totally beginner-friendly experience.
While the Reddit post for PiDog didn’t come with any technical build details, it did inspire us to share some other entry-level robotics projects, in the hope of pushing some of you fence-sitters into building your first ever robot.
Experiential robotics platform (XRP) powered by Raspberry Pi Pico W
Last year our friends at SparkFun launched XRP in collaboration with founding visionaries DEKA Research and Development, Worcester Polytechnic Institute, and others. It’s an all-in-one, Raspberry Pi Pico W-on-board robotics kit which comes with all the hardware you’ll need to build your own robot. It also has an open coding environment where you’ll learn to get your wheeled companion up and running, before branching out into even more exciting areas of robotics. Easy peasy.

We were in the room when the XRP kit delivery landed at Pi Towers and can confirm that it took our Sam just minutes to click together all the bits and pieces, leaving her with something looking like a real-life robot ready to code after seemingly little effort.
Out-of-the-box robotics

The CamJam EduKit #3 is a foolproof (I would know, I am a fool who has accomplished this) way to dip your toe into Raspberry Pi-powered robots. The box that all of the kit comes in turns into the chassis of your robot, and you can get things moving with some easy Python programming. It’s a super-simple, satisfying project which will hopefully stoke your interest in taking your robotics further and making them smarter…
Machine learning isn’t as scary as it sounds
… which leads me nicely onto Adafruit’s BrainCraft HAT. They developed this machine learning (ML) kit around Microsoft’s Lobe tool, which makes ML much more accessible. Machine learning can sound daunting even for experienced Raspberry Pi hobbyists, but Microsoft and Adafruit Industries are determined to make it easier for everyone to have a go.

Watch the BrainCraft HAT in action below running the Bakery machine learning model. Bakery identifies different baked goods based on images taken by the Raspberry Pi camera, then automatically identifies and prices them without barcodes or price tags. Magic.
What can machine learning do?
With machine learning, you can train your robot to sort LEGO bricks by colour, shape, and size; classify your trash and determine which bin you should put it in; or even streamline a factory like the folks at Modzy did. Their detection platform uses Raspberry Pi Zero W and a Raspberry Pi Camera Module to pick up mistakes on factory production lines.
Now is a great time to ask questions if you’d like to dip into robotics but need an extra push. Let us know in the comments what you’re thinking of making, and hopefully you’ll get some warm and wise words of encouragement from someone who has ventured before you.


No comments
Comments are closed