The All-Seeing Pi: a Raspberry Pi photo booth
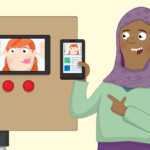
Have you ever fancied building a Raspberry Pi photo booth? How about one with Snapchat-esque overlay filters? What if it tweeted your images to its own Twitter account for all to see?
The All Seeing Pi has seen you visiting @Raspberry_Pi Party @missphilbin #PiParty pic.twitter.com/fbuyQ5UGyU
— The All-Seeing Pi (@theallseeingpi) March 4, 2017
Introducing The All-Seeing Pi
“Well, the thing I really want to say (if you haven’t already) is that this whole thing was a team build”, explains one of the resource creators, Laura Sach. “I think it would be a brilliant project to do as a team!”
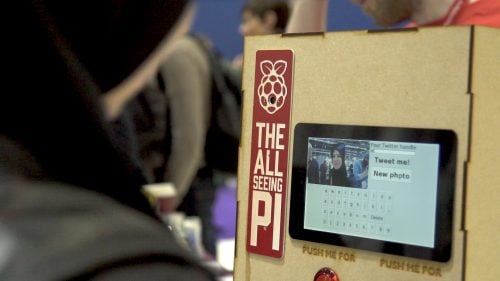
The resource originally came to life at Pycon, where the team demonstrated the use of filters alongside the Camera Module in their hands-on workshops. From there, the project grew into The All-Seeing Pi, which premiered at the Bett stand earlier this year.
The All Seeing Pi has seen you, @theallseeingpi #PiatBETT #BETT2017 pic.twitter.com/R05AsOw9ei
— The All-Seeing Pi (@theallseeingpi) January 27, 2017
Build your own photo booth
To build your own, you’ll need:
- A Camera Module
- A monitor (we used a touchscreen for ours)
- Two tactile buttons (you can replace these later with bigger buttons if you wish)
- A breadboard
- Some male-female jumper leads
If you’re feeling artistic, you can also use a box to build a body for your All-Seeing Pi.
By following the worksheets within the resource, you’ll learn how to set up the Camera Module, connect buttons and a display, control GPIO pins and the camera with Python code, and how to tweet a photo.

Raspberry Pi Foundation’s free resources
We publish our resources under a Creative Commons license, allowing you to use them for free at home, in clubs, and in schools. The All-Seeing Pi resource has been written to cover elements from the Raspberry Pi Digital Curriculum. You can find more information on the curriculum here.

9 comments
Stephen Scott
10 years ago, I was involved in a photo booth project for a whiskey brand. We nicknamed it the Tardis – a bespoke kiosk on castors that could be transported to airports across Europe. It had a large touchscreen, PC and Panasonic photo printer, and a webcam.
The idea was to submit a picture, add various branded filters to it, and submit it for a competition. This was all done with PHP, Flash, and ImageMagick to prepare the picture and then print it out for you to keep.
Needless to say, the kiosk wasn’t well built to deal with airside baggage handling, and broke after two airports, and the project was shelved.
It’s marvellous to think that the Pi makes this kind of project so much easier (and cheaper) to achieve. What a brilliant project.
Jamie Whitehorn
What a great idea for events! – I am soooooo trying this :-)
Sean
I created one very similar a couple years ago based upon a broken Mac Classic Computer.
https://www.raspberrypi.org/forums/viewtopic.php?f=43&t=74452&p=1139544#p1139544
Mr L Abbott
This is an excellent project. I already have a few pupils wanting to build and adapt their own versions!
Dougie
Does it have an option to not create vertically flipped mirror images?
logan
camera.vflip = false
camera.hflip = true
Photo Booth Rental
This is cool! I’ll try to figure out how to incorporate this in my photo booth business
Randa Qutub
Hi, after finishing the original resources file for this project, i noticed the “what’s next” part, and i was wondering if anyone knows or tried to do points 1 and 2
Can you add a text box or perhaps a touchscreen keyboard to your GUI to allow someone to enter their Twitter handle?
Can you use this Twitter handle to add an @username mention to the tweet text?
truly appreciate if u can explain the concept of how to achieve them, any code that might help with this matter is also recommended
thank you
Nick
i like to see this with OpenCV so that the system detect’s automaticly the faces to drop the filters on the heads ;)
Comments are closed