0.06 x LED quantity = output current
How to add ambient lighting to your TV with Raspberry Pi
All tutorials
Make watching TV more immersive: you can extend the action on screen to the surrounding environment and reduce eye-strain with Raspberry Pi-powered ambient lighting.
Overview
To configure ambient lighting for your TV, you’ll need to do the following things:
-
Set up your LEDs.
-
Configure a Raspberry Pi running Raspberry Pi OS.
-
Install HyperHDR to your Raspberry Pi.
-
Configure your setup for the best ambient lighting experience.
Supplies
-
Raspberry Pi
-
suitable Raspberry Pi power supply (see the power supply documentation for details)
-
microSD card (see the SD card documentation for details)
-
adapter to connect your microSD card with your usual computer
-
HDMI Capture Card (see Choose a capture card below)
-
NeoPixels LED strip (see Choose an LED strip below)
-
DC5V barrel jack AC adapter (see Choose a power supply below)
-
Female barrel jack connector
-
2x HDMI to HDMI cable
-
USB-A male to USB-A male cable
-
2x female to male jumper wire
-
Optional — HDMI hub (for multiple input sources; require an additional HDMI to HDMI cable)
For the initial SD card setup, you will need:
-
Another computer connected to your network. We’ll refer to this as your usual computer to distinguish it from the Raspberry Pi computer you are setting up as the ambient lighting controller.
Choose the right Raspberry Pi and accessories
This tutorial uses a Raspberry Pi 3. We do not recommend using a Raspberry Pi Zero for this project.
Choose a capture card
If you plan to watch content from streaming sites such as Netflix and Disney+, you’ll need a capture card that supports HDCP. Choose a capture card that matches your display resolution: for instance, if your TV has a resolution of 4K (or you might soon upgrade to a 4K tv), you’ll want a 4K capture card.
Choose an LED strip
The size of your monitor dictates the length of LED strip you need to purchase. To determine the length, measure all the edges of your monitor and add them together. For example, our 47" TV measures 106cm along the top and bottom, and 62cm either side. So we’ll need at least 336cm of NeoPixels. As strips are usually sold in metres, we ordered 4m and cut off the excess.
Choose a power supply
The more LEDs you have, the more power you will need. To get an approximate measure of the output you’ll need to run your LED strip, use the following equation:
Our project uses 150 LEDs, so we’ll need approximately 9A power. As 9A isn’t a standard output current for off-the-shelf power supplies, and because we also need to power our Raspberry Pi, we’re using a 5V 10A barrel jack power supply for our setup.
Configure your Raspberry Pi
To begin, follow the Getting Started documentation to set up your Raspberry Pi. For your operating system, choose Raspberry Pi OS Lite (32-bit) to run headless (without a mouse and keyboard).
During the OS customisation stage, edit settings as follows:
-
Enter a hostname of your choice (we suggest
pi-ambientfor this tutorial) -
Enter a username and password; you’ll need these later to authenticate
-
Check the box next to Configure wireless LAN so your Pi can automatically connect to Wi-Fi
-
Enter your network SSID (name) and password; you can find these in your Wi-Fi settings or on a sticker on your router
-
-
Check the box next to Enable SSH so we can connect to the Pi without a mouse and keyboard
Remotely connect to your Raspberry Pi
SSH allows you to wirelessly connect to your Raspberry Pi, eliminating the need for a keyboard and mouse. It’s perfect if your Raspberry Pi is located in a hard-to-reach location like the back of your television.
note
To SSH into the Raspberry Pi, you’ll use the hostname you set in Imager. If you have issues connecting using this method, you may want to use the Raspberry Pi’s IP address instead.
For more information about finding your IP address and remote accessing your Raspberry Pi, see the remote access documentation.
Connect via SSH
Open a terminal session on your usual computer. To access your Raspberry Pi via SSH, run the following command, replacing <username> with the username you chose in Imager:
$ ssh <username>@pi-ambient.local$ ssh <username>@pi-ambient.local
The authenticity of host 'pi-ambient.local (fd81:b8a1:261d:1:acd4:610c:b069:ac16)' can't be established.
ED25519 key fingerprint is SHA256:s6aWAEe8xrbPmJzhctei7/gEQitO9mj2ilXigelBm04.
This key is not known by any other names
Are you sure you want to continue connecting (yes/no/
[fingerprint])? yes
Warning: Permanently added 'pi-ambient.local' (ED25519) to the list of known hosts.
<username>@pi-ambient.local's password:
Linux pi-ambient 6.1.21-v8+ #1642 SMP PREEMPT Mon Apr 3 17:24:16 BST 2023 aarch64
The programs included with the Debian GNU/Linux system are free software;
the exact distribution terms for each program are described in the
individual files in /usr/share/doc/*/copyright.
Debian GNU/Linux comes with ABSOLUTELY NO WARRANTY, to the extent
permitted by applicable law.
Last login: Tue Oct 24 09:41:00 2023
<username>@pi-ambient:~ $When asked for your password, use the password you created in Raspberry Pi Imager.
Install HyperHDR
We’re going to install HyperHDR, a fork of Hyperion that supports HDR. While not everyone using this tutorial will need HDR support, having this added benefit will future-proof your build with no loss of Hyperion functionality.
Now you’ve gained access to your Raspberry Pi, it’s best to check it’s up-to-date with the latest version of Raspberry Pi OS. To do this, run the following commands in a terminal:
$ sudo apt update
$ sudo apt upgrade
Next, we need to download and install HyperHDR. HyperHDR is available for a variety of platforms. The following code will allow us to check the system and install the Raspberry Pi-specific software. Run the following script, entering Y when prompted.
$ wget https://github.com/awawa-dev/HyperHDR/releases/download/v17.0.0.0/HyperHDR-17.0.0.0-Linux-`uname -m`.deb
$ sudo apt install ./HyperHDR-17.0.0.0-Linux-`uname -m`.deb
$ sudo sed -i '/^User/d' /etc/systemd/system/hyperhdr\@.service
$ sudo systemctl daemon-reload
$ sudo service hyperhdr@pi restart
$ sudo service hyperhdr@pi status
The above script has been slightly edited from EverythingSmartHome’s original install script to include the recent version of HyperHDR. You can find the original script at https://gist.github.com/EverythingSmartHome/e4151d7e9b7c1c953a72ddb536730c6d.
Connect hardware
Power your LED strip
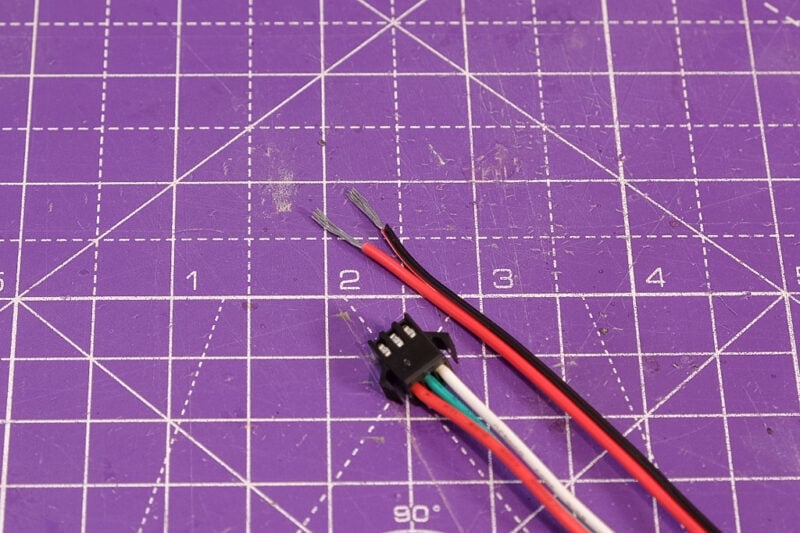
Your LED strip should arrive pre-wired with three wires: live, ground, and data. Ideally, they’ll be pre-installed into a connector, with additional live and ground wires, which we’ll be using to power the strip.
These two wires will likely be red and white, or red and black. Red is live, and white/black is ground. If required, strip them to expose 0.5cm of wire
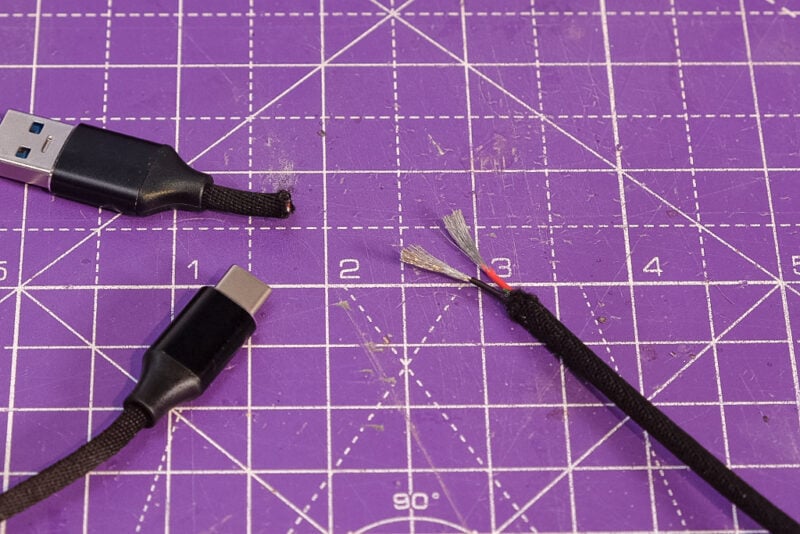
Next cut the USB-A end from your microUSB/USB-C cable. Depending on the type of cable, you’ll find either two or three wires inside. Again, these represent live and ground and, in some cases, data. As with the LED strip, strip 0.5cm of the live wire (usually red), and the ground wire (usually white or black)
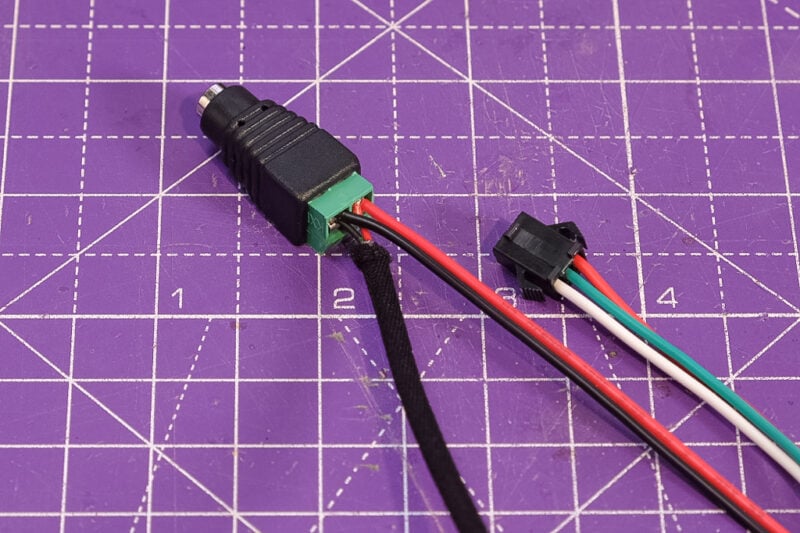
Insert the live wire from the LED strip and microUSB/USB-C lead into the + hole of your female barrel jack connector and tighten them in place. Our connector uses a small screw to secure the wires. Next, insert the ground wire from the LED strip and microUSB/USB-C lead into the + hole of the connector and again tighten them into place
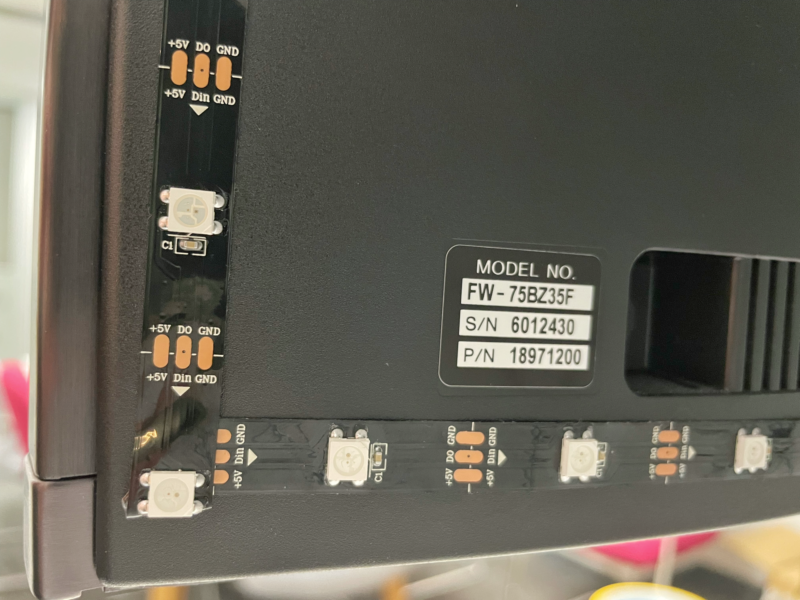
Connect your LED strip to your Raspberry Pi
We’re going to use the GPIO pins of the Raspberry Pi to connect to the data wire of the LED strip. By default, HyperHDR is configured to connect to GPIO 18 and, though you can change this in the dashboard settings later, there’s no reason not to use GPIO 18.

You may also wish to connect a second wire between the ground wire of your LED strip and one of the GPIO ground pins to prevent your lights from flickering. For some setups, we’ve found this isn’t necessary, and for some it is. Better safe than sorry.

Attach the LED strip to your TV
Next, you need to line the rear edge of your monitor with the LED strip. Try to get them as close to the edge as you can without making them visible from the front. When approaching corners, you can either:
-
cut your strip and solder wires to allow for the bend
-
use dedicated LED strip corner adapters
-
fold the strip as shown
Folding is the easiest option, but remember to account for any 'hidden' LEDs later when we set up HyperHDR.
For ease, attach your LED in a clockwise direction when facing the monitor. If you attach them anti-clockwise, remember to select Reverse direction in the LED layout menu of HyperHDR later on in the process.
Connect your input device
-
Connect the USB port of your capture card to a USB port of your Raspberry Pi using a USB-to-USB cable.
-
Connect the capture card’s HDMI OUT port to your monitor using an HDMI-to-HDMI lead.
-
Lastly, connect your input device (games console, DVD Player, TV receiver) to the capture card’s HDMI INPUT port using the second HDMI to HDMI lead.

Multiple input devices (optional)
If you have more than one device you wish to input into your TV, you can use an HDMI hub. Plug all your devices into the hub and connect the hub’s HDMI OUT port to the HDMI IN port of the capture card.
Once everything is plugged in, connect your power supply to the barrel jack connector. Your setup is now complete. We recommend tidying up your wires and securing everything to the back of your TV or into a ventilated container.
Configure HyperHDR
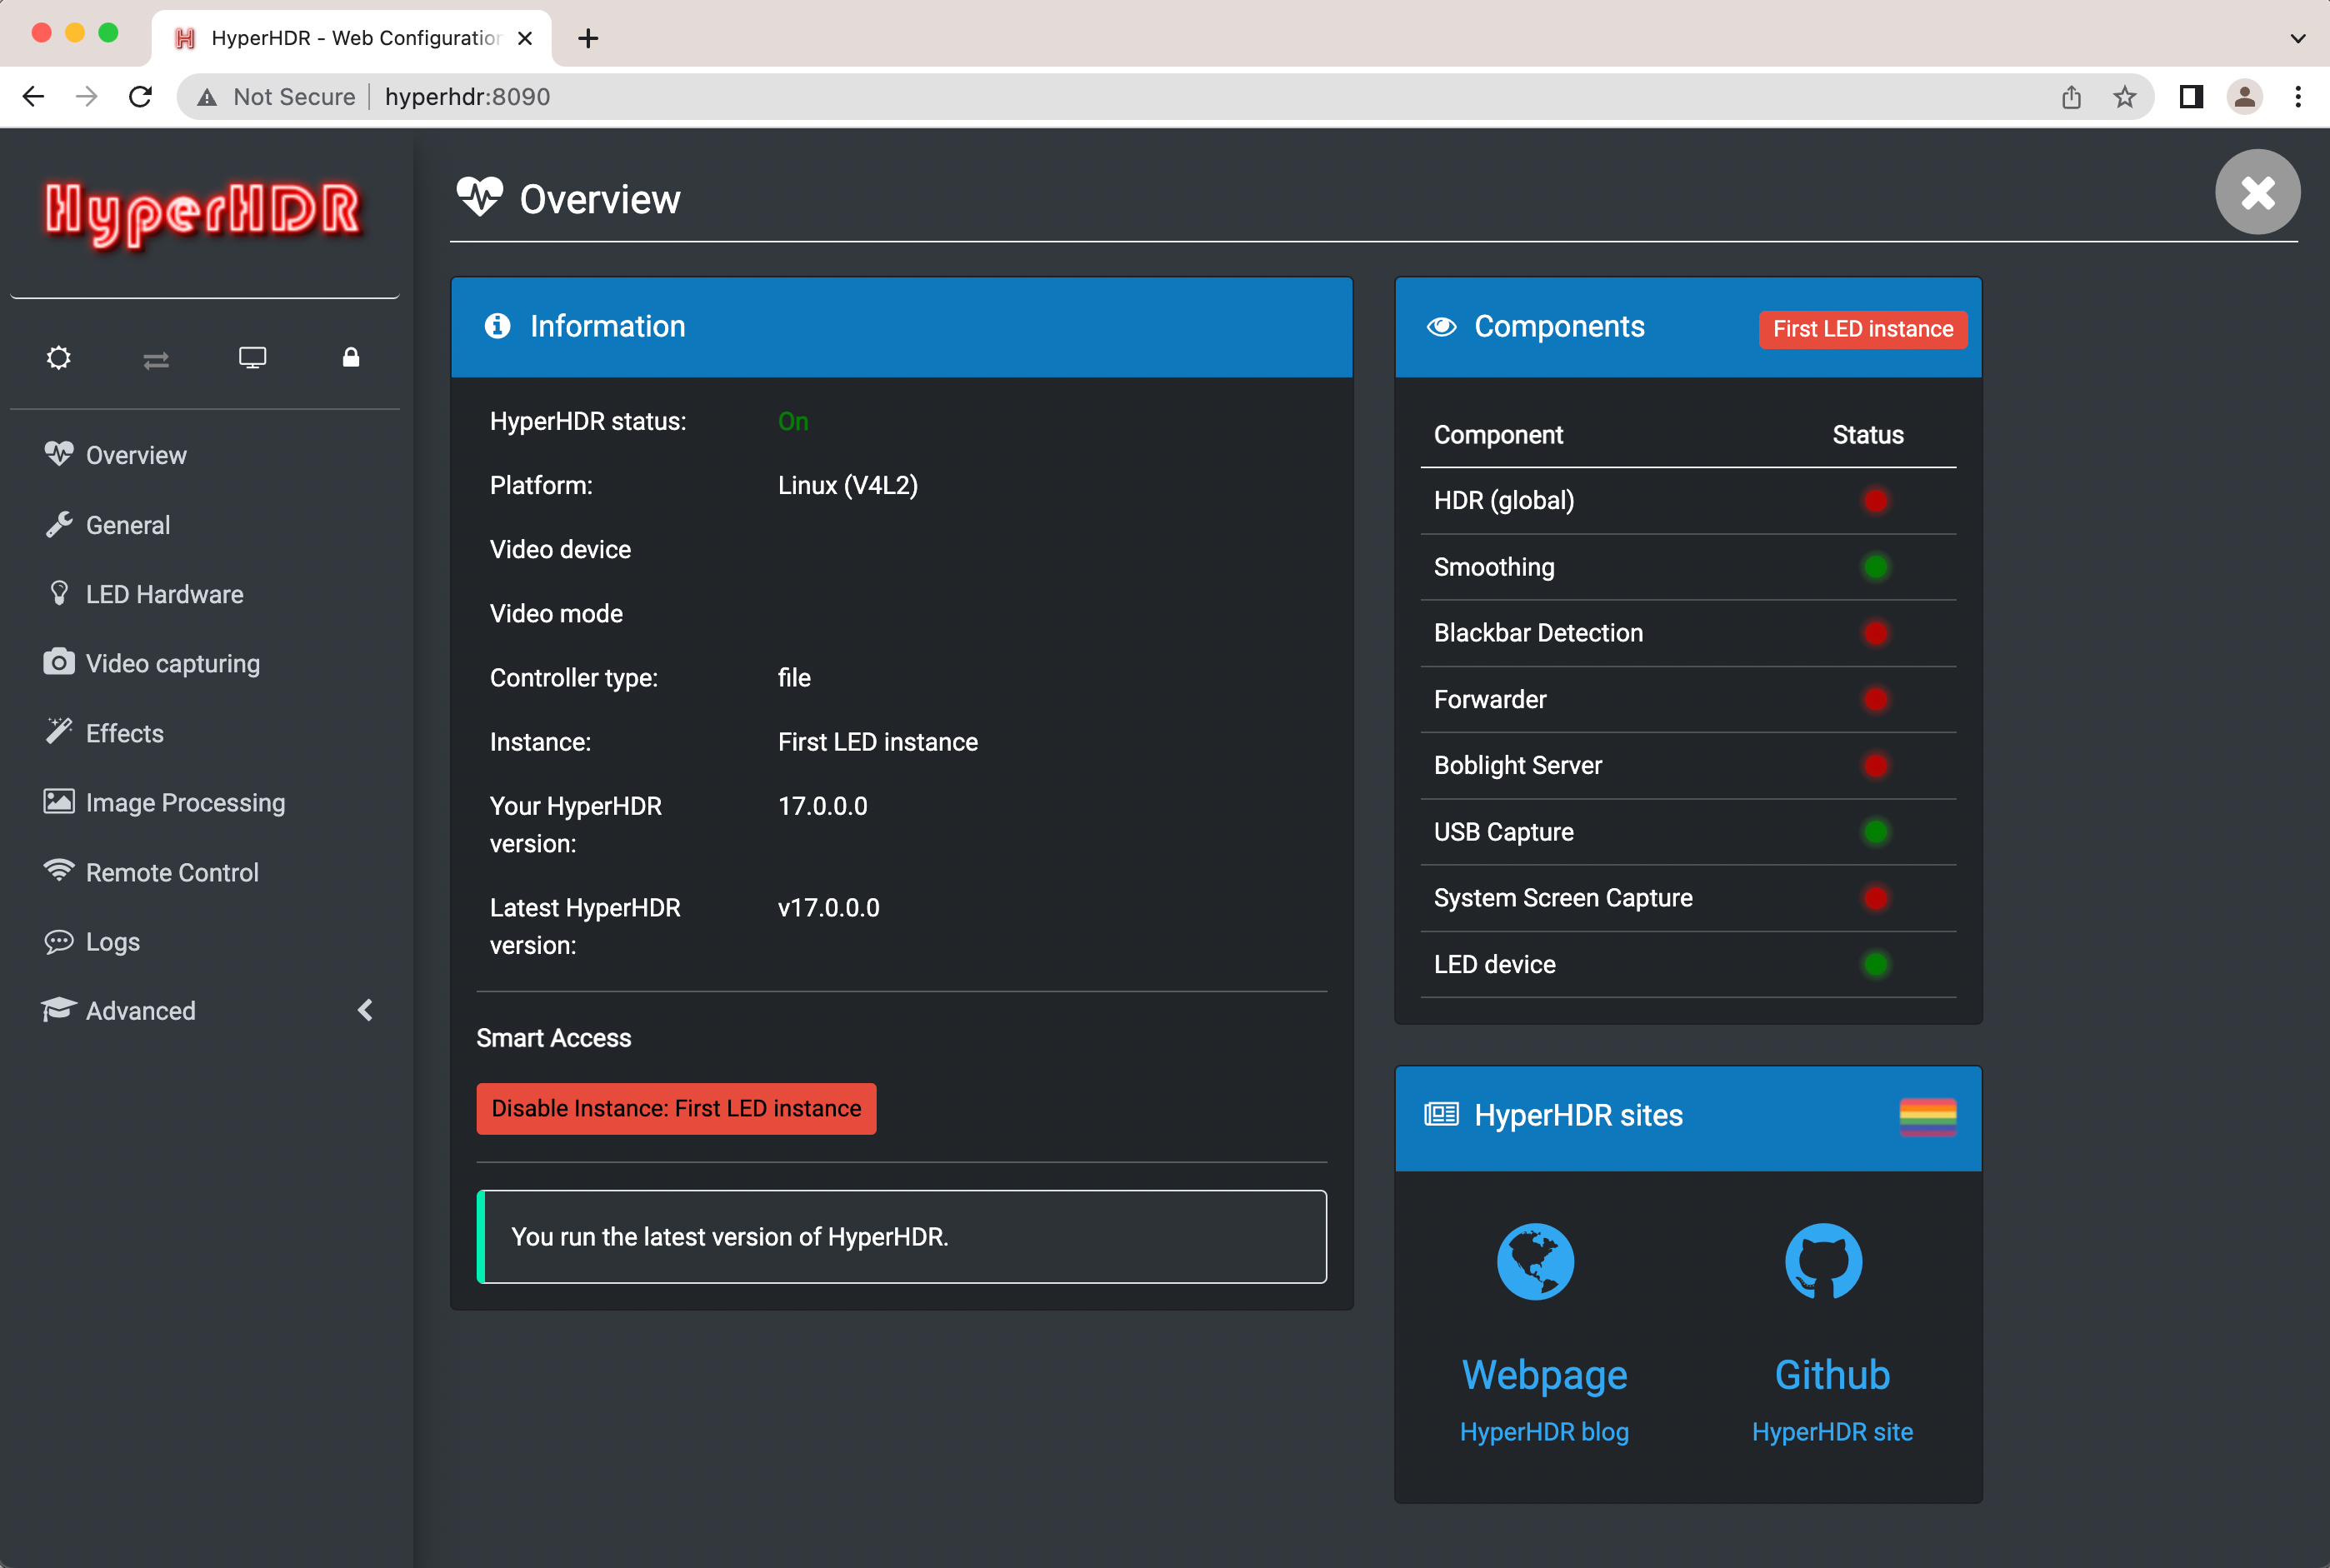
Next, we’re going to use the HyperHDR dashboard to configure the setup for your monitor. Open a browser window on your computer and enter your hostname into the address bar: http://pi-ambient.local:8090
The HyperHDR dashboard will open in the browser window. If it does not, check your network connection and restart your Raspberry Pi.
LED hardware
Our first step is to tell HyperHDR what type of LEDs we have, and how many there are. Select LED hardware in the side menu. This should open up the LED controller menu.
There are many different types of LED controllers on the market. We’re using a ws2812B LED strip, as it’s a good balance between functionality and cost. So we’ll select "ws281x" from the Controller type dropdown menu.
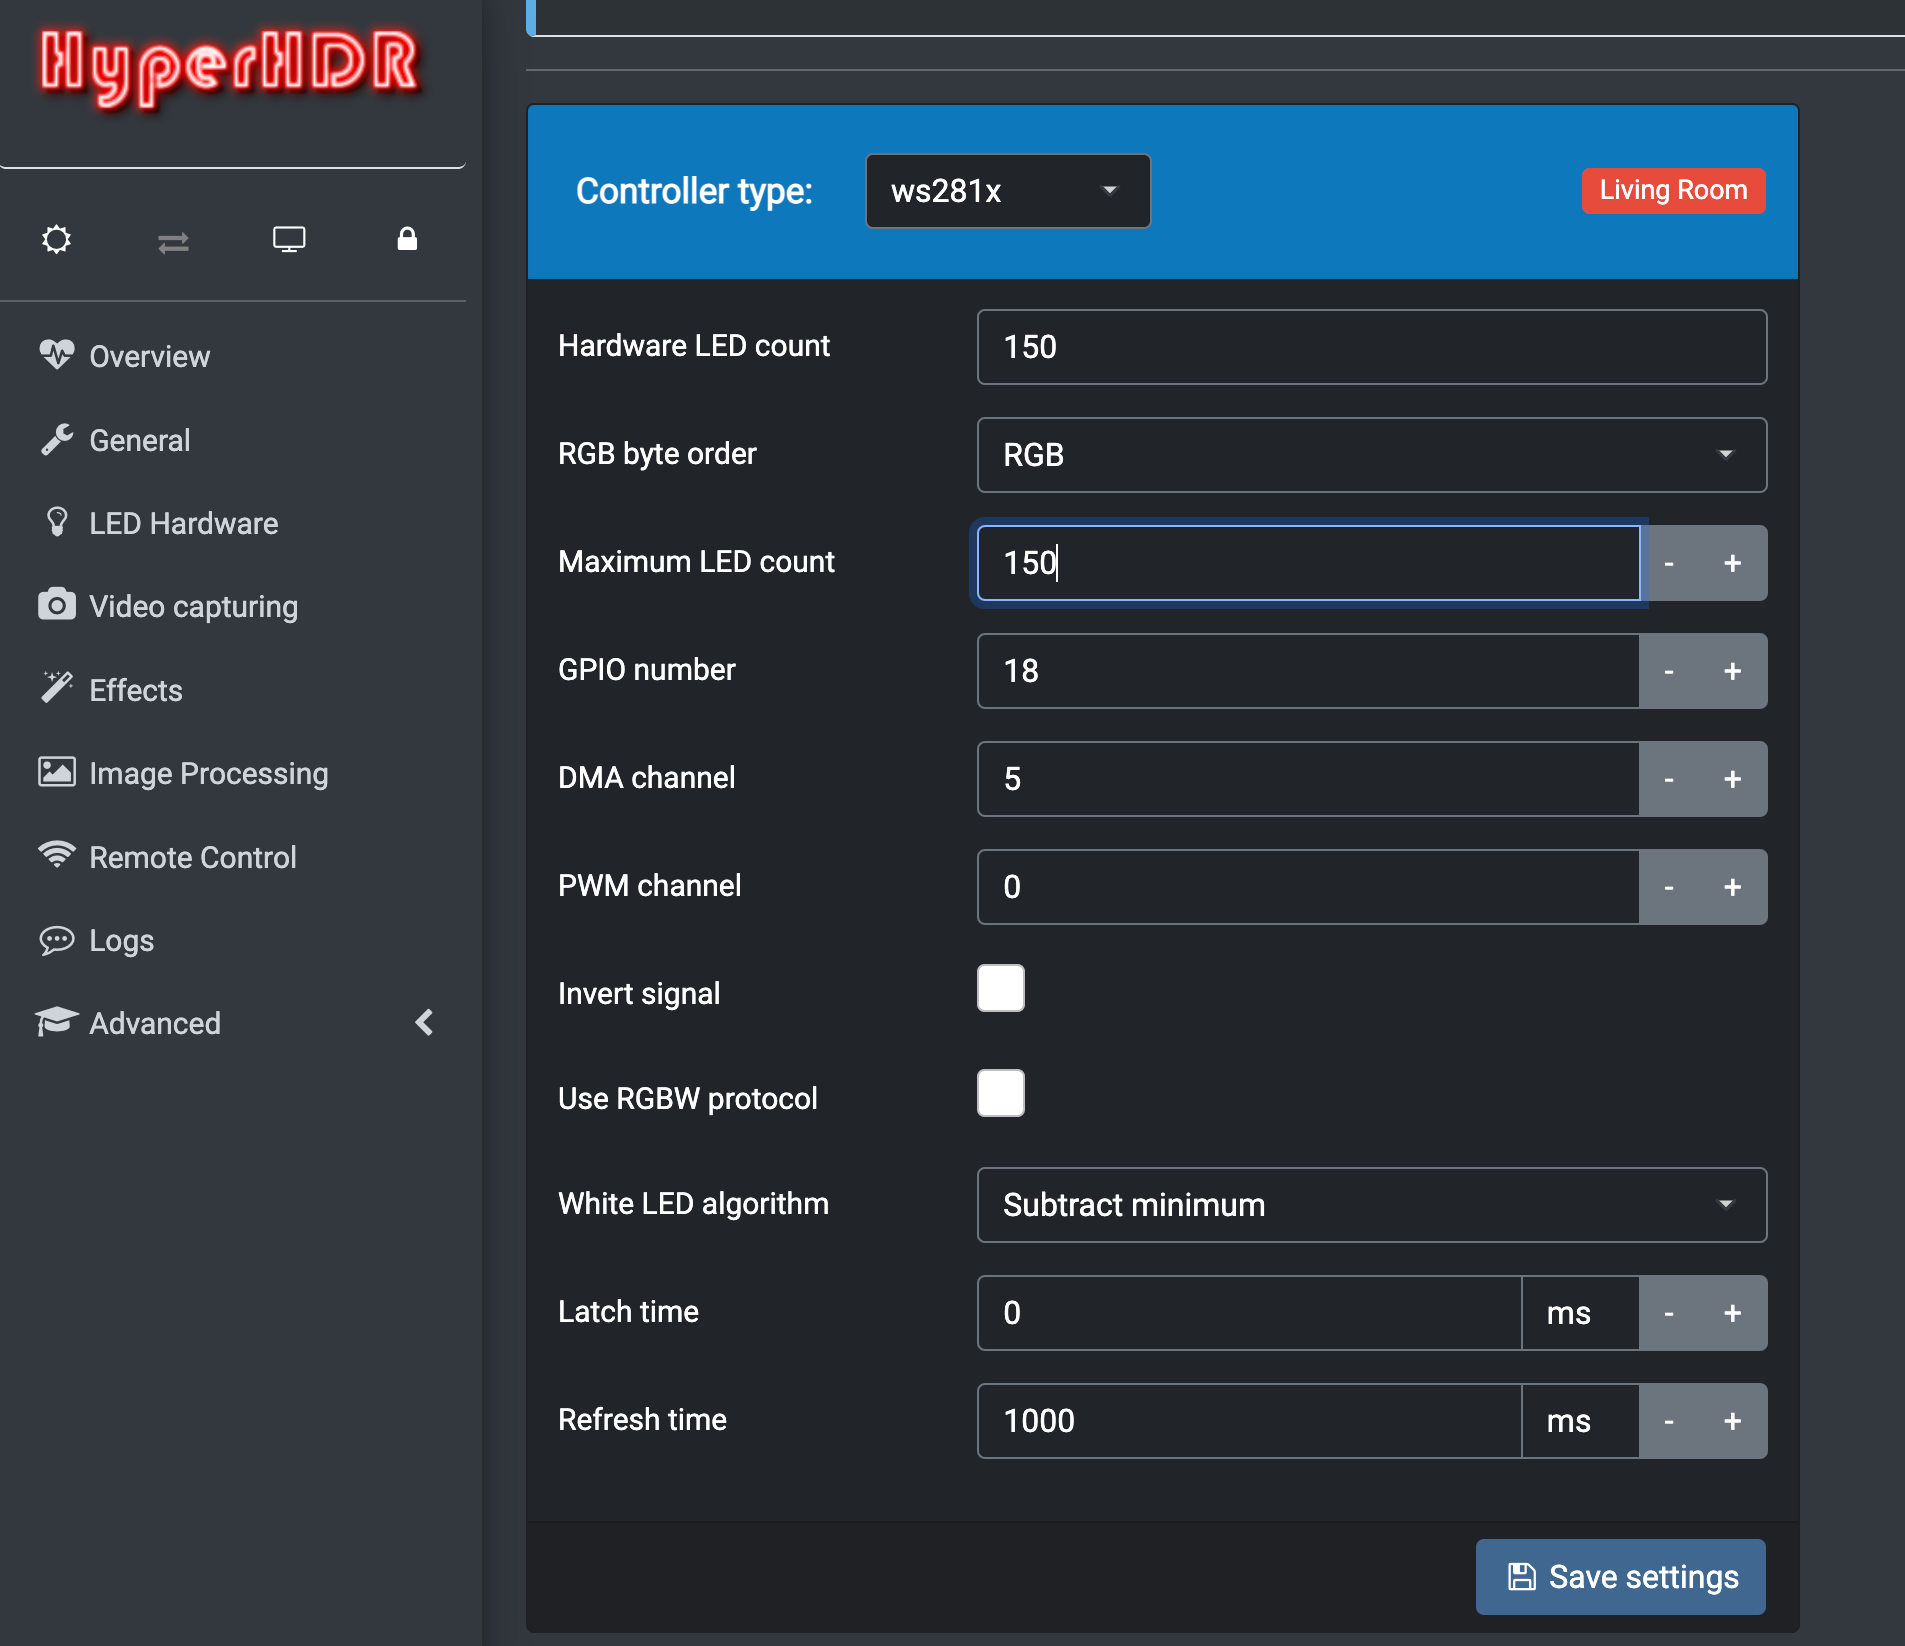
Once you’ve selected your controller type, you need to enter the number of LEDs on your strip in both the Hardware LED count and Maximum LED count boxes. Confirm your jumper wire is connected to GPIO 18 and that 18 is selected in the GPIO number box, then click Save settings.
Next, select LED layout at the top of the page.
Here, we need to tell HyperHDR where our LEDs are. Enter the number of LEDs for the top, bottom, and sides of your monitor into the appropriate boxes. You’ll also want to move the input indicator to the correct position. Ours is located at the bottom of our television.
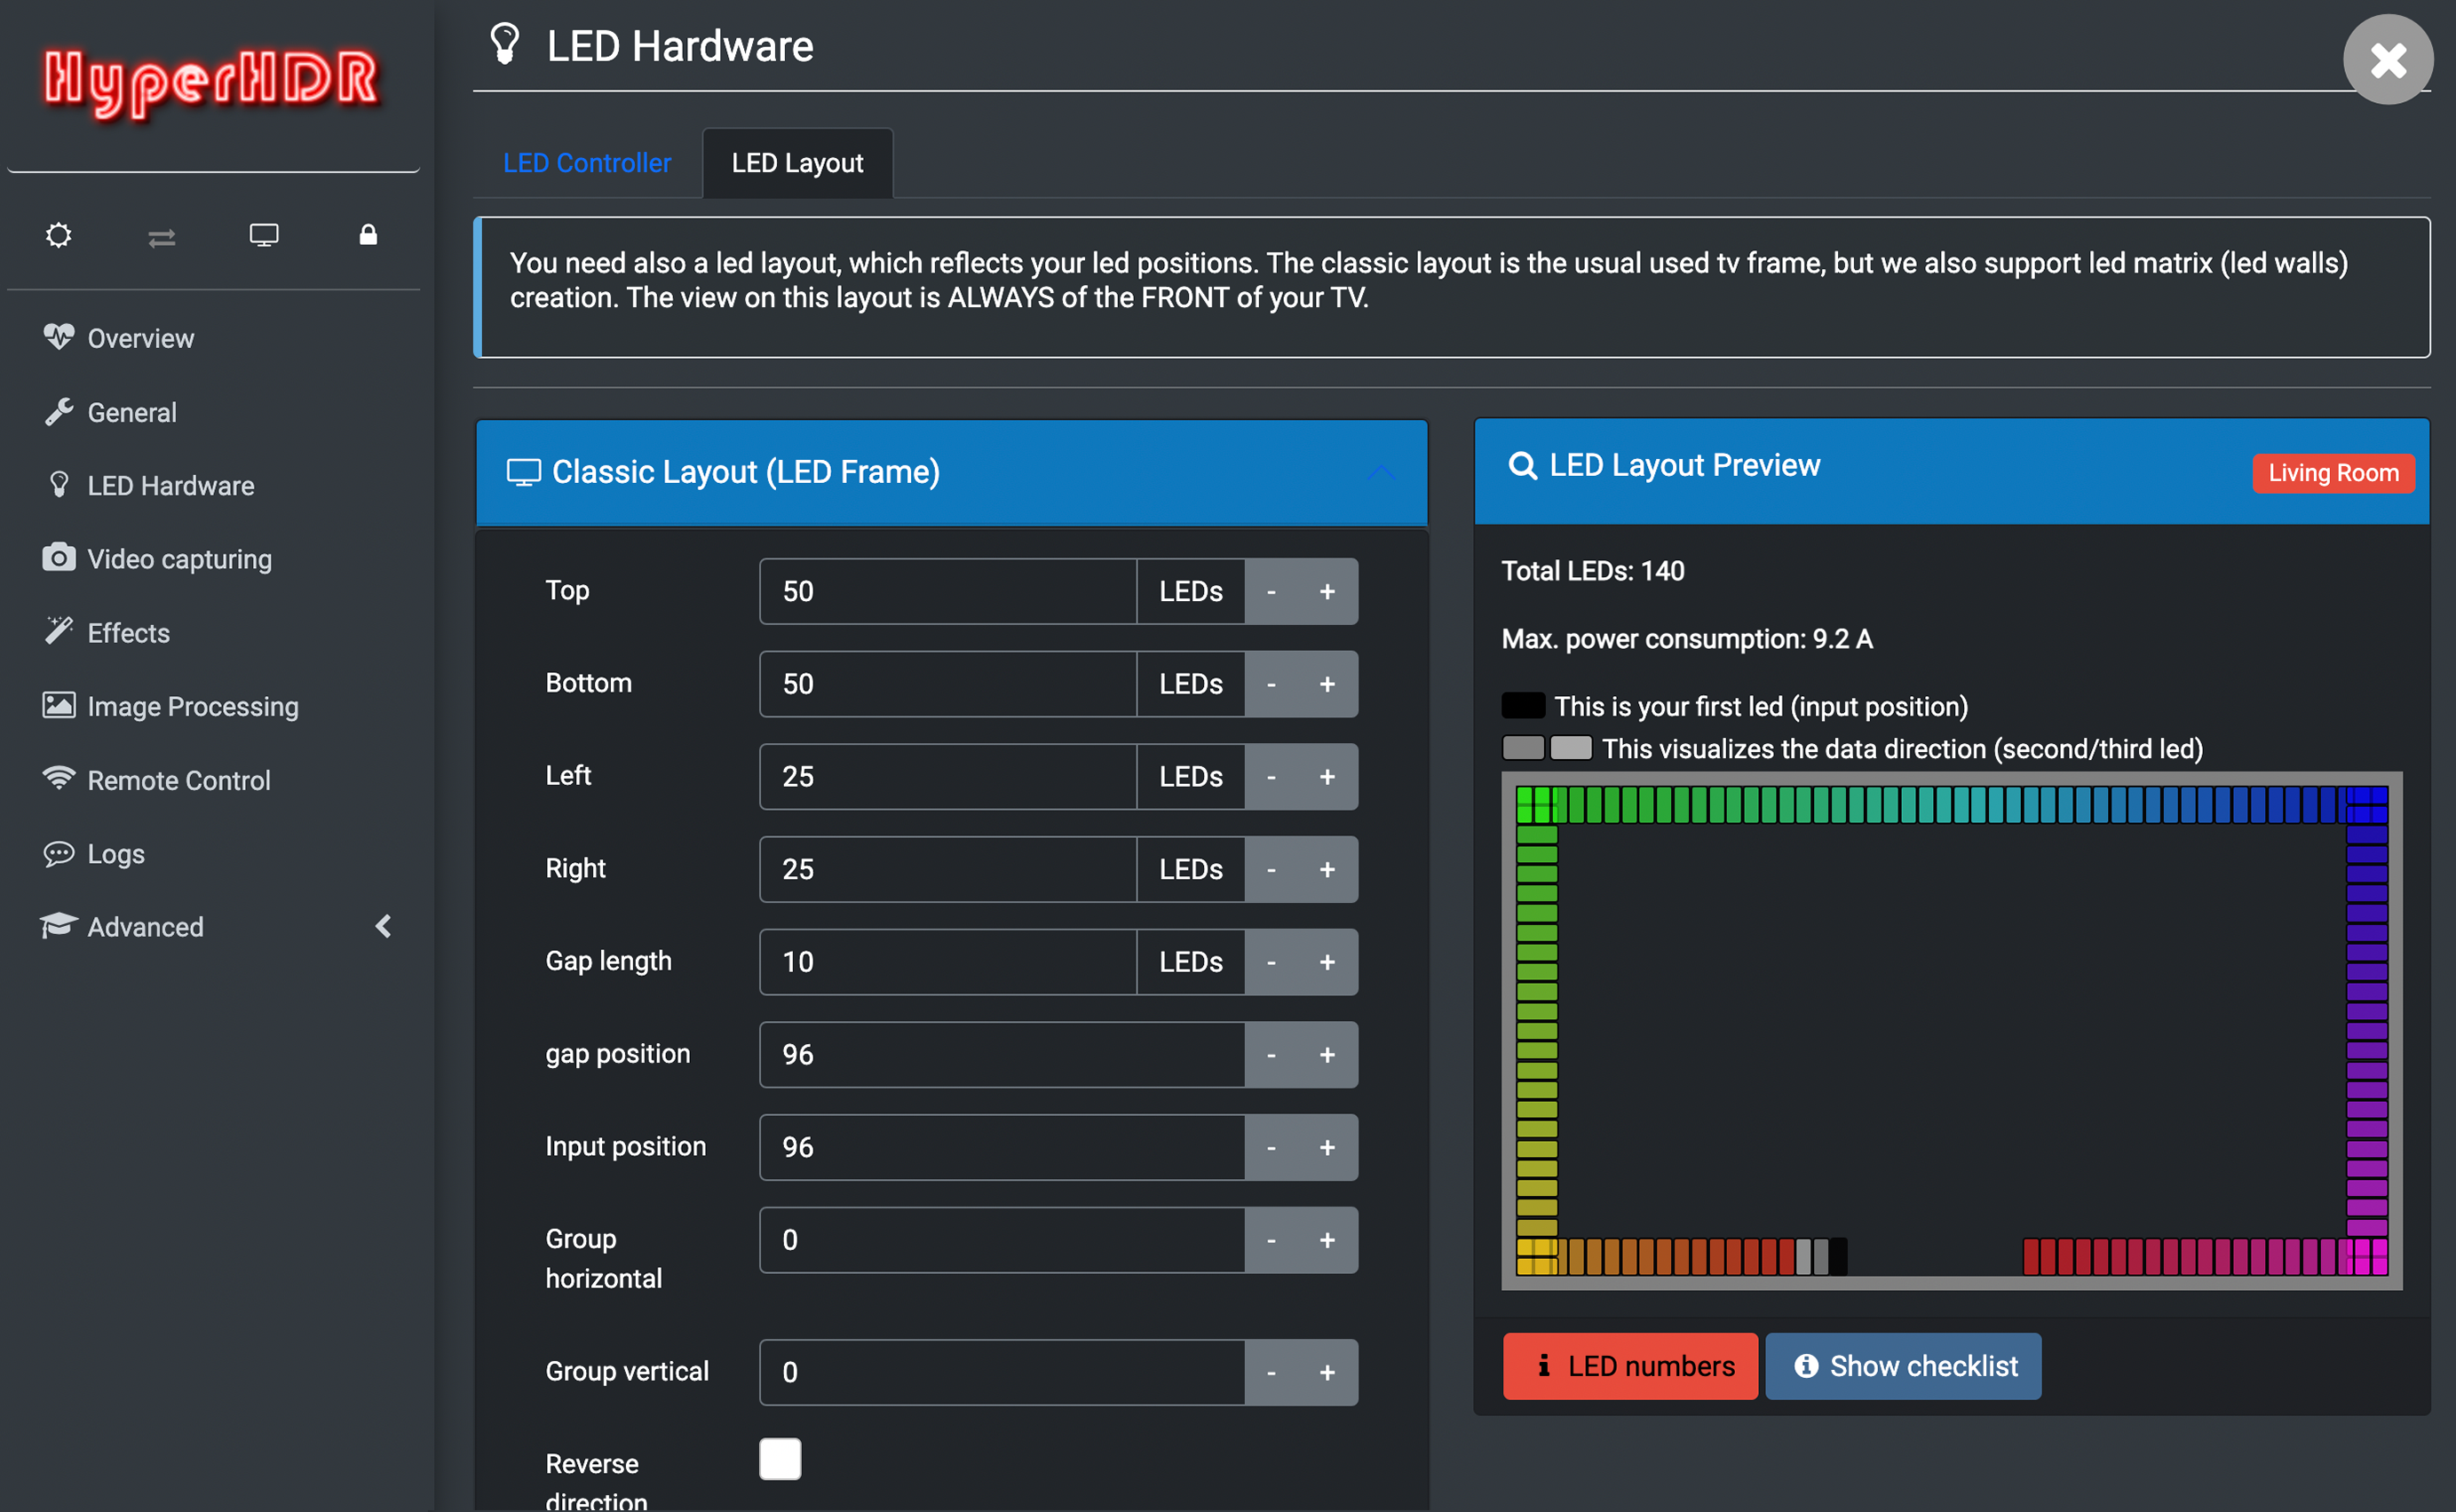
Ideally, you’ll have attached your LEDs in a clockwise direction. If not, now is the time to select Reverse direction.
Click Save layout.
Video capturing
-
Select Video capturing from the side menu.
-
Check USB capture > Device for your capture card. If you don’t see the capture card, try restarting the Raspberry Pi and waiting a few minutes.
-
Select your capture card and save settings at the bottom of the menu.

-
In Instance USB capture, select Enable USB capture and save settings at the bottom of the menu.
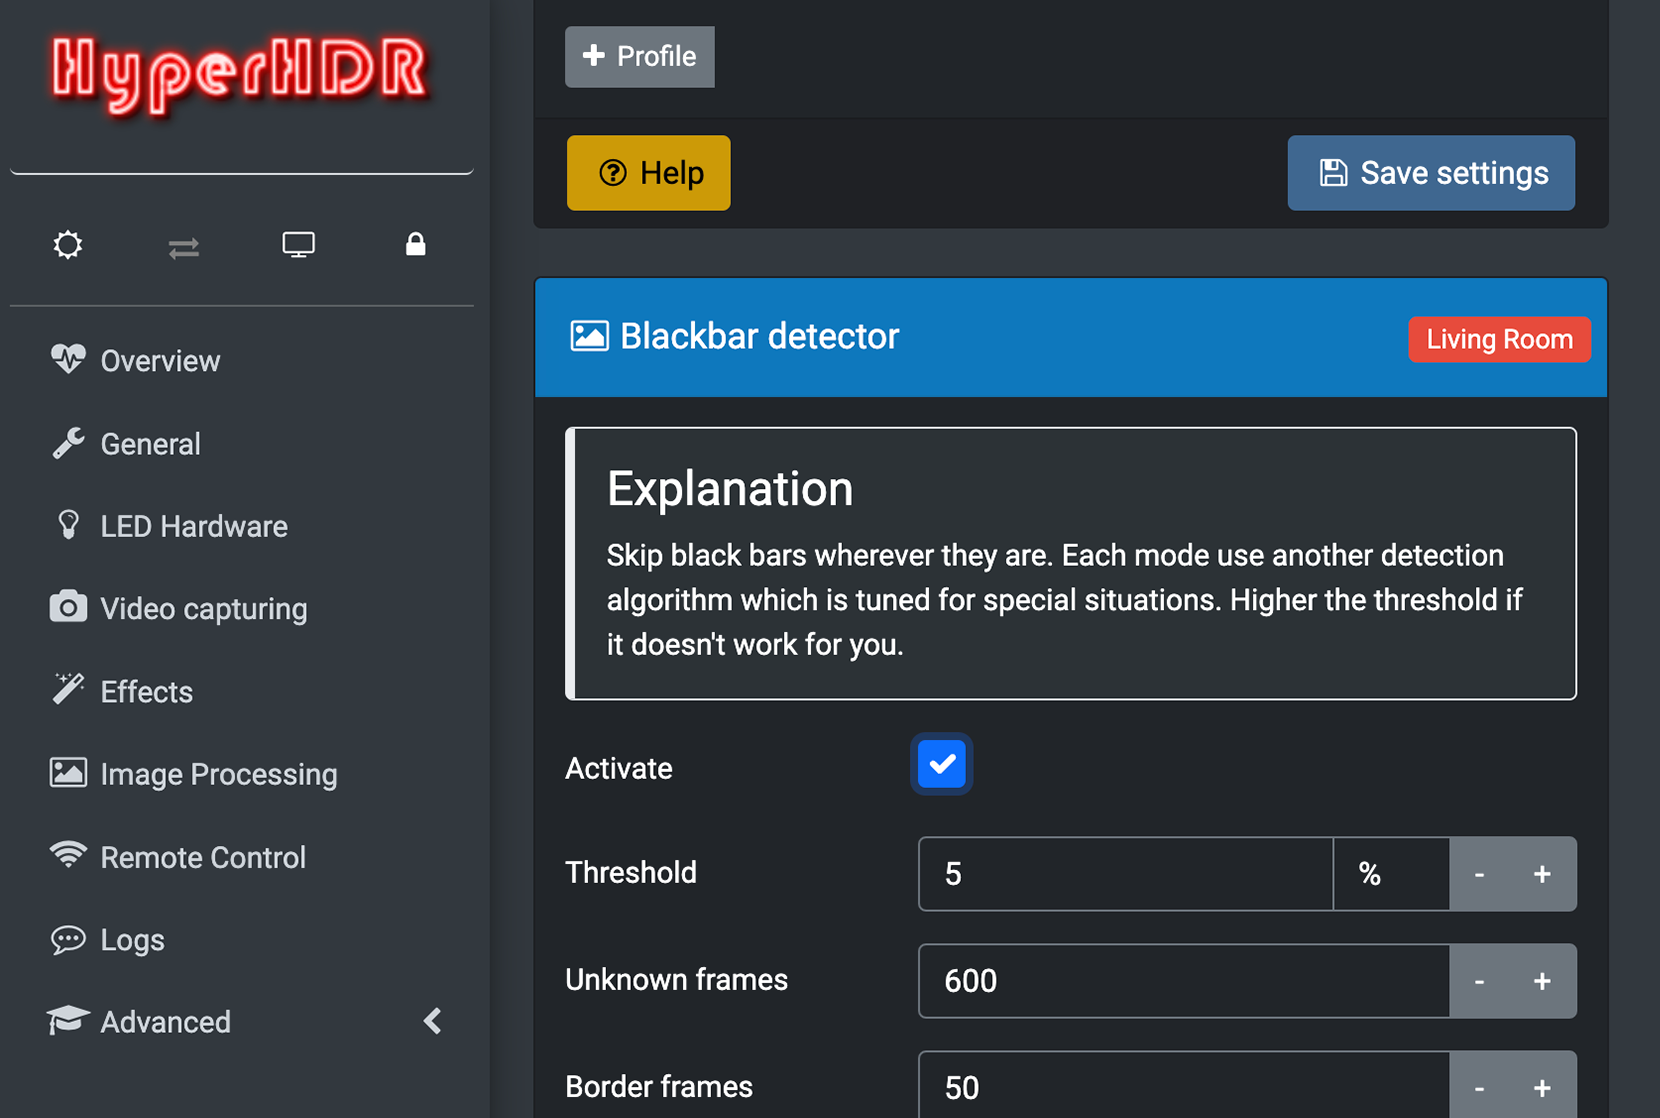
Image processing
Select Image processing from the side menu. Scroll down and activate Blackbar detection and Save settings.
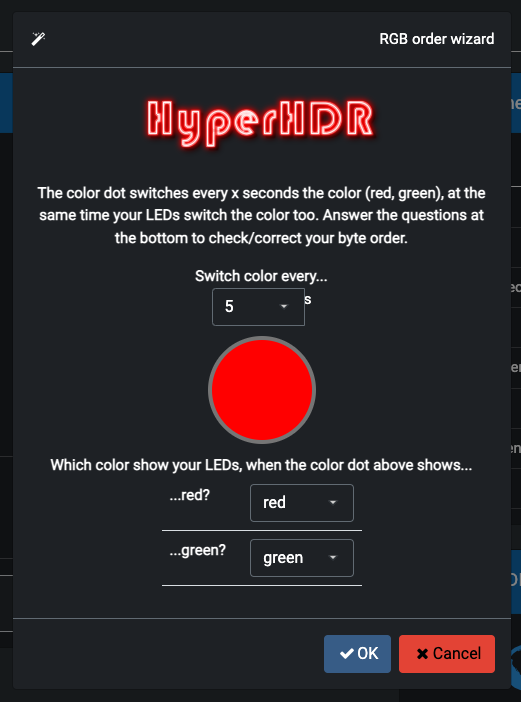
RGB order wizard
Lastly, we’re going to make sure HyperHDR is aware of the RGB order of your LED strip. Select Advanced from the side menu, followed by Misc and RGB order wizard. Here, you’ll need to tell HyperHDR whether the colours on the screen match the colours of your LEDs:
Finish up
After following the steps of this tutorial, you should see your LED lights reacting to the video content on your television. If you don’t, go back and double-check the steps to ensure you followed them correctly.
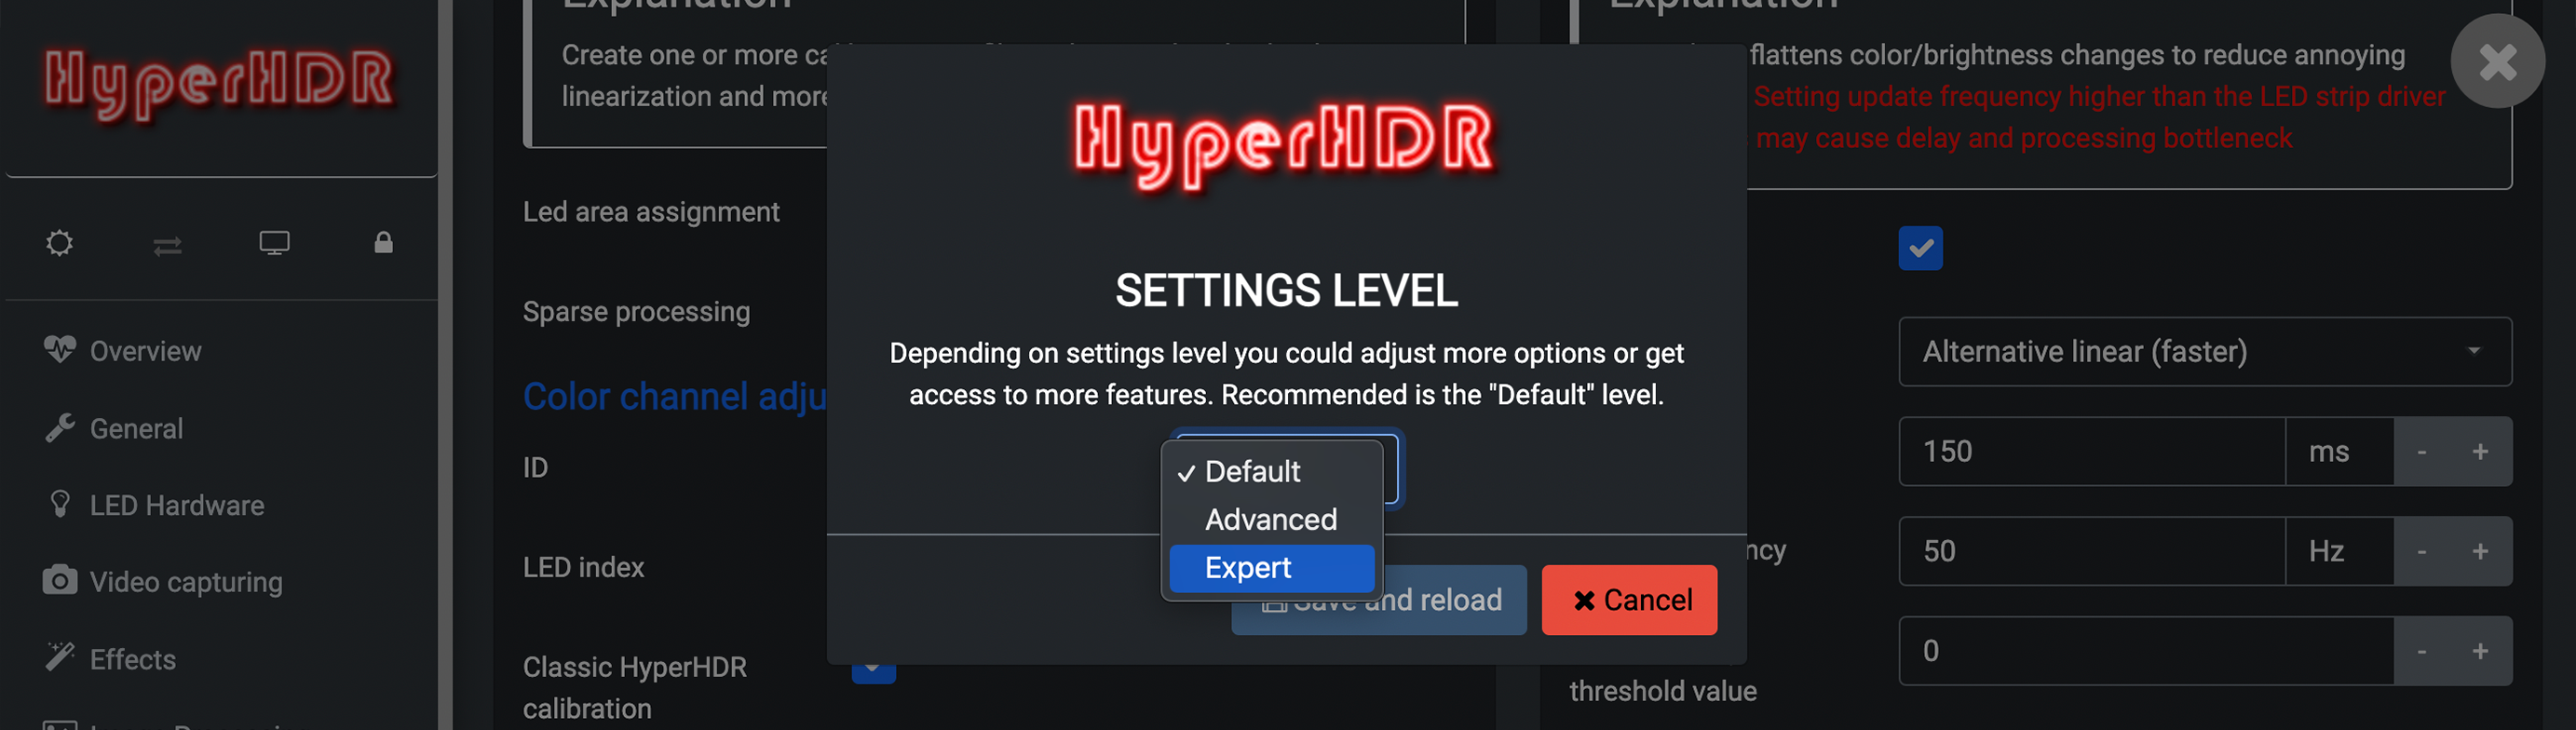
Chances are, you’ll need to tweak the settings to get the best experience from your LEDs. We needed to move the input location a few LEDs in the LED layout section to match our lights to the images on the screen. For those of you with a taste for colour theory, HyperHDR offers a variety of more advanced options. To access them, select Advanced from the side menu, followed by Misc and Settings level. Here, you can select Expert to access all HyperHDR features in the dashboard.
Help and support
For support with Hyperion settings and issues, please visit the Hyperion forums.
For HyperHDR specific queries and to submit issues with the software, visit the HyperHDR GitHub repo.
For support with official Raspberry Pi products, please visit the Raspberry Pi Forums.