$ ssh <username>@pi-nas.localHow to build a Raspberry Pi NAS
All tutorials
Network-attached storage (NAS) allows you to save files from your computer and mobile devices to external hard drives via your home or office wireless network. Using Raspberry Pi, you can connect your existing storage devices — such as external portable hard drives and USB flash drives — to create secure backups of all your important files, accessible from anywhere in the world.
Supplies
-
Raspberry Pi
-
suitable Raspberry Pi power supply (see the power supply documentation for details)
-
microSD card (see the SD card documentation for details)
-
adapter to connect your microSD card with your usual computer
-
Powered USB hub
-
Ethernet cable
-
External USB storage
For the initial SD card setup, you will need:
-
Another computer connected to your network. We’ll refer to this as your usual computer to distinguish it from the Raspberry Pi computer you are setting up as NAS.
Choose the right Raspberry Pi
The faster your Raspberry Pi, the faster your data will save to your external storage. For this tutorial, we’ll be using a Raspberry Pi 4 8GB.
Choose the right storage
Unless you’re very frugal with file sizes, an SD card probably isn’t large enough for NAS.
So in this tutorial, we’ll use a portable USB solid state drive (SSD). You could also use a USB flash drive or a USB hard disk drive (HDD). We recommend clearing your drive of data, as you may need to format it.
To maintain a consistent power supply to your external hard drives, it is best to use a powered USB hub to connect your storage to your Raspberry Pi.
Configure your Raspberry Pi
To begin, follow the Getting Started documentation to set up your Raspberry Pi. For your operating system, choose Raspberry Pi OS Lite (32-bit) to run headless (without a mouse and keyboard).
During the OS customisation stage, edit settings as follows:
-
Enter a hostname of your choice (we suggest
pi-nasfor this tutorial) -
Enter a username and password; you’ll need these later to authenticate
-
Check the box next to Configure wireless LAN so your Pi can automatically connect to Wi-Fi
-
Enter your network SSID (name) and password; you can find these in your Wi-Fi settings or on a sticker on your router
-
Check the box next to Enable SSH so we can connect to the Pi without a mouse and keyboard
Set up your Raspberry Pi
For the best performance, connect your Raspberry Pi to your network via an Ethernet cable. For most people, this means connecting the device directly to your router.
Power down your Raspberry Pi by disconnecting it from the power supply. Then, attach your storage to the powered USB hub, and the hub to your Raspberry Pi. Finally, power your Raspberry Pi by plugging it back into the power supply.
Remotely connect to your Raspberry Pi
SSH allows you to wirelessly connect to your Raspberry Pi, eliminating the need for a keyboard and mouse. It’s perfect if your Raspberry Pi is located in a hard-to-reach location like the back of your television.
note
To SSH into the Raspberry Pi, you’ll use the hostname you set in Imager. If you have issues connecting using this method, you may want to use the Raspberry Pi’s IP address instead.
For more information about finding your IP address and remote accessing your Raspberry Pi, see the remote access documentation.
Connect via SSH
Open a terminal session on your usual computer. To access your Raspberry Pi via SSH, run the following command, replacing <username> with the username you chose in Imager:
$ ssh <username>@pi-nas.local
The authenticity of host 'pi-nas.local (fd81:b8a1:261d:1:acd4:610c:b069:ac16)' can't be established.
ED25519 key fingerprint is SHA256:s6aWAEe8xrbPmJzhctei7/gEQitO9mj2ilXigelBm04.
This key is not known by any other names
Are you sure you want to continue connecting (yes/no/
[fingerprint])? yes
Warning: Permanently added 'pi-nas.local' (ED25519) to the list of known hosts.

<username>@pi-nas.local's password:
Linux pi-nas 6.1.21-v8+ #1642 SMP PREEMPT Mon Apr  3 17:24:16 BST 2023 aarch64

The programs included with the Debian GNU/Linux system are free software;
the exact distribution terms for each program are described in the
individual files in /usr/share/doc/*/copyright.

Debian GNU/Linux comes with ABSOLUTELY NO WARRANTY, to the extent
permitted by applicable law.
Last login: Tue Oct 24 09:41:00 2023
<username>@pi-nas:~ $
When asked for your password, use the password you created in Raspberry Pi Imager.
Configure storage
Now that the Raspberry Pi is up and running, it’s time to transform it into network storage.
Find your drive
First, we need to find the identifiers for the drives we want to format. To see the storage devices currently connected to your system, run the following command:
$ lsblkYou should see output similar to the following:
NAME        MAJ:MIN RM   SIZE RO TYPE MOUNTPOINT
sda           8:0    0   1.8T  0 disk
mmcblk0     179:0    0 238.8G  0 disk
├─mmcblk0p1 179:1    0   256M  0 part /boot
└─mmcblk0p2 179:2    0 238.5G  0 part /
This command describes storage devices connected to your Raspberry Pi. The mmcblk0 device is your microSD card. The first USB storage device you connect should show up as Storage Device A, or sda for short. If you connect additional USB storage devices, you’ll see them as Storage Device B (sdb), C (sdc), etc.
Partition drive
Next, partition your drive so Raspberry Pi OS recognizes it as a single storage device:
$ sudo fdisk /dev/sdaWhen prompted:
-
Enter
nto create a new partition. -
If a partition already exists, use
dto delete it. -
Enter
pfor primary partition.
Use the default option for all other prompts.
warning
Back up all data stored on the external drive before you partition! The partition process will erase the drive.
Format drive
Now that the drive has been partitioned, we need to format it so Raspberry Pi OS can read and write data. The following command formats your drive into the ext4 file system:
$ sudo mkfs.ext4 /dev/sda1Mount drive
Next, mount the drive to make it available to the file system on your Raspberry Pi:
$ sudo mount /dev/sda1And ensure that the drive is mounted after each boot:
$ sudo nano /etc/fstabAdd the following line at the end of the file:
/dev/sda1 /mnt/sda1/ ext4 defaults,noatime 0 1Press Ctrl+X, then Y, and finally Enter to save the edited file with nano.
Create a shared folder
Run the following command to create a shared folder on your drive:
$ sudo mkdir /mnt/sda1/sharedRun the following command to grant read, write, and execute permissions to the folder to all users on your Raspberry Pi:
$ sudo chmod -R 777 /mnt/sda1/sharedShare drive over your network
Run the following command to install Samba, a tool that shares directories over a network between computers:
$ sudo apt install samba samba-common-binThen tell Samba to share the directory over the network. We can give Samba instructions via the Samba configuration file, smb.conf. Open the configuration file in an editor:
$ sudo nano /etc/samba/smb.confAnd add the following line at the end of the file:
[shared]
path=/mnt/sda1/shared
writeable=Yes
create mask=0777
directory mask=0777
public=no
Press Ctrl+X, then Y, and finally Enter to save the edited file with nano.
Restart Samba to load the configuration changes:
$ sudo systemctl restart smbdGrant drive access
Finally, you’ll want to grant access to your Samba share so only authenticated users can access files over the network.
Run the following command to create a user to manage Samba sharing:
$ sudo adduser pi-nas-userAnd add a password to that user with the following command:
$ sudo smbpasswd -a usernameAccess from macOS
From your desktop, press Command+K. Type smb://pi-nas.local and press the Enter key.

Enter the username pi-nas-user and the password you chose in the Grant drive access step:
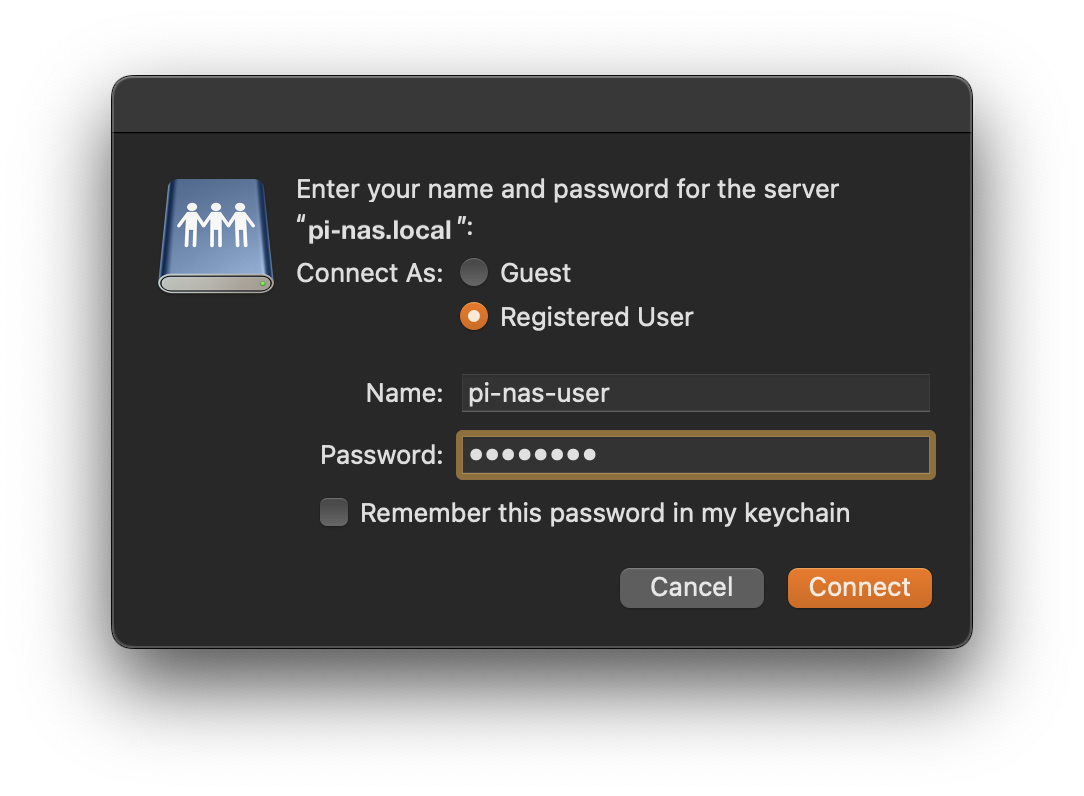
Your shared folder will now show in a Finder window.
Access from Windows
Open Windows Explorer. In the path bar, enter pi-nas.local and press the Enter key.
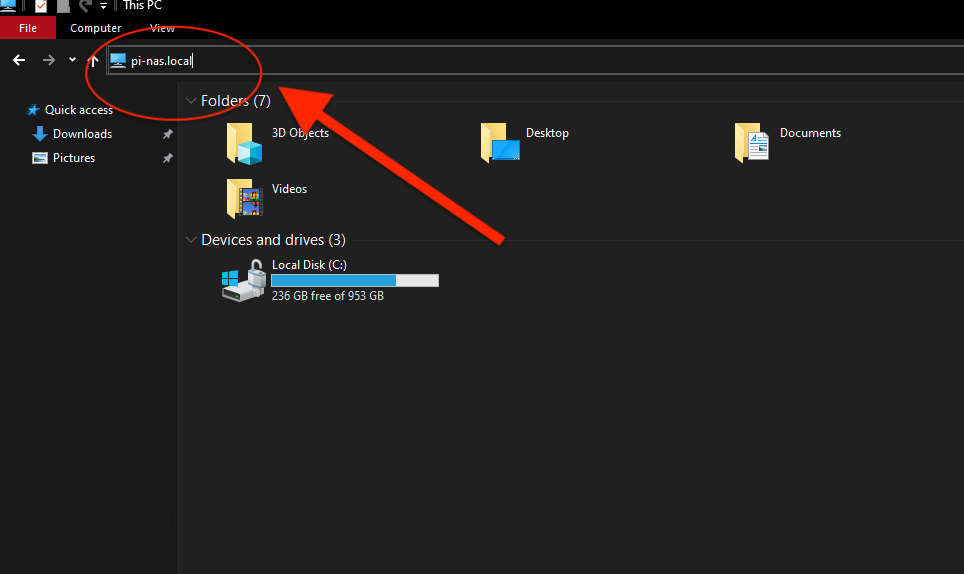
That should create a new entry under Network in the left navigation bar and show its contents. Double-click on the share and enter the username pi-nas-user and the password you chose in the Grant drive access step when prompted.
Access from iOS
You can connect your iPhone to your NAS system using the iOS Files app.
Open the app, navigate to the Browse view, and select the three dots icon in the top right of the screen.
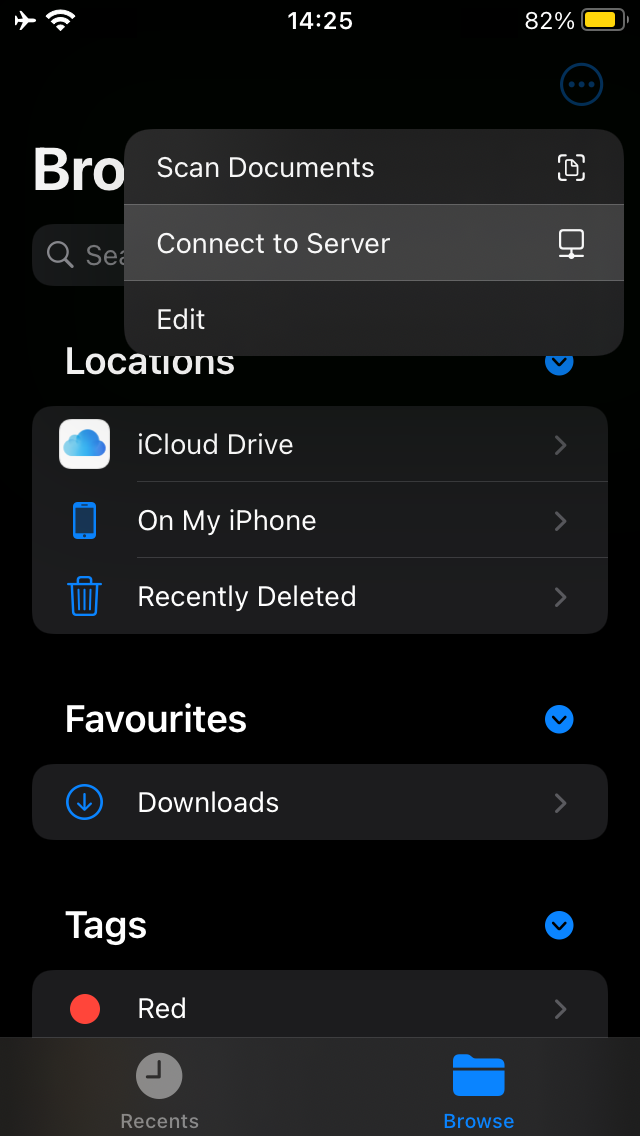
You should see a Connect to Server option. Enter pi-nas.local.
Under Connect as, select Registered User. Enter the username pi-nas-user and the password you chose in the Grant drive access step.
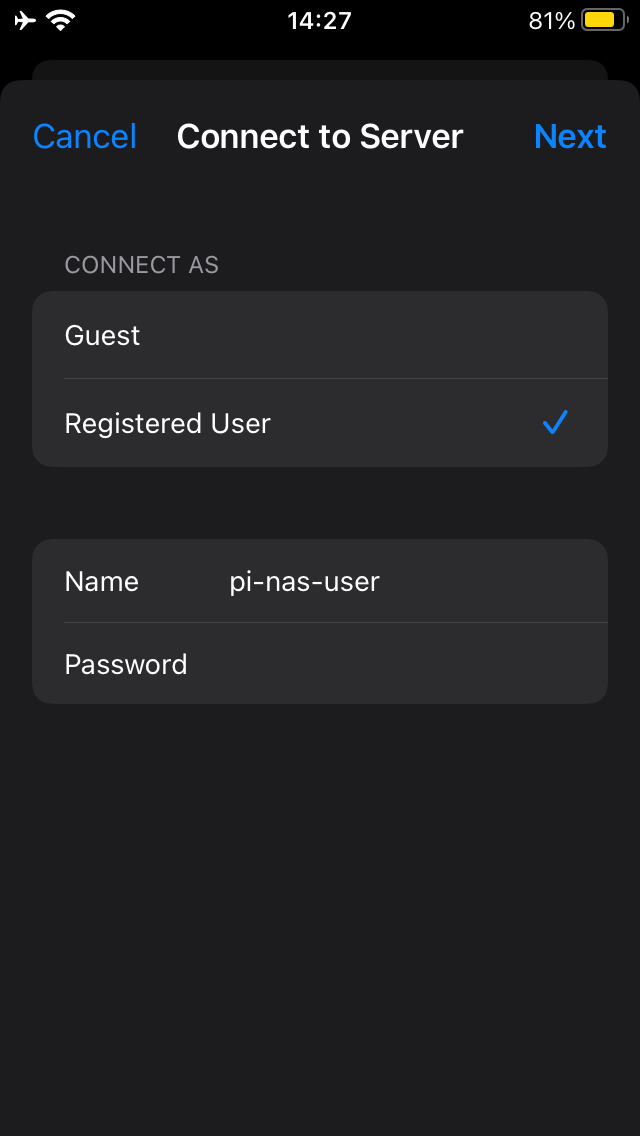
Tap Next in the upper right to connect.
Next Steps
Now that you’ve got shared storage on your network, put it to good use! Use it to collaborate with friends and family quickly and easily. Donate all of your USB flash drives to a worthy cause, since you don’t need them any more to share data. Cut down on cloud storage usage by migrating large files onto your NAS.
To make your network storage configuration even nicer, consider setting up RAID (Redundant Array of Inexpensive Disks) to protect your data from corruption and disk failures.
You might get annoyed at the rat’s nest of cables, hubs, and drives around your Raspberry Pi NAS. Don’t worry: Thingiverse has you covered with a variety of 3D printed case designs that will help you clean up the physical appearance of your drives and hubs.