This smart disco ball changes colour like a chameleon
Tim van de Vathorst, like myself, is a big fan of disco balls. The glitter, the twirling, the visual invitation to hit a sweaty dance floor. Unlike me, though, he has taken his fascination one step further, building the world’s smartest disco ball using a Raspberry Pi 3 Model B+ and roughly a bajillion LEDs.
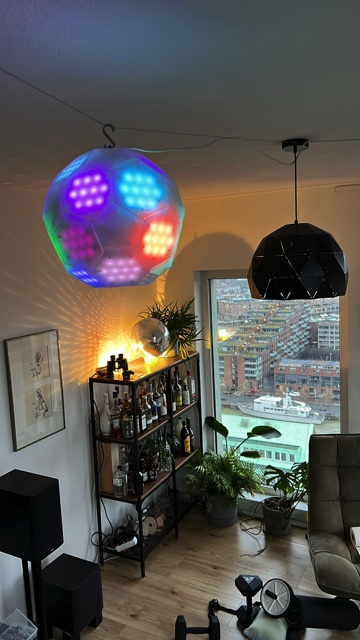
This disco ball’s trick is that it changes its colours like a chameleon based on its surroundings. The ball is covered with over 300 LEDs, and features a camera and a microphone. Tim grossly underestimated the time required to solder that many LEDs, so while it was a fun build, it took many, many hours.

Three smart party tricks
Thanks to a Python script running on the Raspberry Pi, this disco ball does lots more than simply twirl on a hook in the ceiling looking pretty.
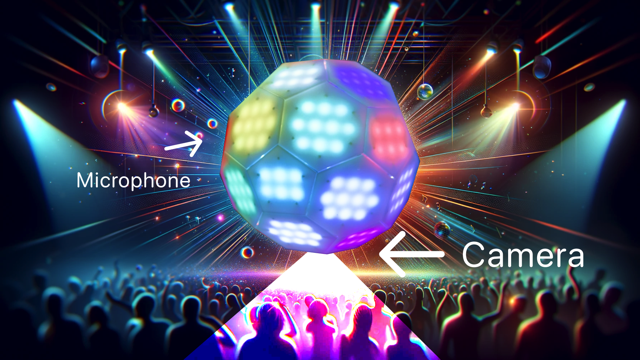
- Chameleon-like colour detection: the smart disco ball uses its on-board camera to detect different colours in the room, and changes its lights to match them.
- Matching lights to sounds: the integrated microphone lets the disco ball respond to sounds and music. The ball can be programmed to react with a light display matching the tempo and intensity of the sounds it detects.
- Customisable patterns: each LED is individually programmable, so you could create endless patterns and sequences. Tim’s creation currently operates in rainbow and random mode.
Build your own disco ball
Tim has open-sourced all the code on GitHub and you should visit his Thingiverse post to download all the vector files you need to create your own smart disco ball. He is also one of those gems of a maker who has shot a YouTube video (below) with detailed instructions for you to follow along with as you assemble your own ball and set up the software.


No comments
Comments are closed